
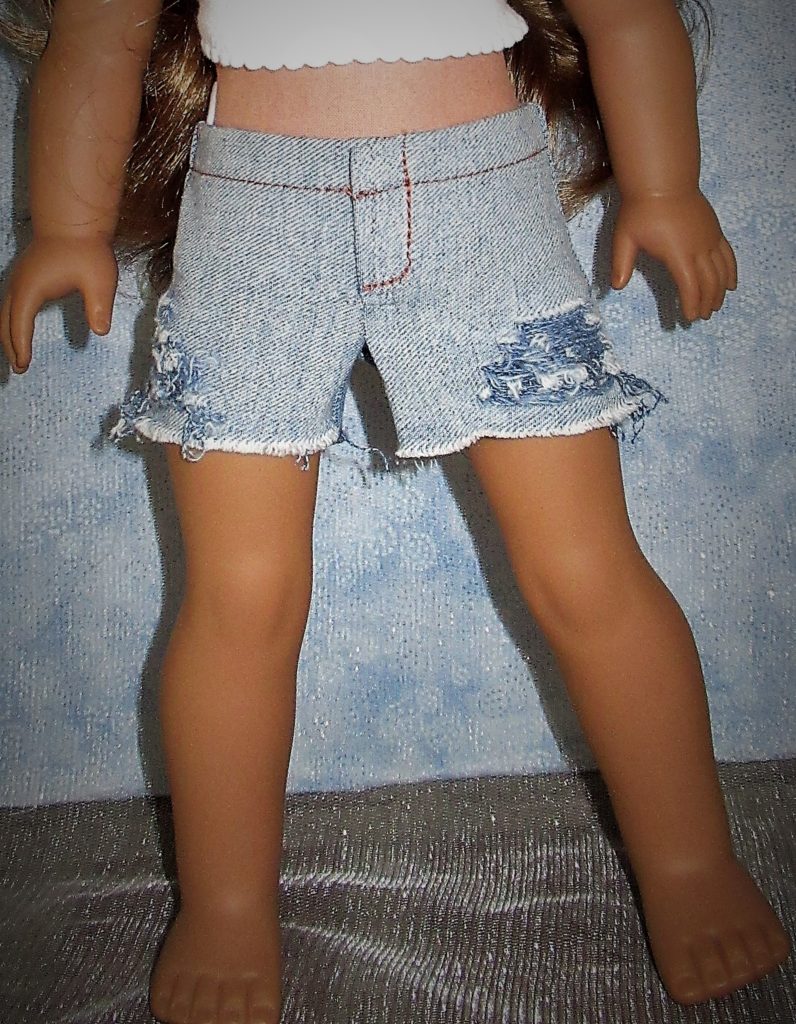
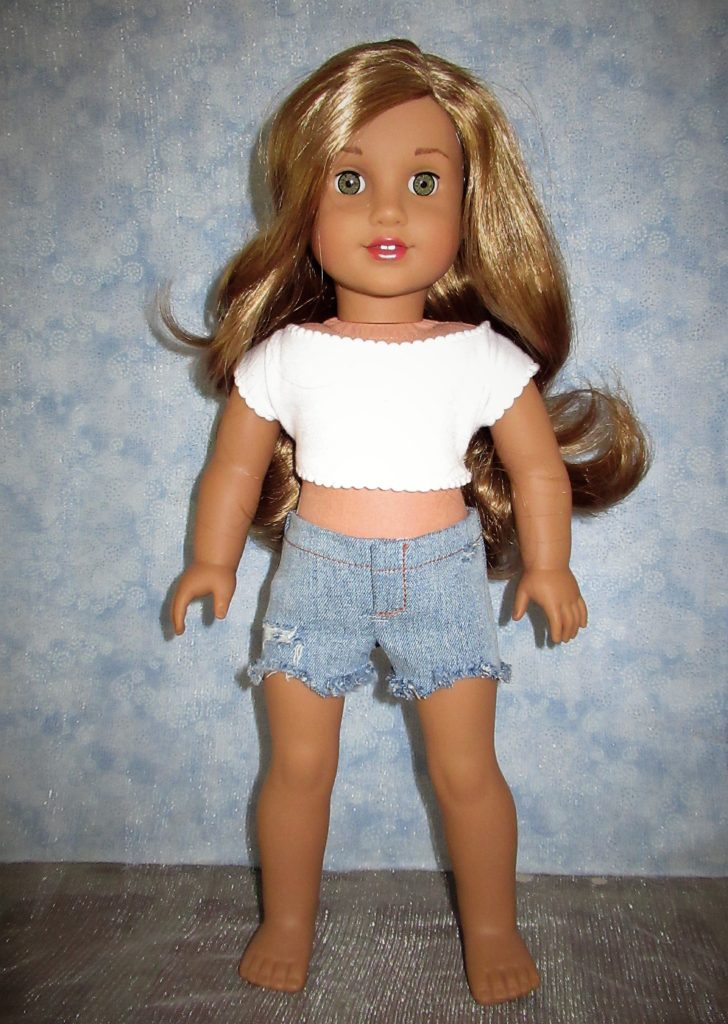
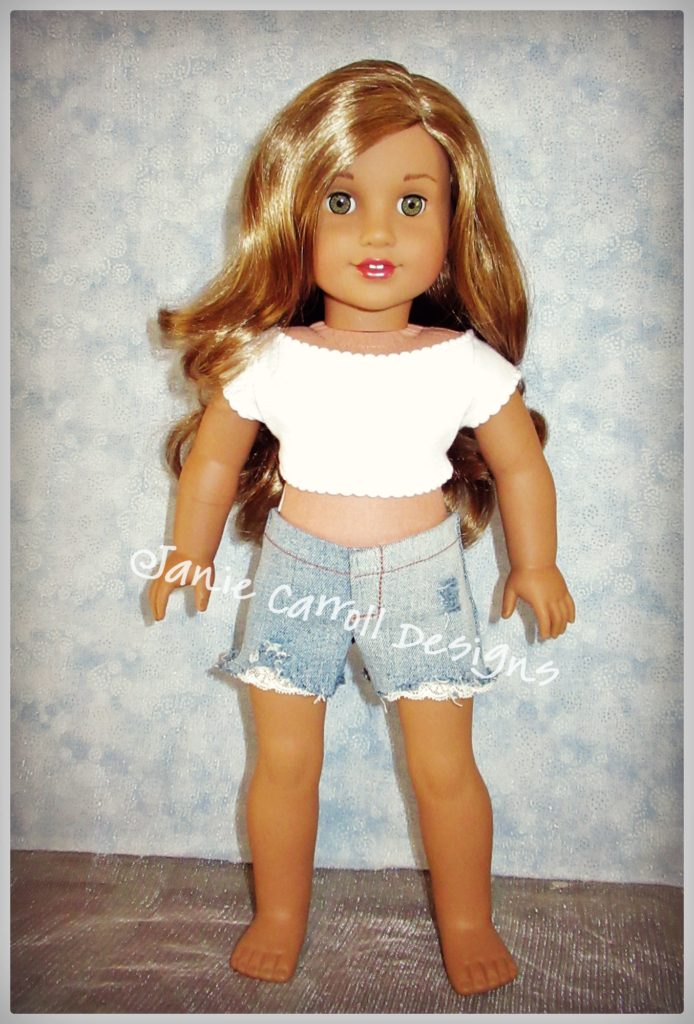
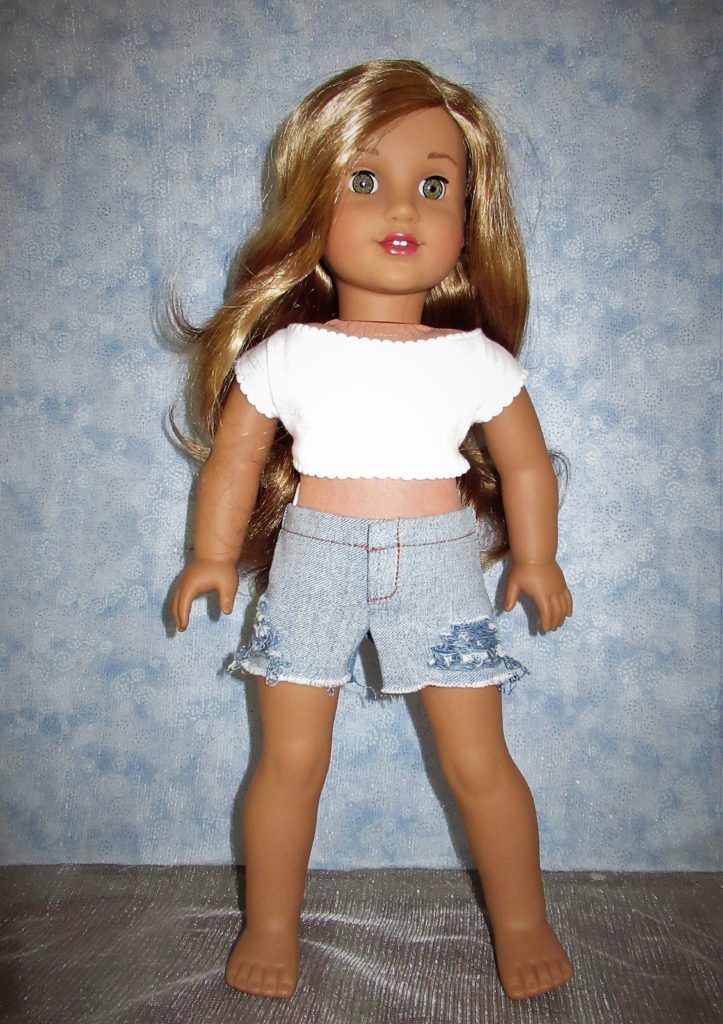
I’ve had a great deal of interest lately in the destructed denim shorts that I sell in my etsy shop. Though each pair is unique, they start with up-cycled denim jeans and they look like this…
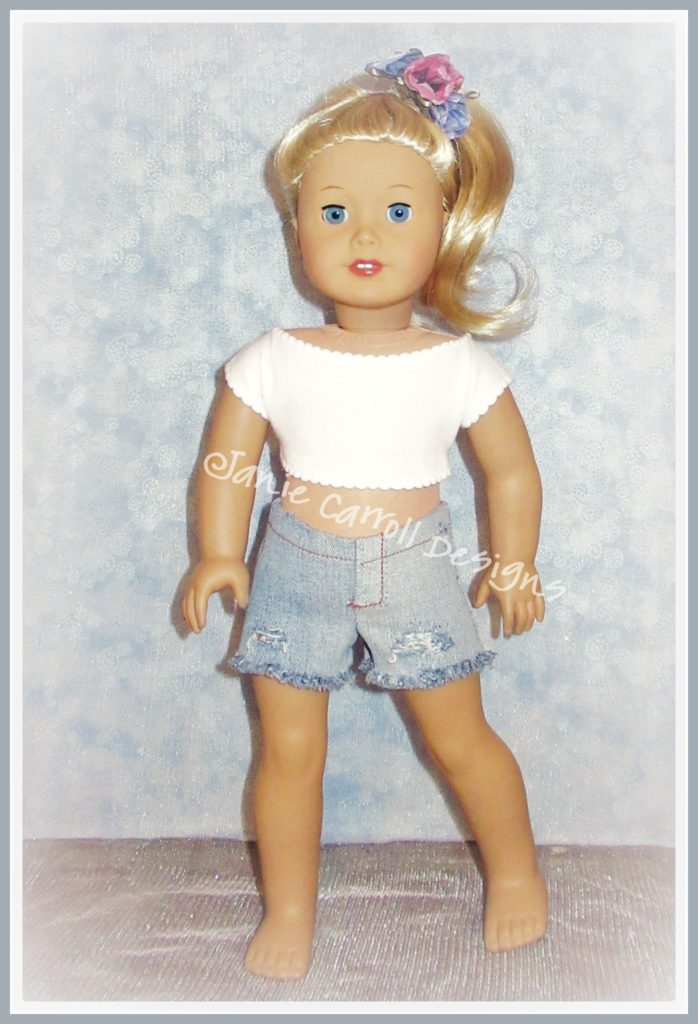
You can see the listing here: Destructed Denim shorts by Janie Carroll Designs
With additional orders that came in yesterday, I decided today was as good a day as any to take a few pics and give you a few tips. Let’s start with fabric.
The entire point of these shorts is that they look worn out already. Our dolls will need a head start to get that old, worn-out, worn-in, look.
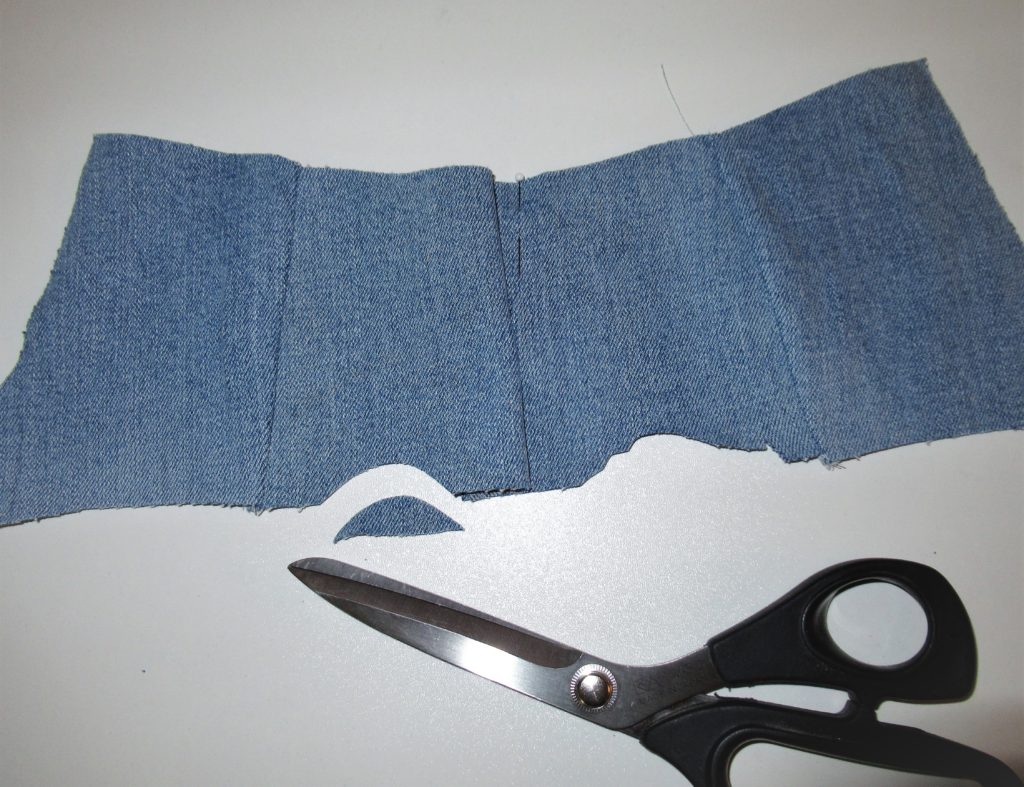
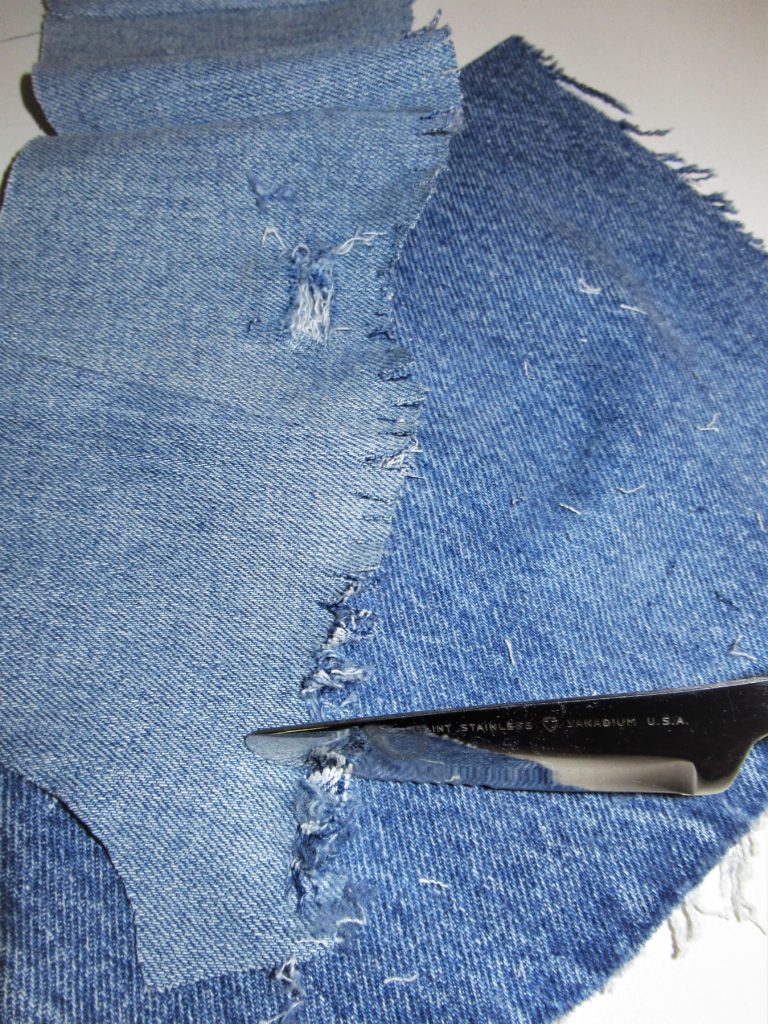
I begin with young adult style men’s jeans with a looser leg. (ie: not skinny jeans) You’ll need light to mid weight denim; please nothing too heavy or stiff. Here’s the remnants of the pair I used to make the shorts for this post. You can see that they were well-worn to start with!
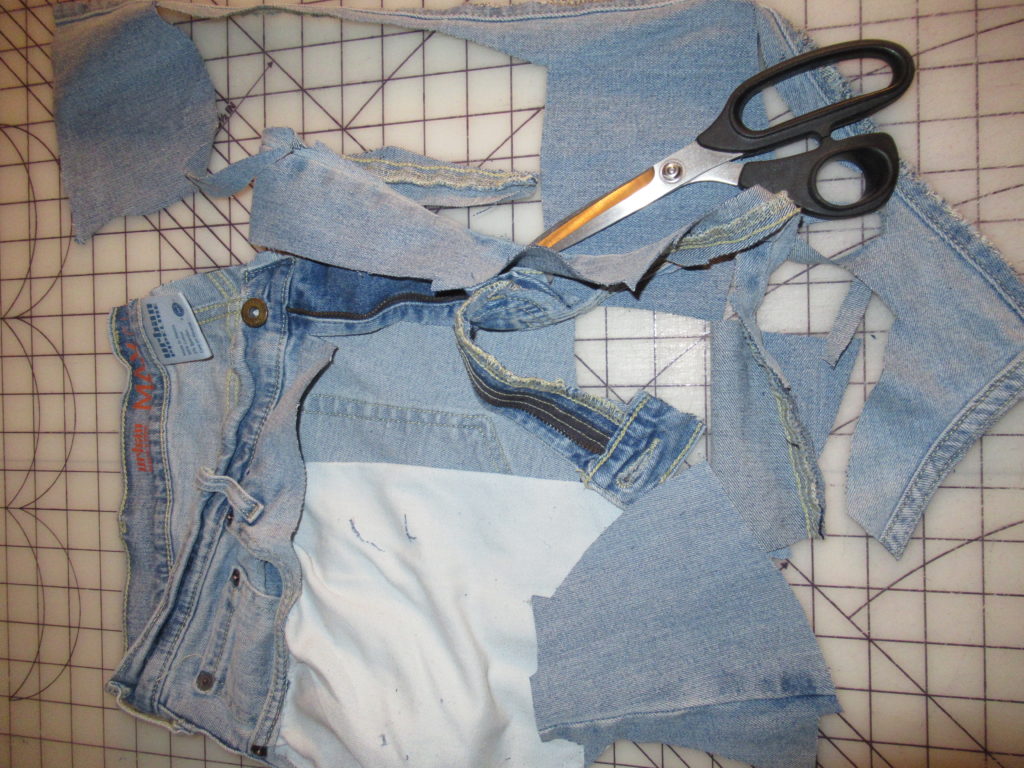
If you’re not lucky enough to have a supply in the family, ask friends and family members for their worn out jeans. I did this once and was gifted over 20 pair from just 3 people! I couldn’t use all of it in a timely manner so I donated several pair to thrift.
And that’s my next tip. If you must purchase jeans to get started, try the cheapest thrift store in your area. You can get a lot of mileage out of one pair – I got 13 pair of shorts from these jeans, which had a 36″ waist and 34″ leg. If you wish to make only a single pair of doll shorts, a much smaller size would be fine.
For the most authentic look, you’ll need a fitted pattern. Mine has a fly-front and fits current AG brand 18″ dolls snugly. Unfortunately, the pattern here has not yet been published.
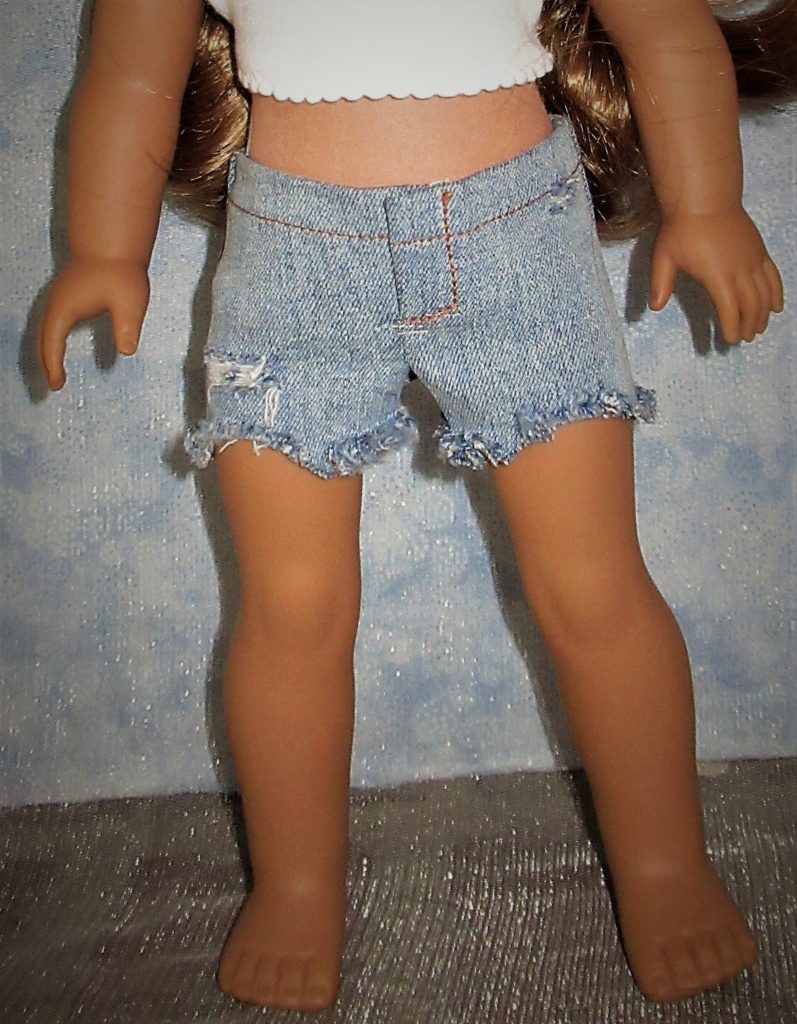
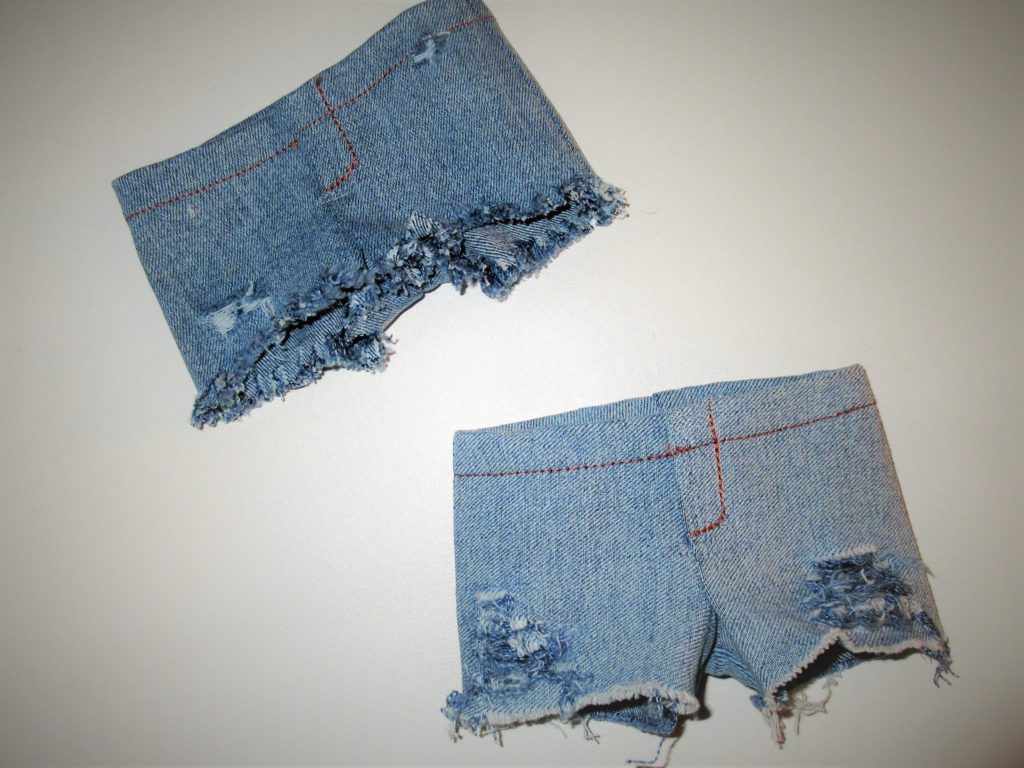
Distressing denim is a subjective process with lots of choices to make. With that in mind, I thought it best to show you two pair of shorts, each with slightly different finished looks. Here they are, after distressing and before final construction. The center front/fly area is in the center of each section shown.
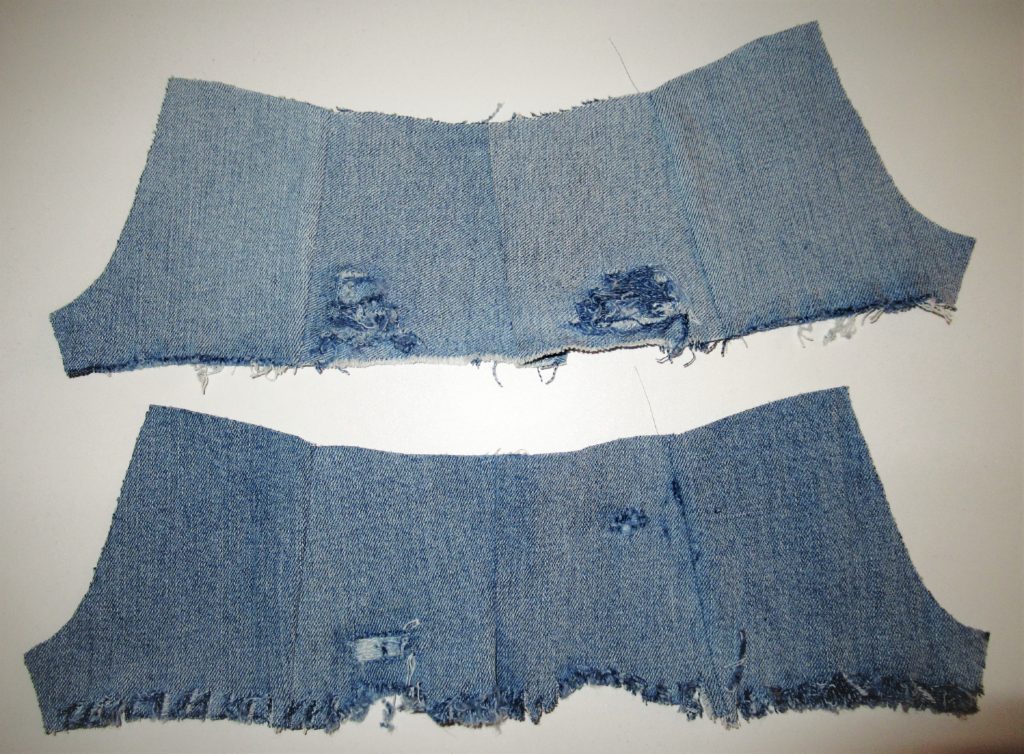
First, we’ll go over details for a pair with destruction near the lower front, paired with a lightly distressed straight hem edge. Later I’ll show you details on the fringed hemline, with slightly arched front leg openings.
Good news, you likely will not need to buy anything for this project. Besides the fabrics and thread for your shorts, you’ll need an old steak knife and a large scrap of heavy denim or canvas to place under your work surface. (don’t have the steak knife? Hit up your local thrift store. Look for a serrated edge and a rounded/blunt tip. If the knife is dull, so much the better!)
I will suggest the addition of one notion, though you could certainly do without it. I have found a Frixion pen helpful to mark areas or lines you want to distress.
Frixion pens are erasable. While they were not developed for sewing use, they have many helpful applications in sewing! A quick press with my steam iron? Voila! Marks vanish like magic. (I would advise caution with specialty fabrics. I have heard that the marks may re-appear on very light colors.) I bought my Frixion pens in the school supply aisle at Wal-mart. You can check them out with this Amazon link, too. https://amzn.to/2VUpm6y
I’ll assume that you’ve already cut your shorts out, fronts and backs, and begun construction. In my photos you’ll see that I’ve stitched the front seam, and the side seams. I find this makes it easier for me to visualize where I want to add destructed areas.
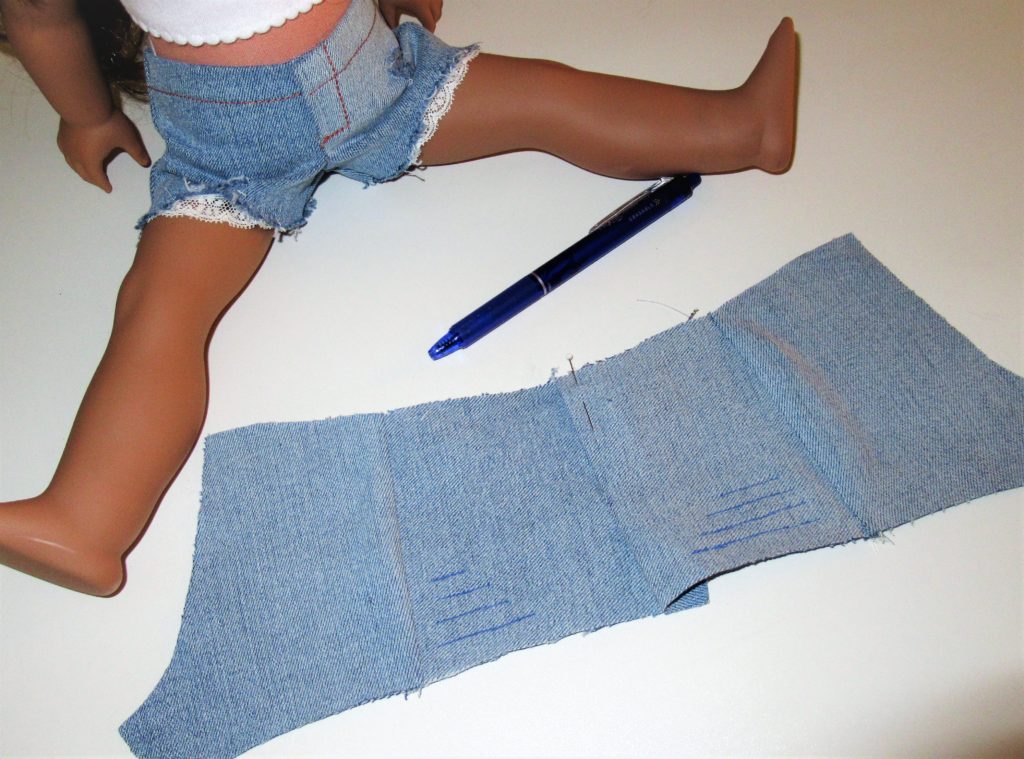
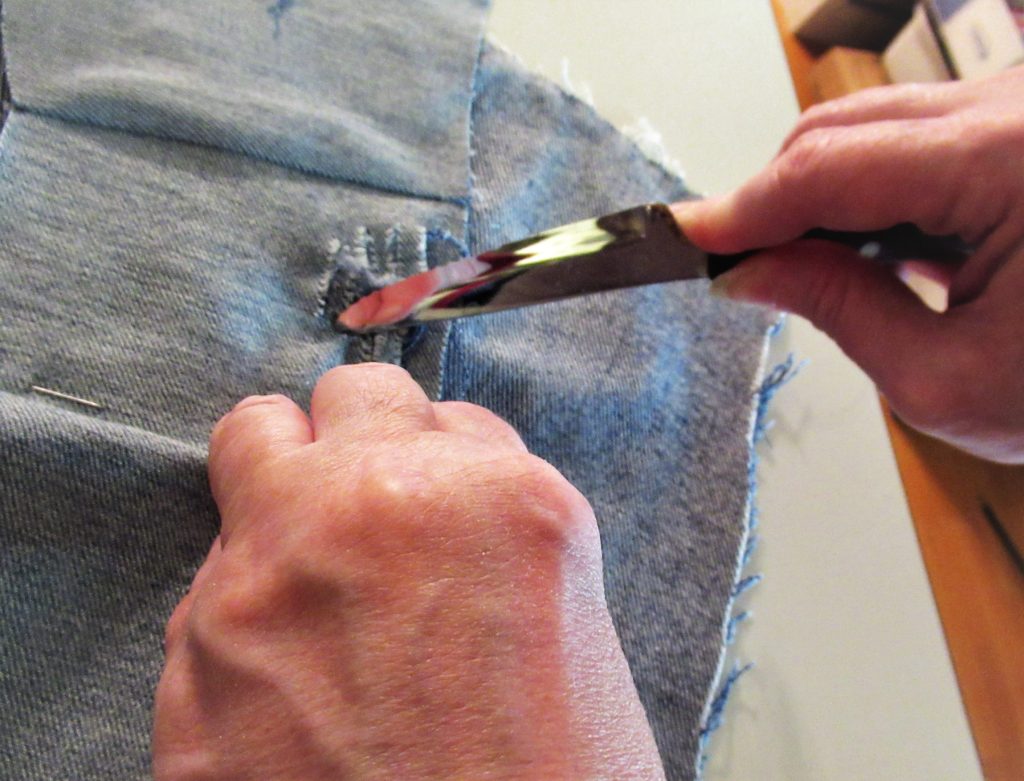
Next, decide on the hemline treatment and destruct this first. For this pair, I’ve added a very light distressing at the hem. You’ll want to trim away any hem allowance first. There are many things you might use to distress the hemline edge. I’ve used a small wire brush, the blunt end of a seam guage and the edge of a stiff metal ruler. A few months ago I hit on my favorite tool yet: A simple steak knife, paired with a large scrap of heavy denim.
For a work surface, I throw the heavy denim scrap over my thigh. I lay the denim shorts on top and I use the serrated blade of the steak knife along the hemline edge. Scraping the blade towards me, along the edge will ‘rough’ things up nicely! Working over my own leg is quick and easy, though you could certainly do this at a table. You can trim away any dangling threads, or leave a few in place for authenticity.
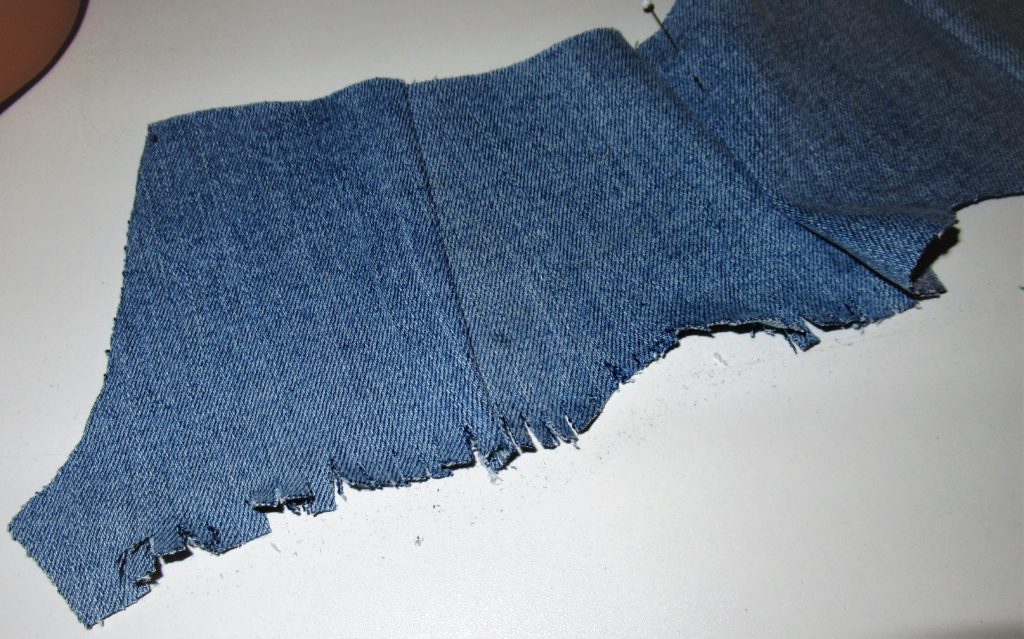
Next fold the denim in the approximate center of the marked lines and take a very small snip with sharp shears.
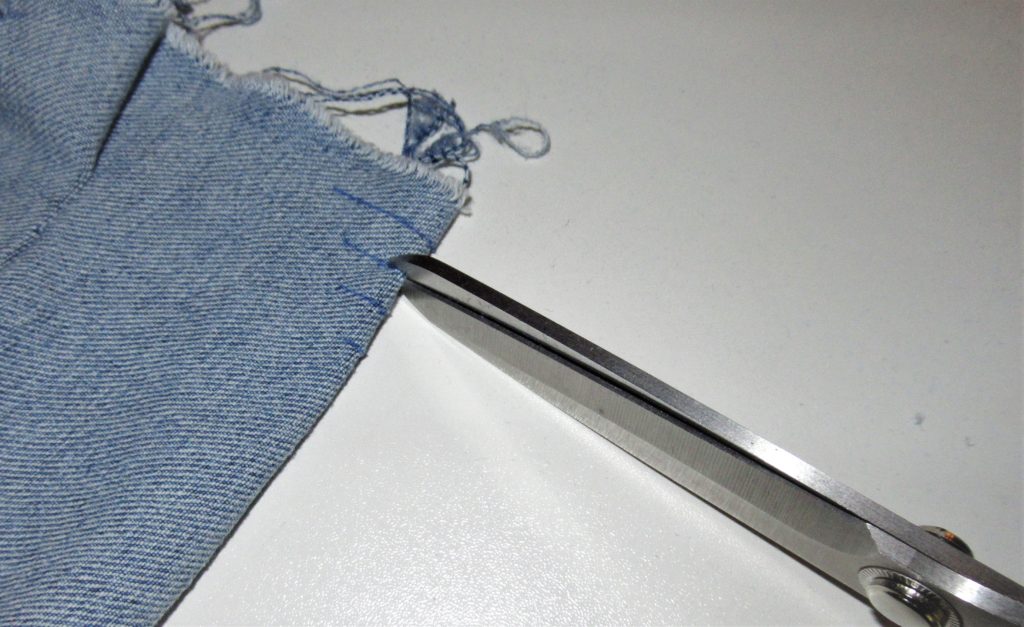
After the initial snips, carefully cut the full length of each line.
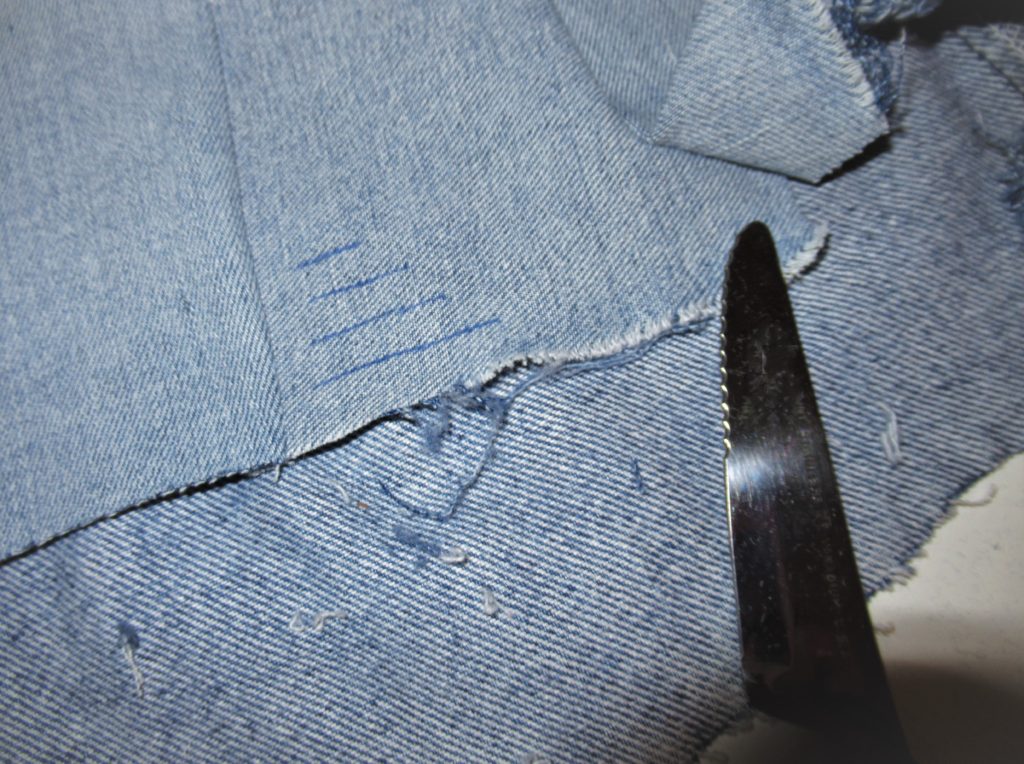
Working over my own leg again, I use the blunt side/tip of the steak knife to scrape along the marked lines. You’ll need patience. I tend to work on these sections for about 10 minutes per pair.
I hope you can see that my left hand is stabilizing the denim, while I scrape the side of the blunt edge along the lines. I alternately work towards myself for a few strokes, and then away for a few strokes. The goal is to loosen, and ultimately remove, bits of the length threads, leaving only the crosswise threads in place. I use my fingers, to remove little bits of thread as you work; you can use tweezers, if you prefer.
Please do not use the serrated blade for the marked lines. Trust me, you will cut the fibers and end up with a hole.
Let’s look at another, slightly different method and final appearance. A fuller, fringed hemline with slight arched cut-aways at the front hem edge.
Begin by cutting away a small arched bit at the center of each leg at the hem edge. The height of these arches is no more than 1/2″. It’s fine for the shape of these to be irregular. In fact, irregular distressing is the word of the moment! They should not look too perfect!
I have found it best to distress the hem edges first. To begin the fringing process, make tiny clips all along the hem edge. My snips are about 3/8″ deep, and less than 1/4″ apart. Take care at the arched sections! Your clips in those areas should be very shallow, maybe 1/8″. Remember, we want our dolls to look fashonable – but not trashy! lol.
Use the Frixion pen to mark the areas for destruction. For this pair, I chose 2 lines above the hem on one leg, and a tiny area at the high hip of the opposite leg. It’s all very subjective. You are the designer and you get to decide!

Next, grab that steak knife and your heavy denim scrap. We’ll scrape that clipped hem edge with the serrated blade, protecting your work surface (or your leg!) with the denim scrap.
Continue by cutting along your marked distressing lines and scraping those areas, as above. Remember to use the blunt side/tip of the steak knife for those areas.
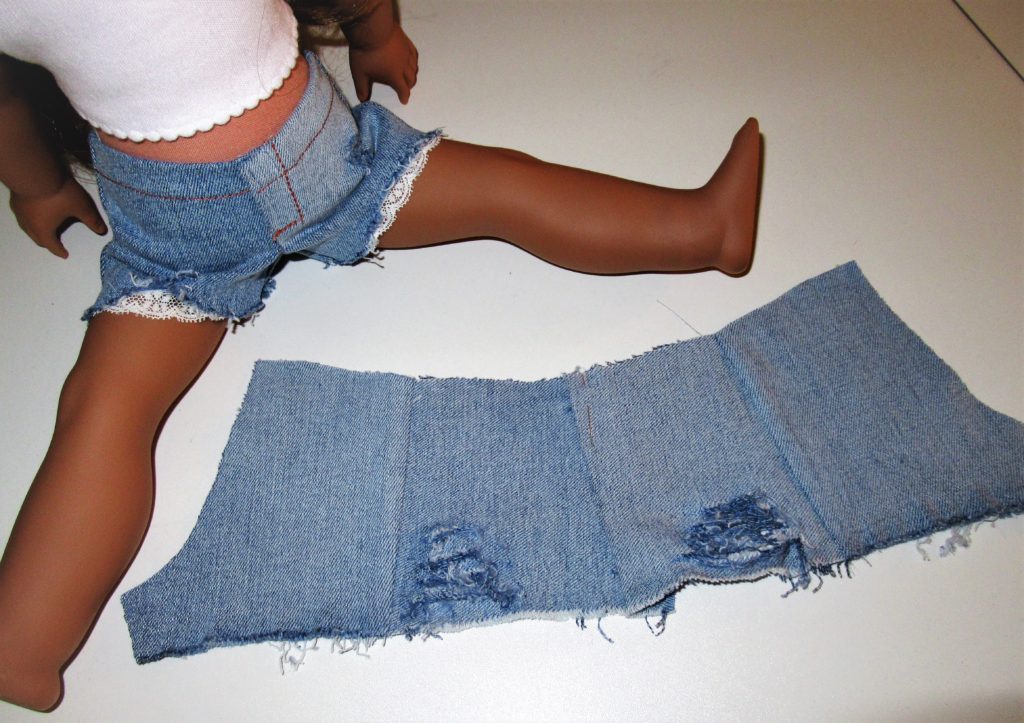
Finish with the construction of the shorts. Here’s what mine look like…
Now, if you find that you got a little over-zealous and now you have a nasty hole? No worries. Go back to your scrap denim and cut a piece that is slightly larger than the hole. Set your machine for a wide zigzag stitch and place the patch scrap under the hole. From the right side, stitch back and forth across the hole and patch. I use a light gray/blue thread that is all but invisible for this. Honestly, a patch or two like this only adds to the charm of the shorts!
Other ideas include ‘patching’ holes or hem edges with lace, as I’ve done with this pair.
I am certainly not the expert on distressing denim. You may find other tools or methods suggested by searching Pinterest or You Tube. I’ve seen the use of Xacto knives recommended (I’m too accident prone for this idea!), as well as the use of bleach to add ‘whiskering’ lines, etc. Because I’m largely sewing for profit, I have found my methods to yield a satisifactory result with a modest investment of time and supplies.
Happy destructing Friends!
Janie these look great! I may have to try this sometime, when I have time to do it properly. I love the look of them though. I am a jeans girl anyway so it would work for my girls too. Thanks for sharing this!
Kathy
The techniques can certainly be used on any denim – for people, too!
These look great, definitely going to try!
It’s fun to do!
You make it look so simple! I didn’t realize you have a blog or I’d have been here long ago. Thanks so much for sharing all your bright ideas, Jane.
Love your ideas and suggestions! Will be trying these when sewing jeans the next time!