
I adore patterns that can be used in multiple ways! There’s just nothing better than oodles of design ideas!
Using elements from 2 patterns multiples those oodles exponentially!
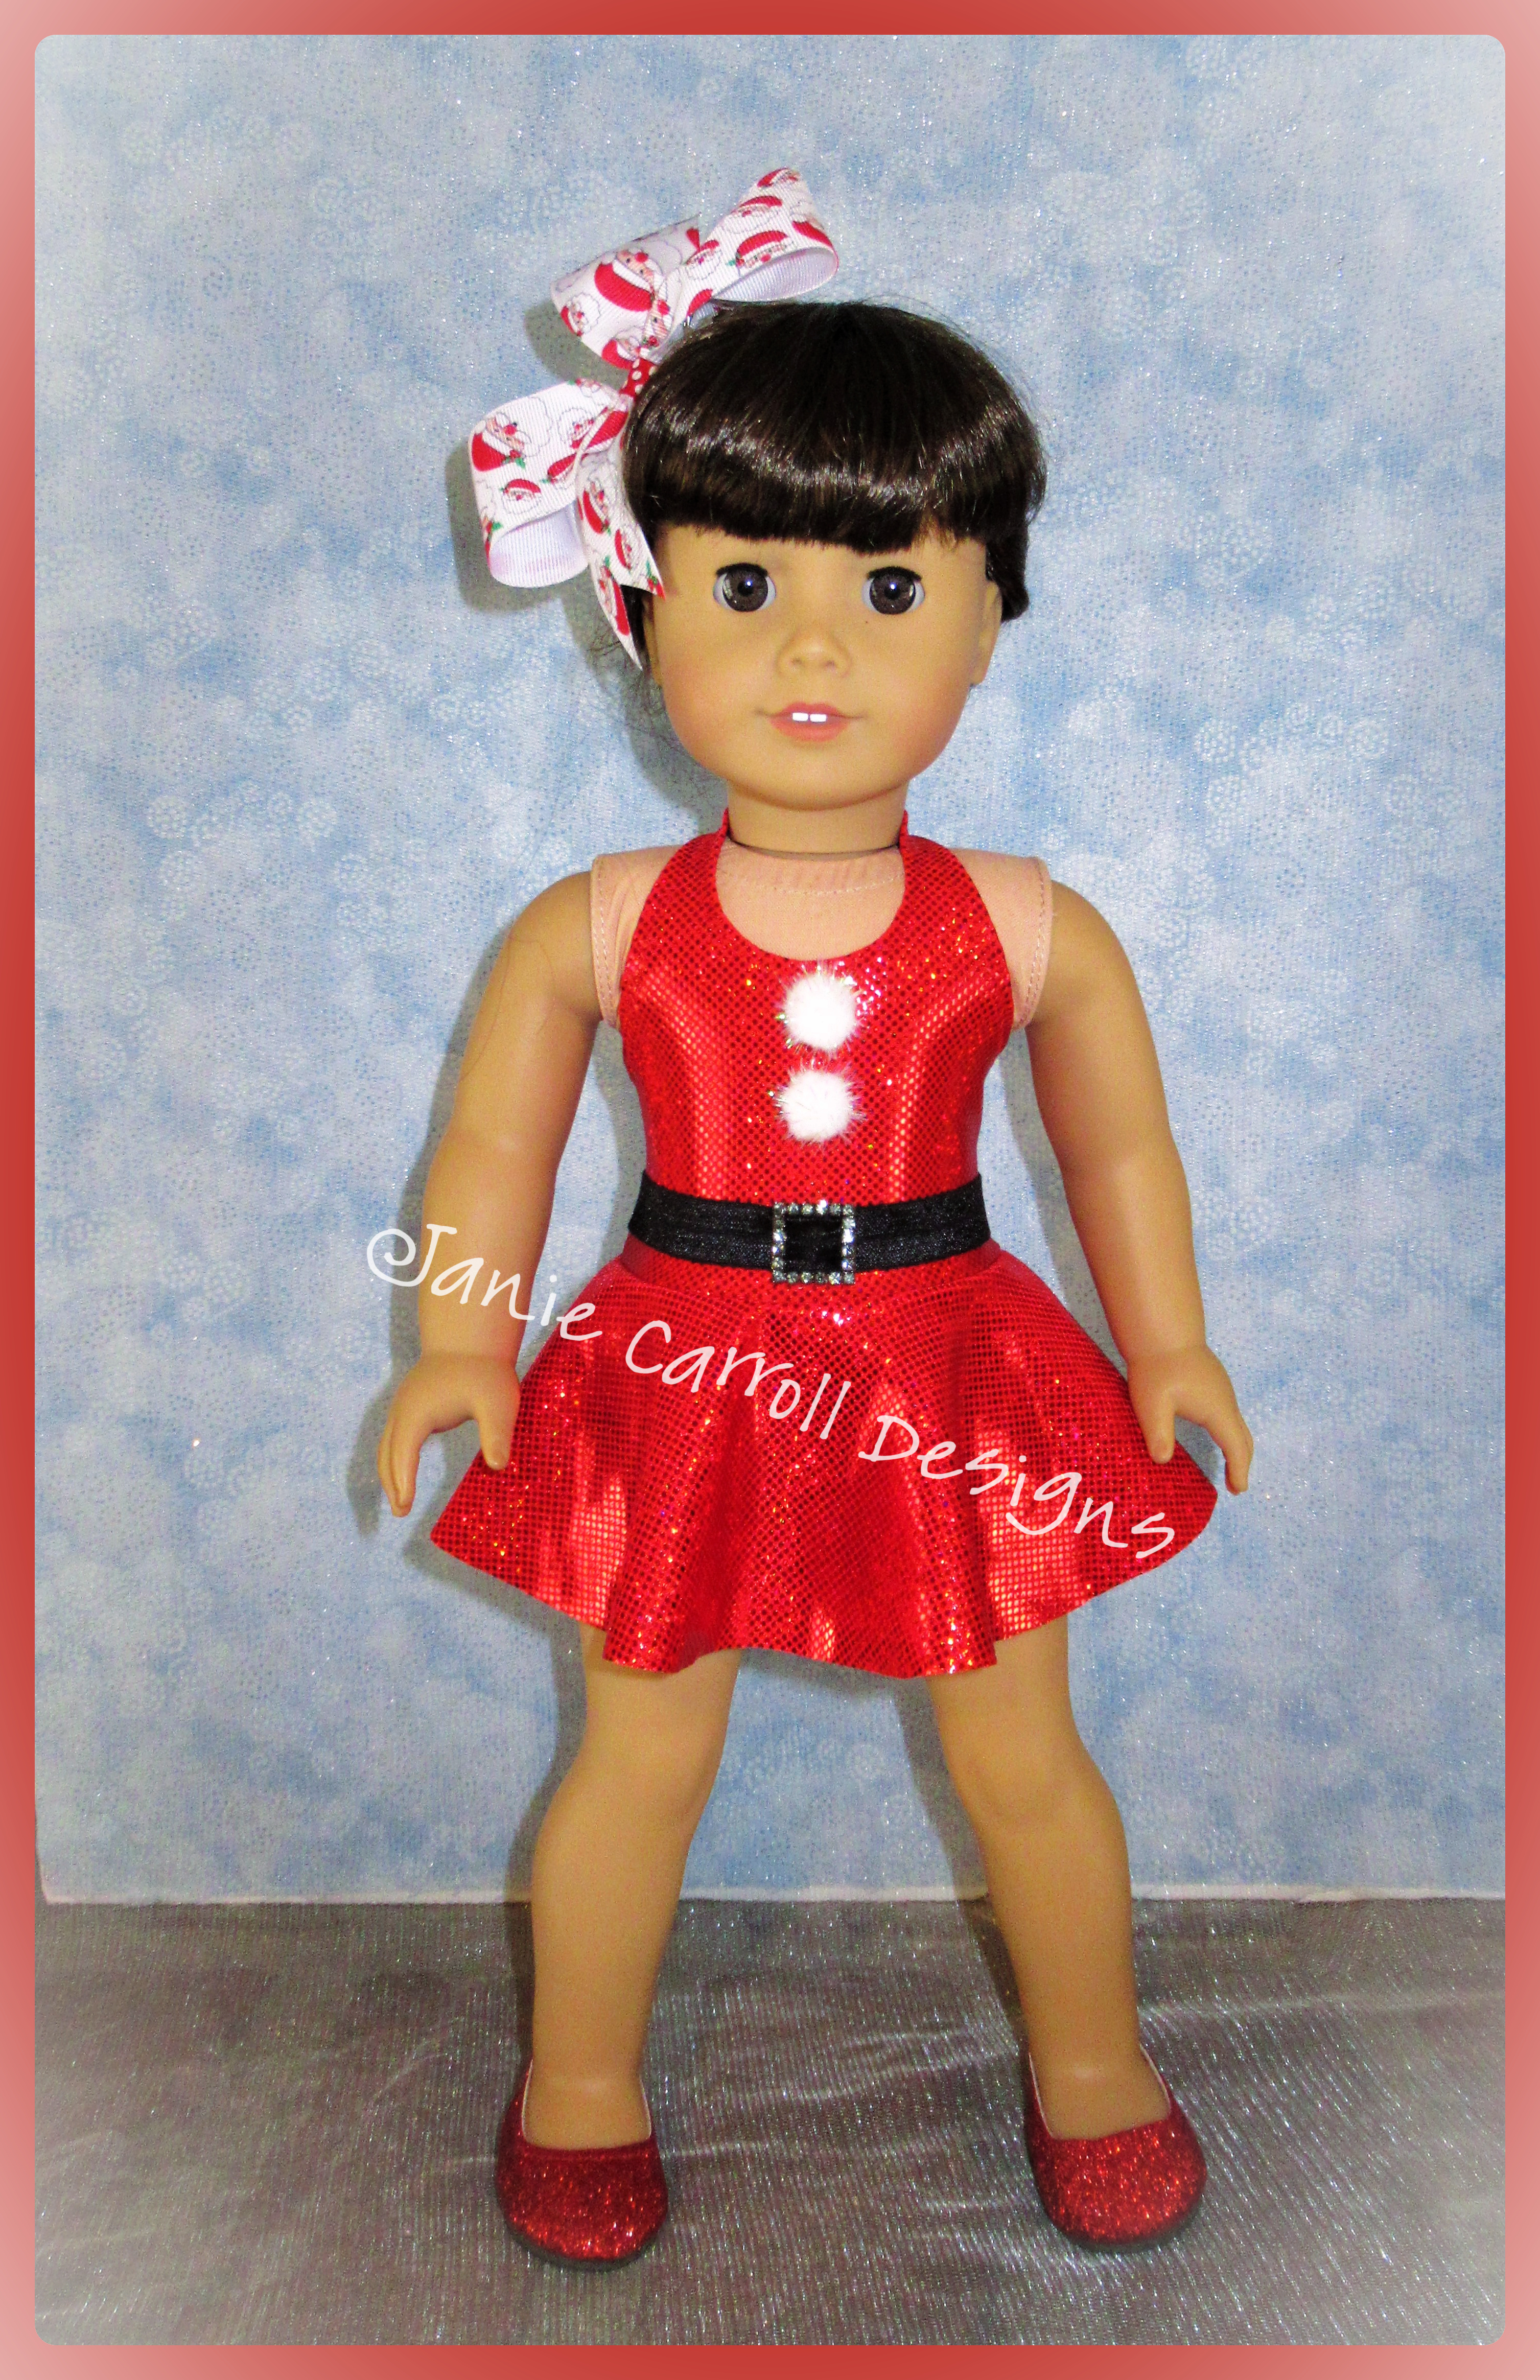
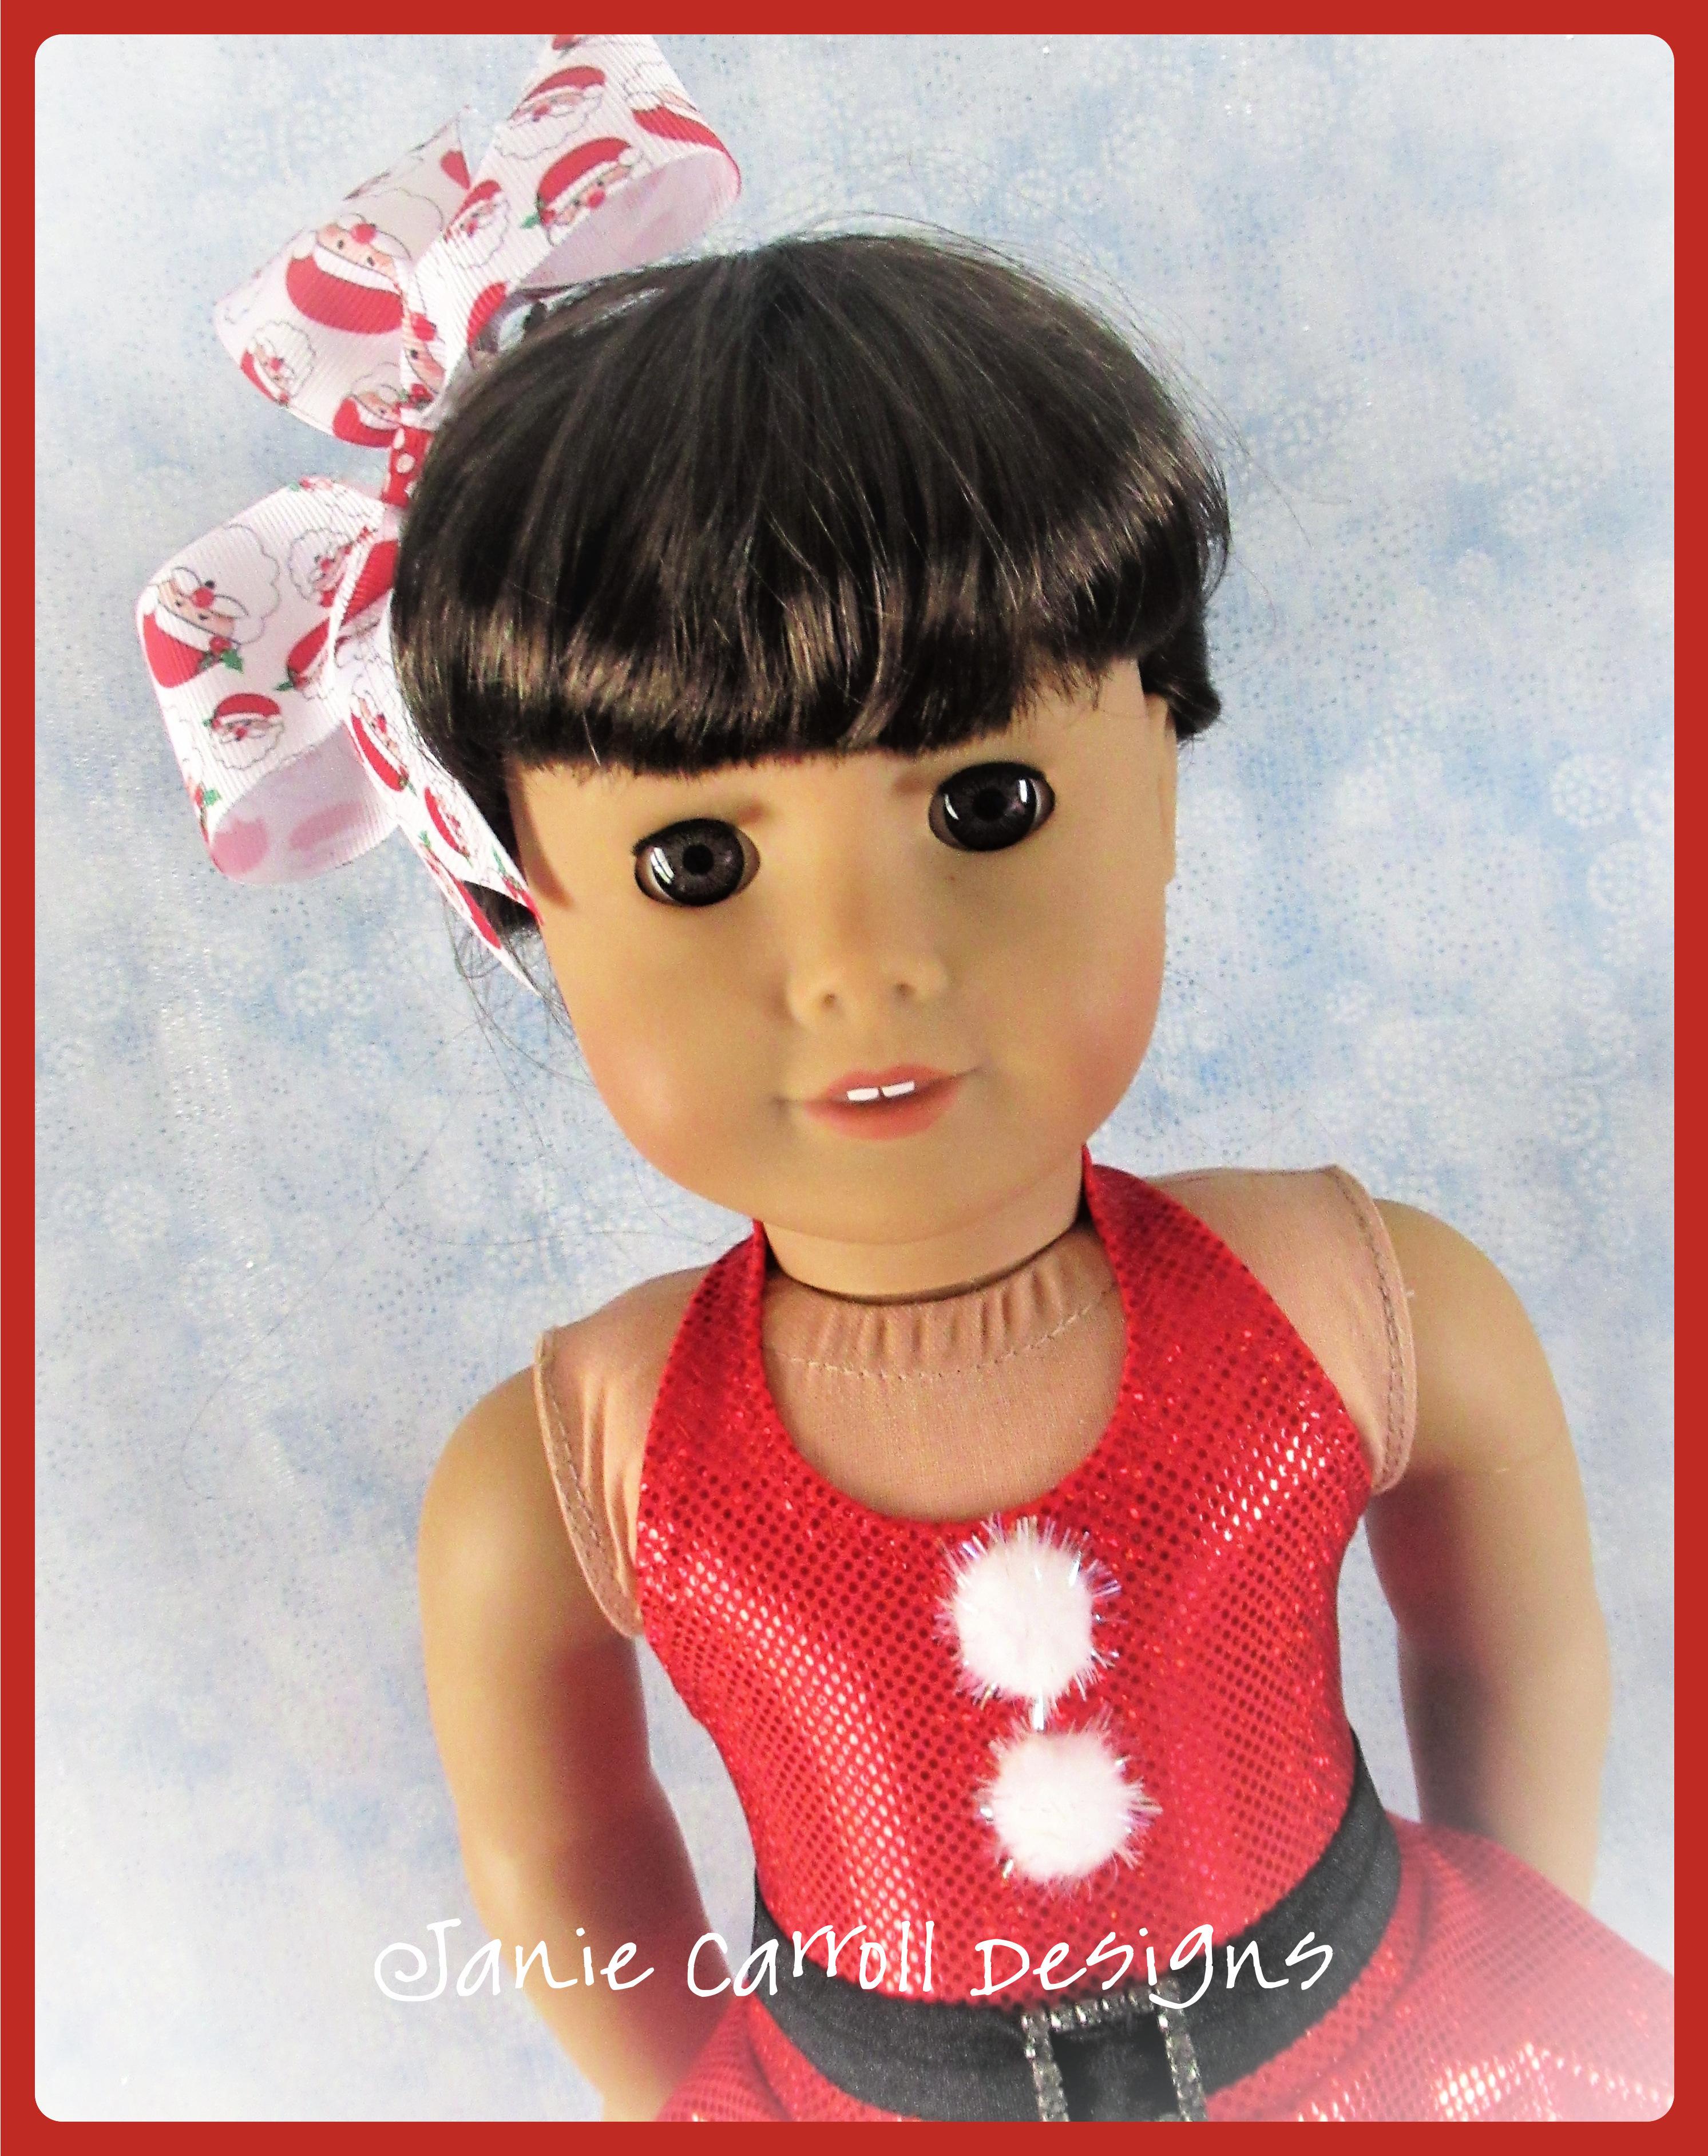
How ’bout this darling halter dress for standard 18″ dolls? Here’s the front,

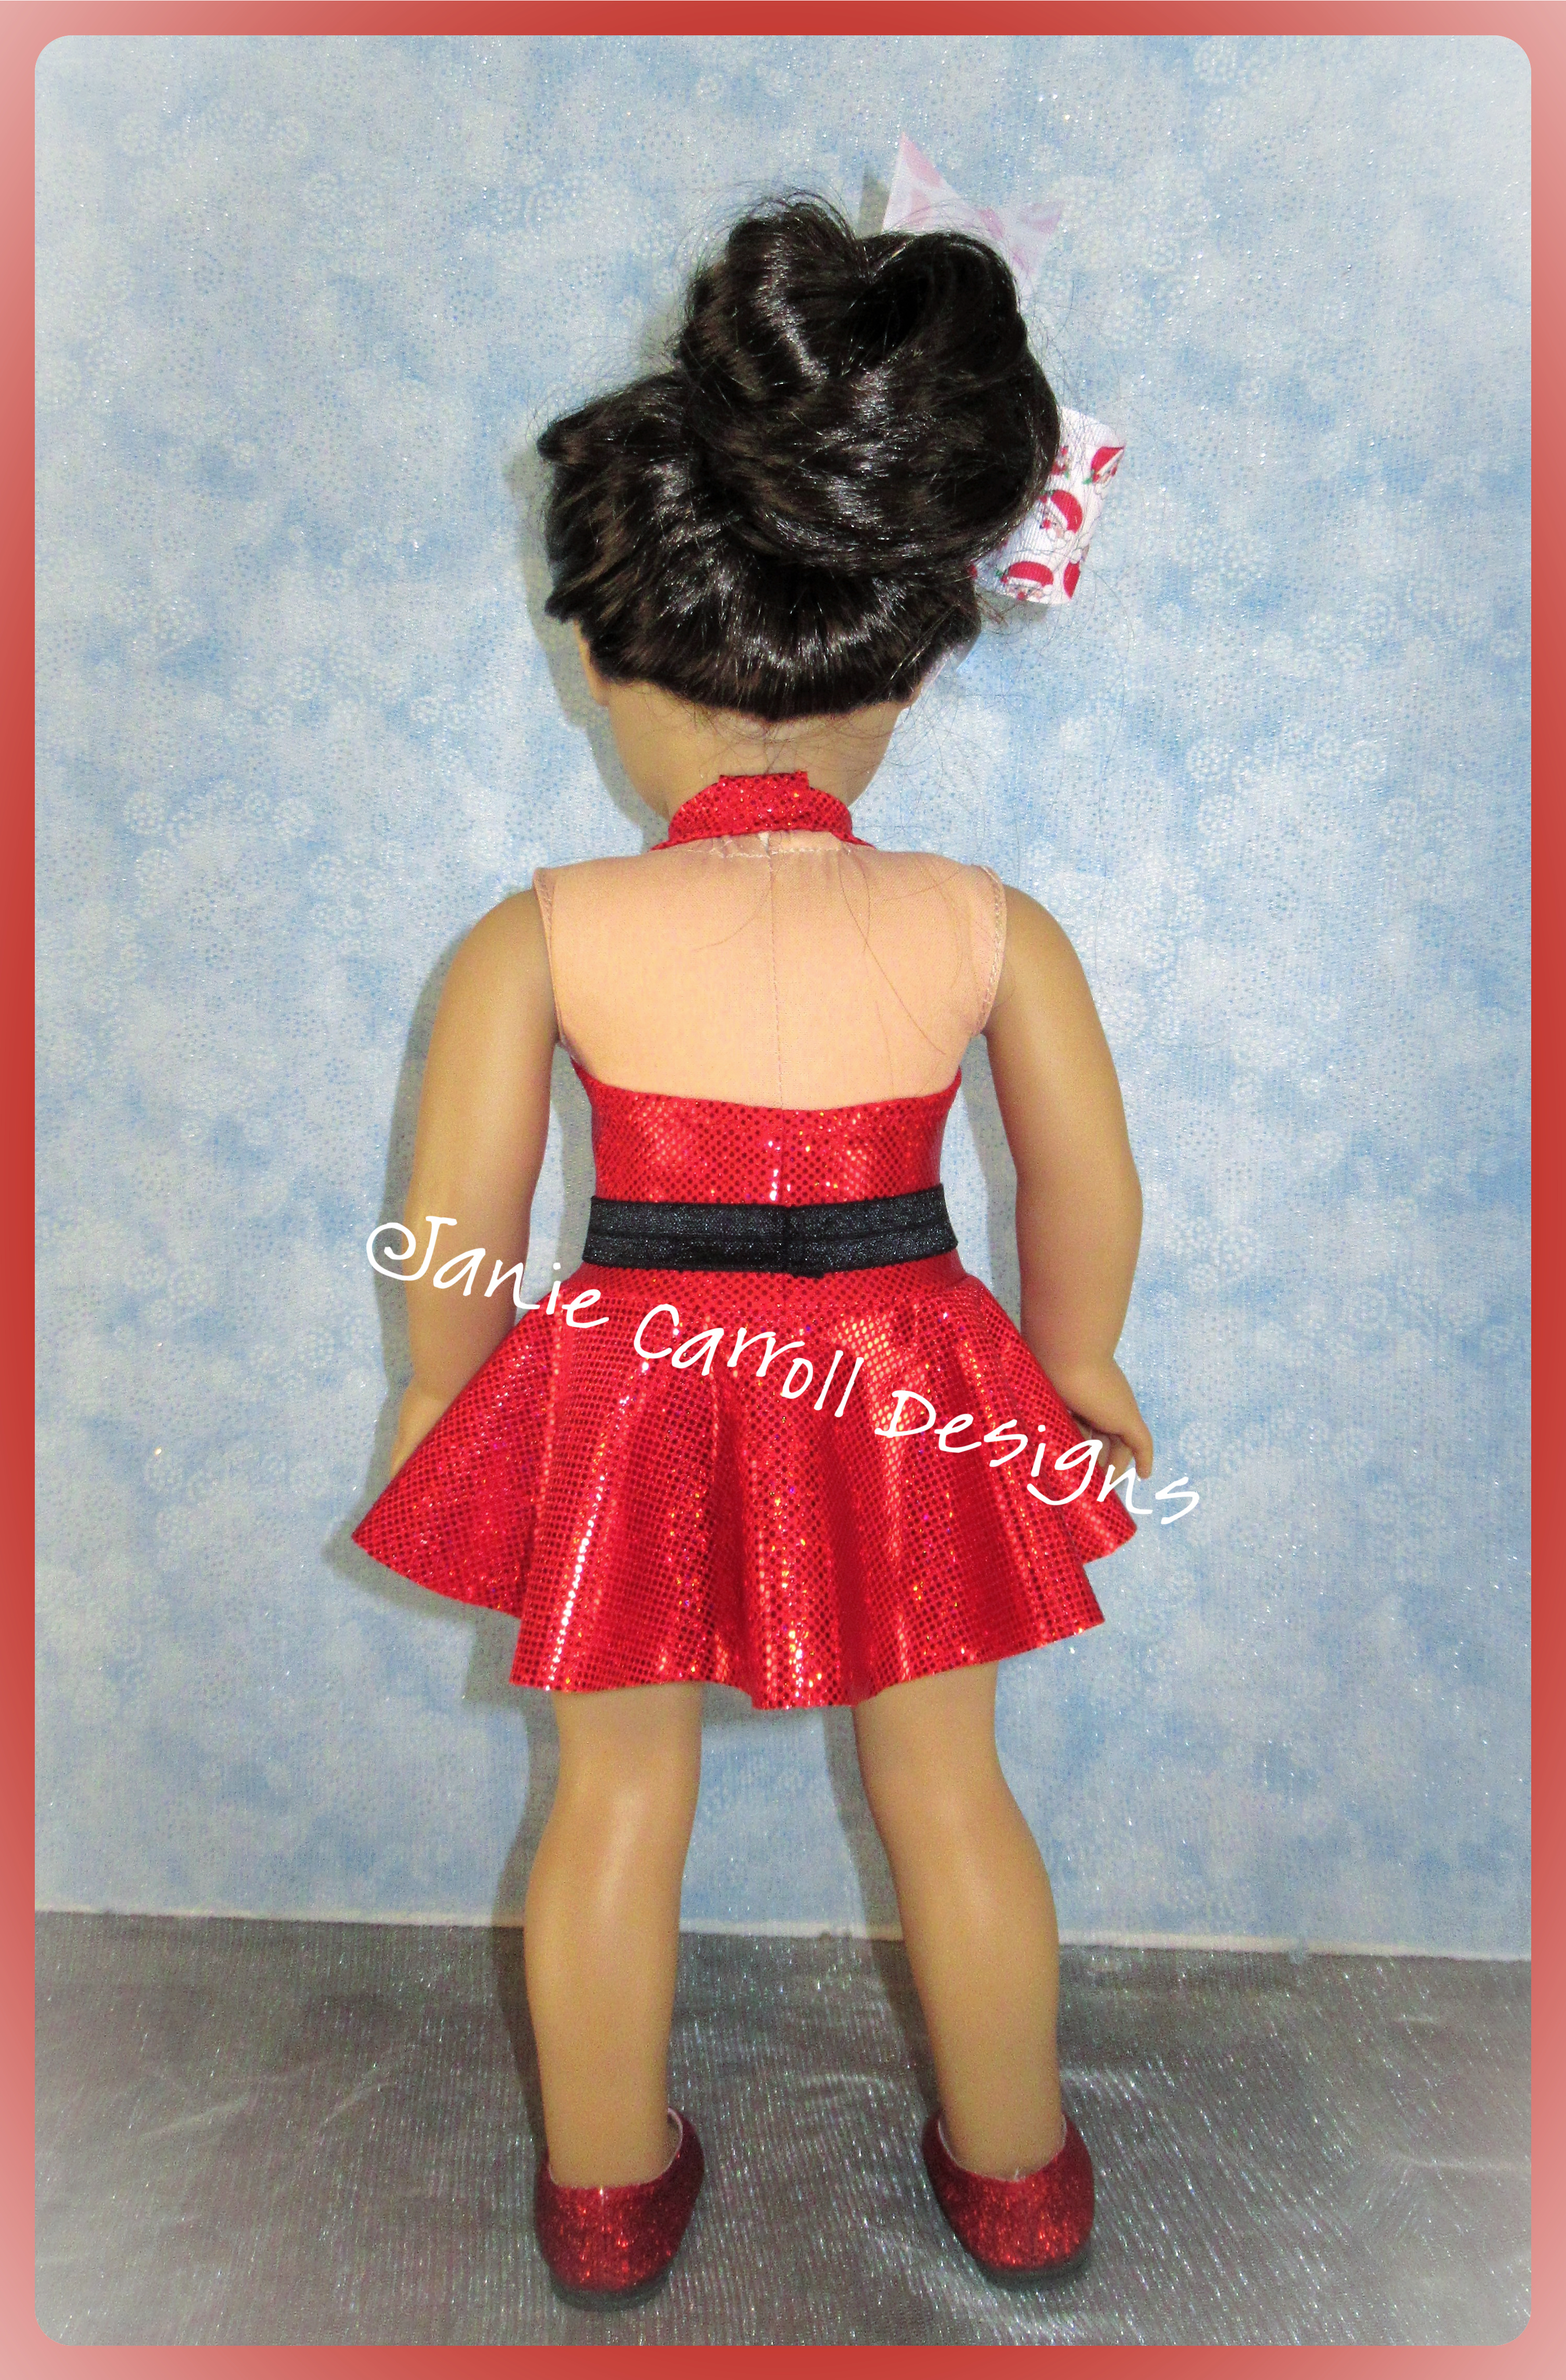
and the back view…
So cute – if I do say so myself!
This halter style dress requires active wear knit fabric – such as swim type fabrics. You’ll need good stretch (at least 50%) and decent recovery, meaning the fabric ‘snaps back’ to at, or near, it’s original measurement when stretched. This post will assume you understand basic properties of stretch and recovery, and can identify a ‘swim type’ fabric.
Specifically, the red holographic Mystique brand fabric here was ordered online from www.Spandexworld.com (Just to be clear, I do not receive any compensation, as of 9/2021, for sharing info of this nature.) I actually DO shop with Spandex World quite a bit and have found them to be a reliable source with excellent active wear fabrics.
We’ll cover trim details later in the post, but for now, you’ll need two Janie Carroll Designs patterns.
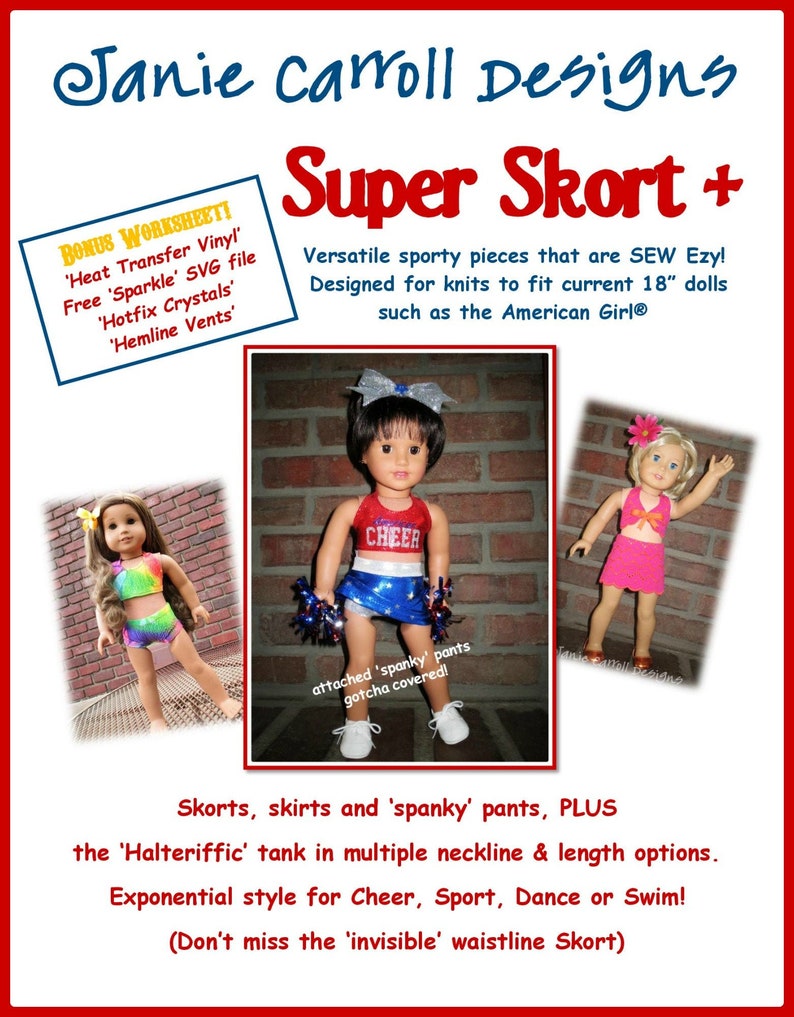
First, you’ll need my Super Skort + pattern, in the 18″ standard size. (I have yet to try this method for 14 1/2″ dolls, such as the Wellie girl, so I cannot give you appropriate measurements now. Feel free to let me know if you decide to give it a try. Otherwise, I’ll let you know in future, when I get around to trying this style for the smaller girls.)
Back to the Super Skort +. We’ll be using the halteriffic tank for our dress bodice. You can find the pattern here: https://www.etsy.com/listing/522867904/super-skort-plus-pattern-for-18-doll?ref=shop_home_active_51 and it looks like this:
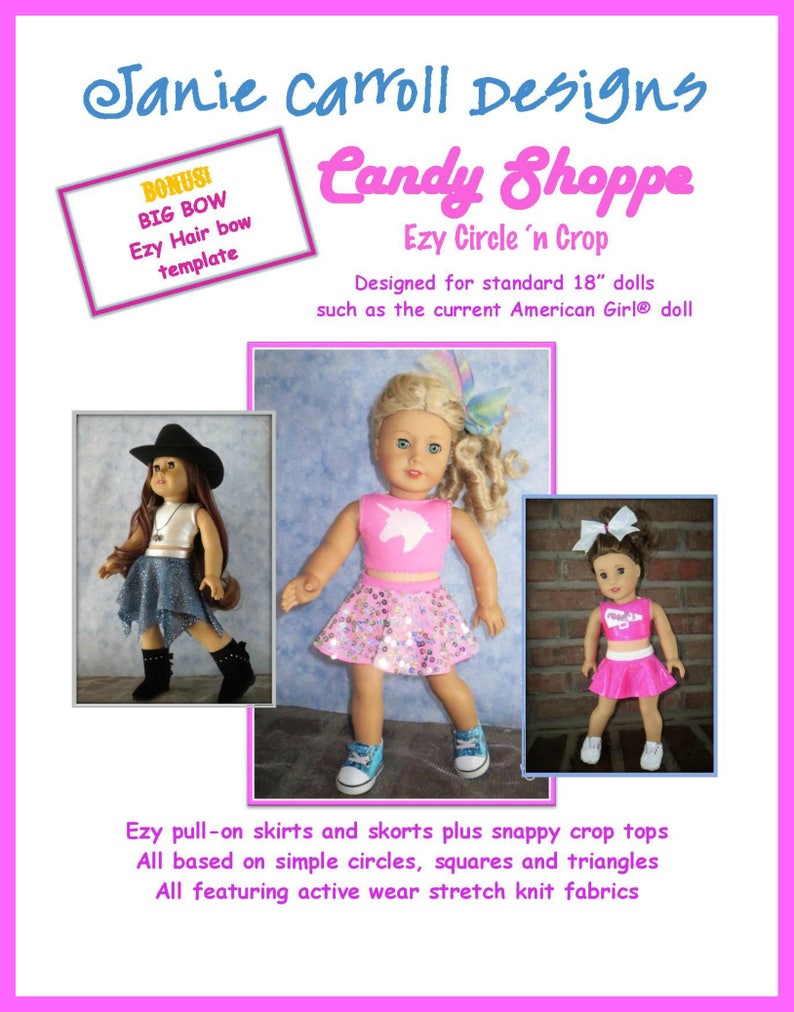
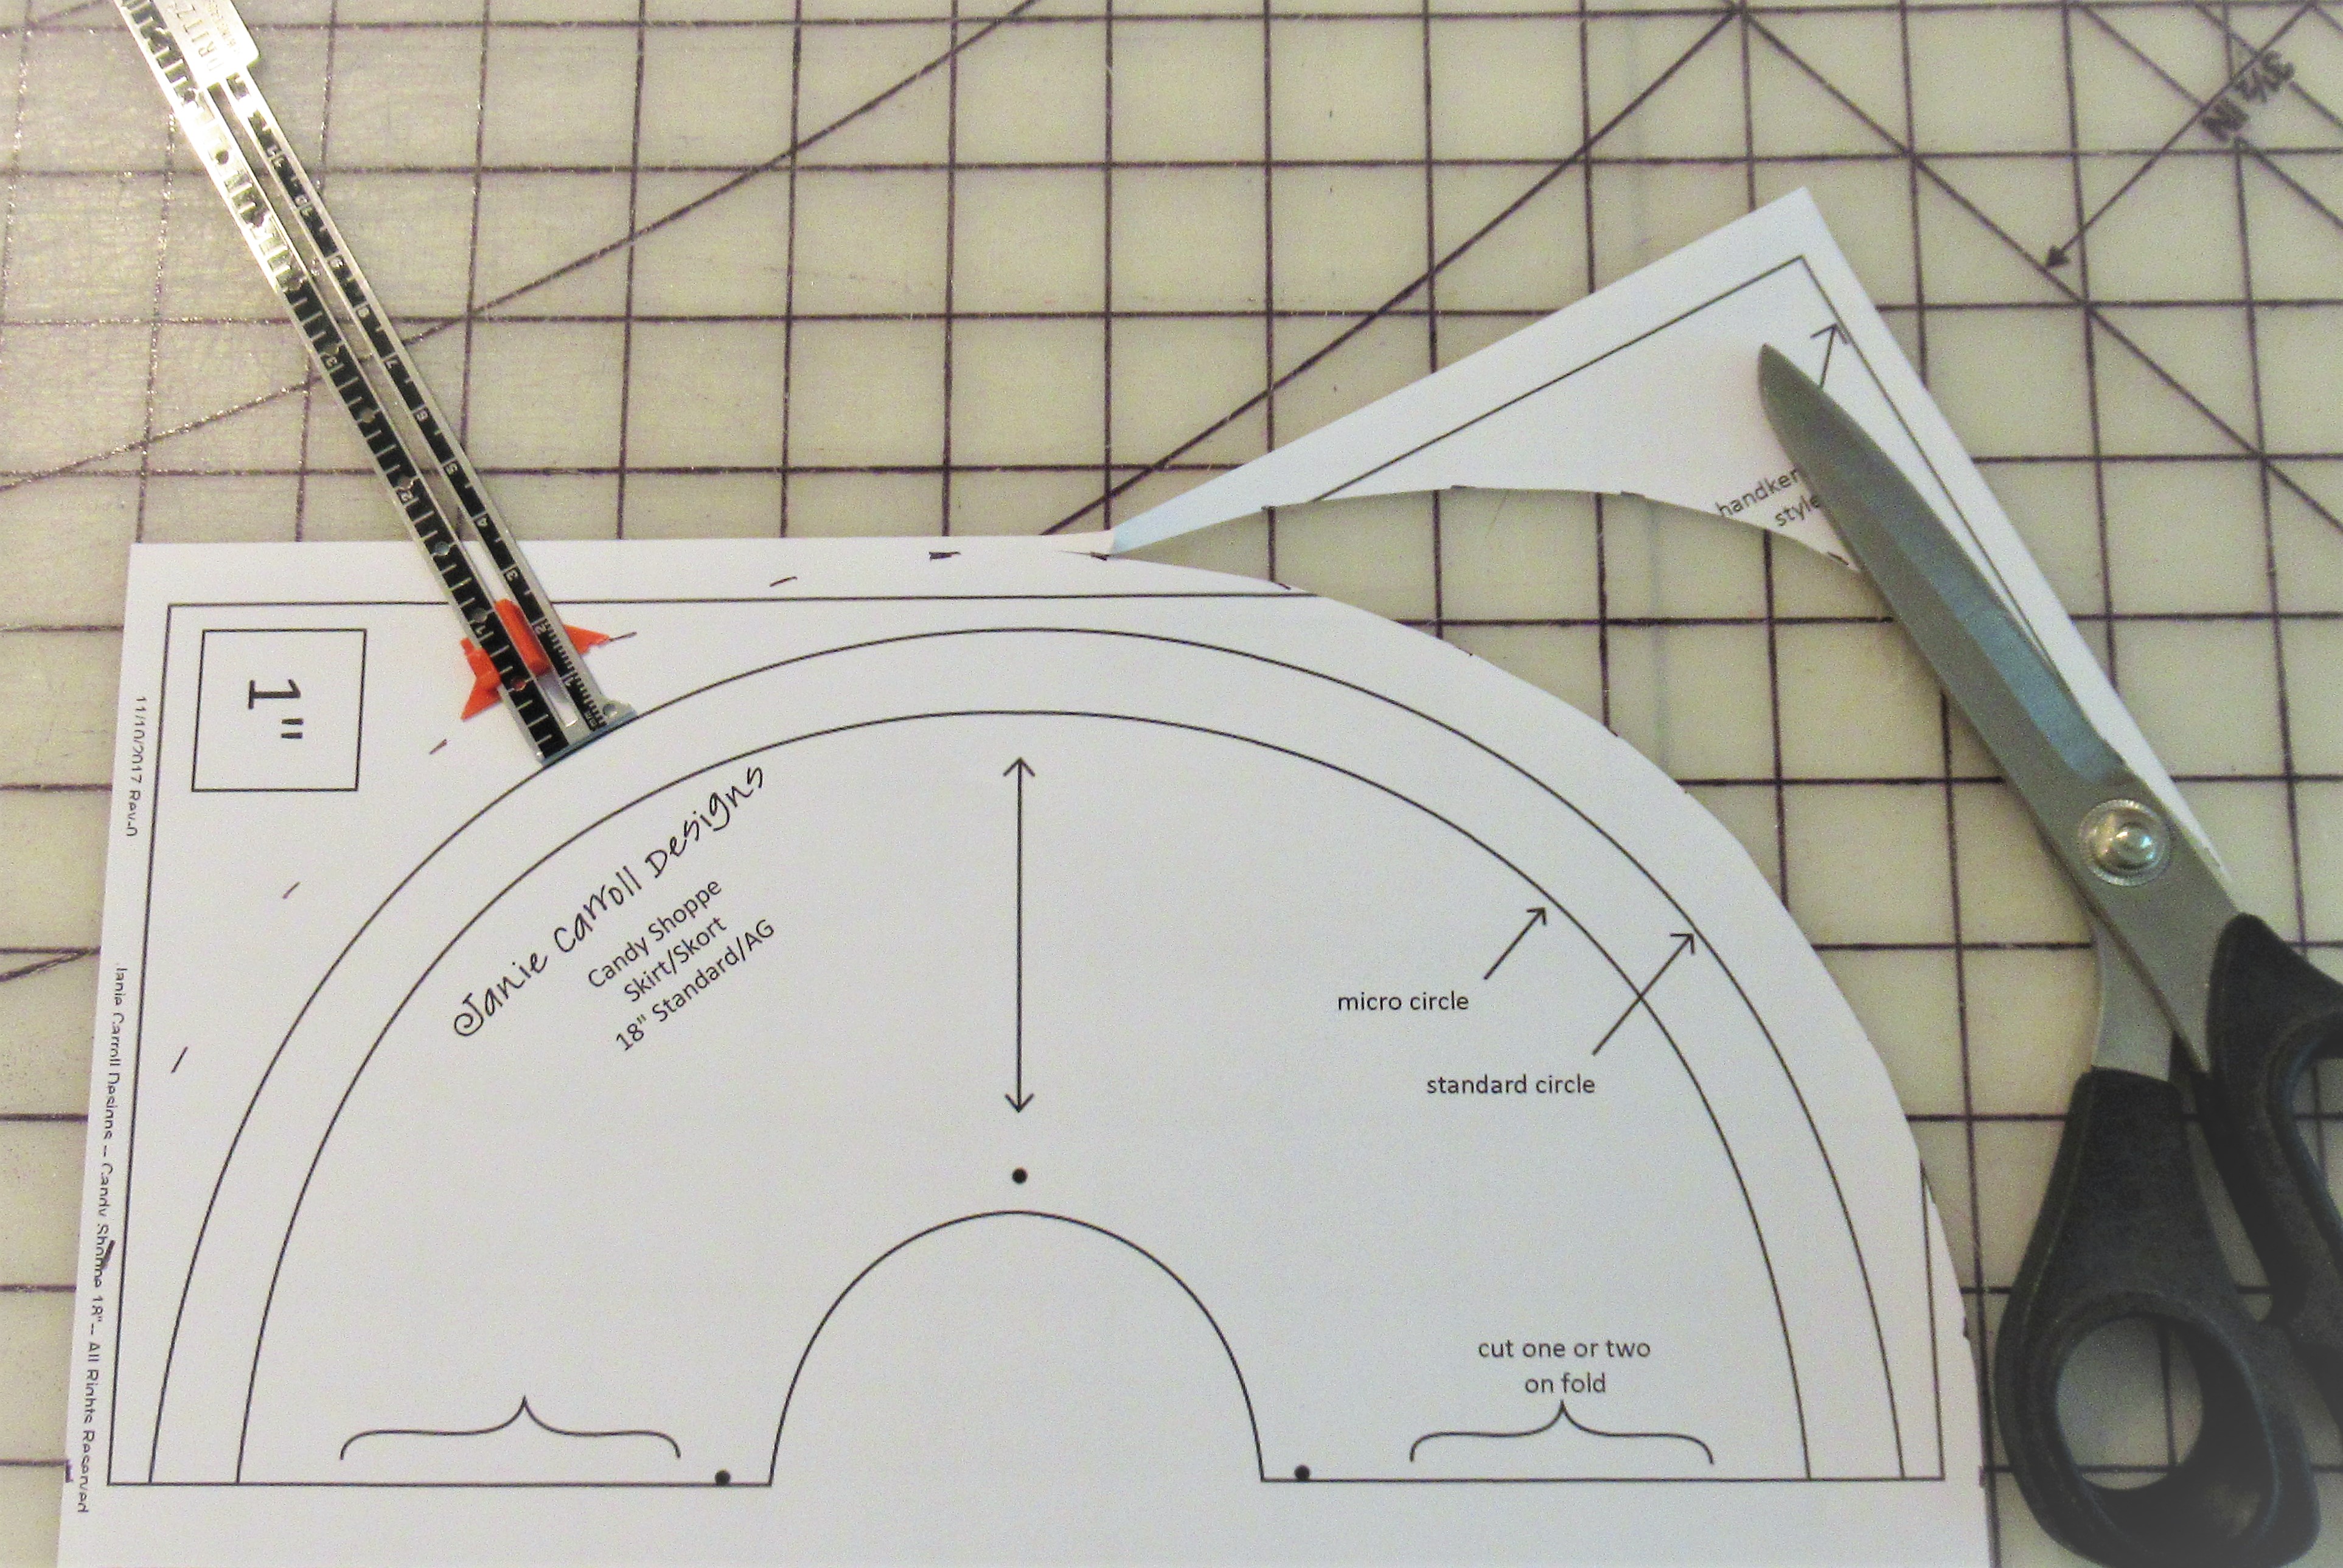
You’ll also need the Candy Shoppe pattern, 18″ standard size, which you can find here: https://www.etsy.com/listing/557333256/candy-shoppe-ezy-circle-n-crop-pattern?ref=shop_home_active_43&crt=1
and it looks like this:
We’ll be using the panty and the circle skirt piece from the Candy Shoppe. You may be wondering why we need the attached panty, since our finished product will be a dress. Good question! Due to the stretch of the knit, and the snug fit of the garment, the attached panty helps to keep the bodice smooth. It also encourages the skirt to lay correctly, and it keeps the dress from twisting or ‘riding up’ unpleasantly. Lastly, it maintains the doll’s modesty and dignity! lol.
So, that’s it! Just 3 pattern pieces for all of this adorable!
Where to begin? You’ll need a 10″ length of fabric, or just under 1/3 of a yard. Use large scrap, or, if you’re purchasing fabric you’ll be able to get at least 2 halter dresses out of a normal 58/60″ width. Remember, you must use stretchy knit for this one. The dress pulls on, and hugs the body so there is no substitute way to use woven fabric unless you want to add a center back closure, etc. and that’s not what this dress is about.
We’re all about quick and simple with this dress!
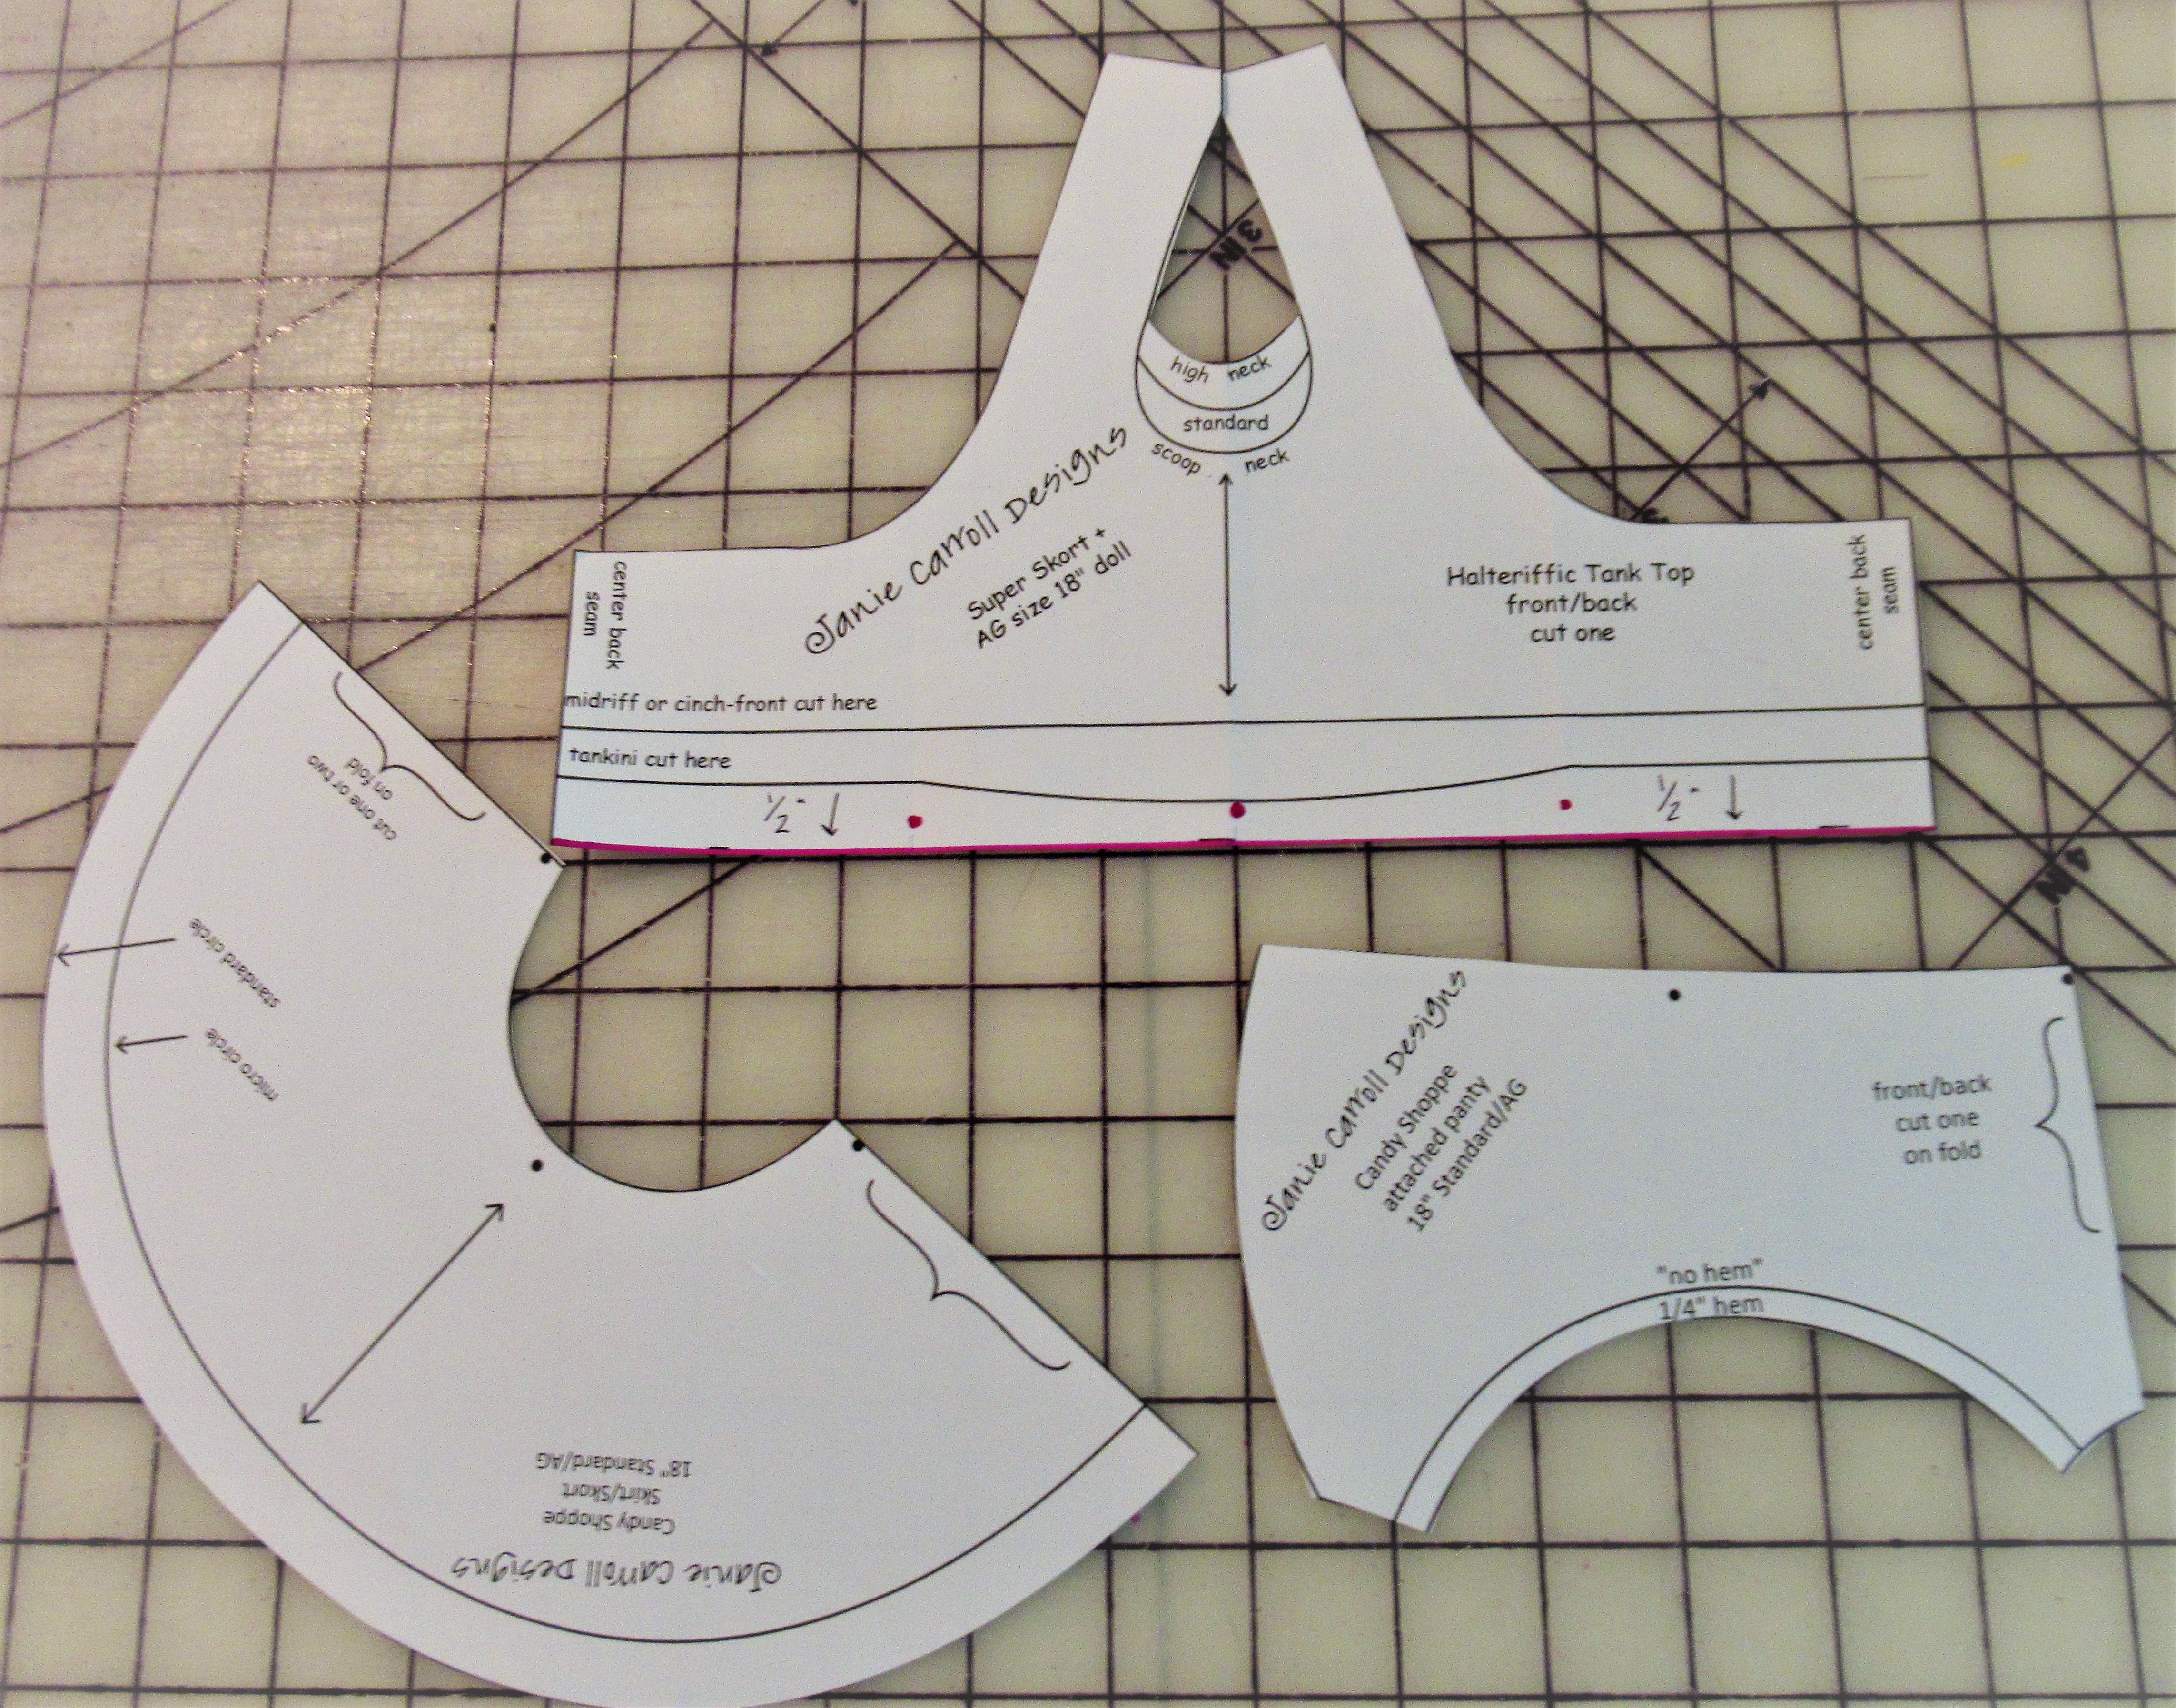
Let’s start with the halteriffic tank top pattern piece and make the ONE modification that this pattern will require. (yes, I did say just ONE modification!)
Print a clean, new photocopy of the pattern sheet. Observe the length choices for the top, and identify the tankini cutting line. Measure down 1/2″ from the straight ends of that line and draw a single straight line across the entire piece. This will be our new cutting line and it should look like this:
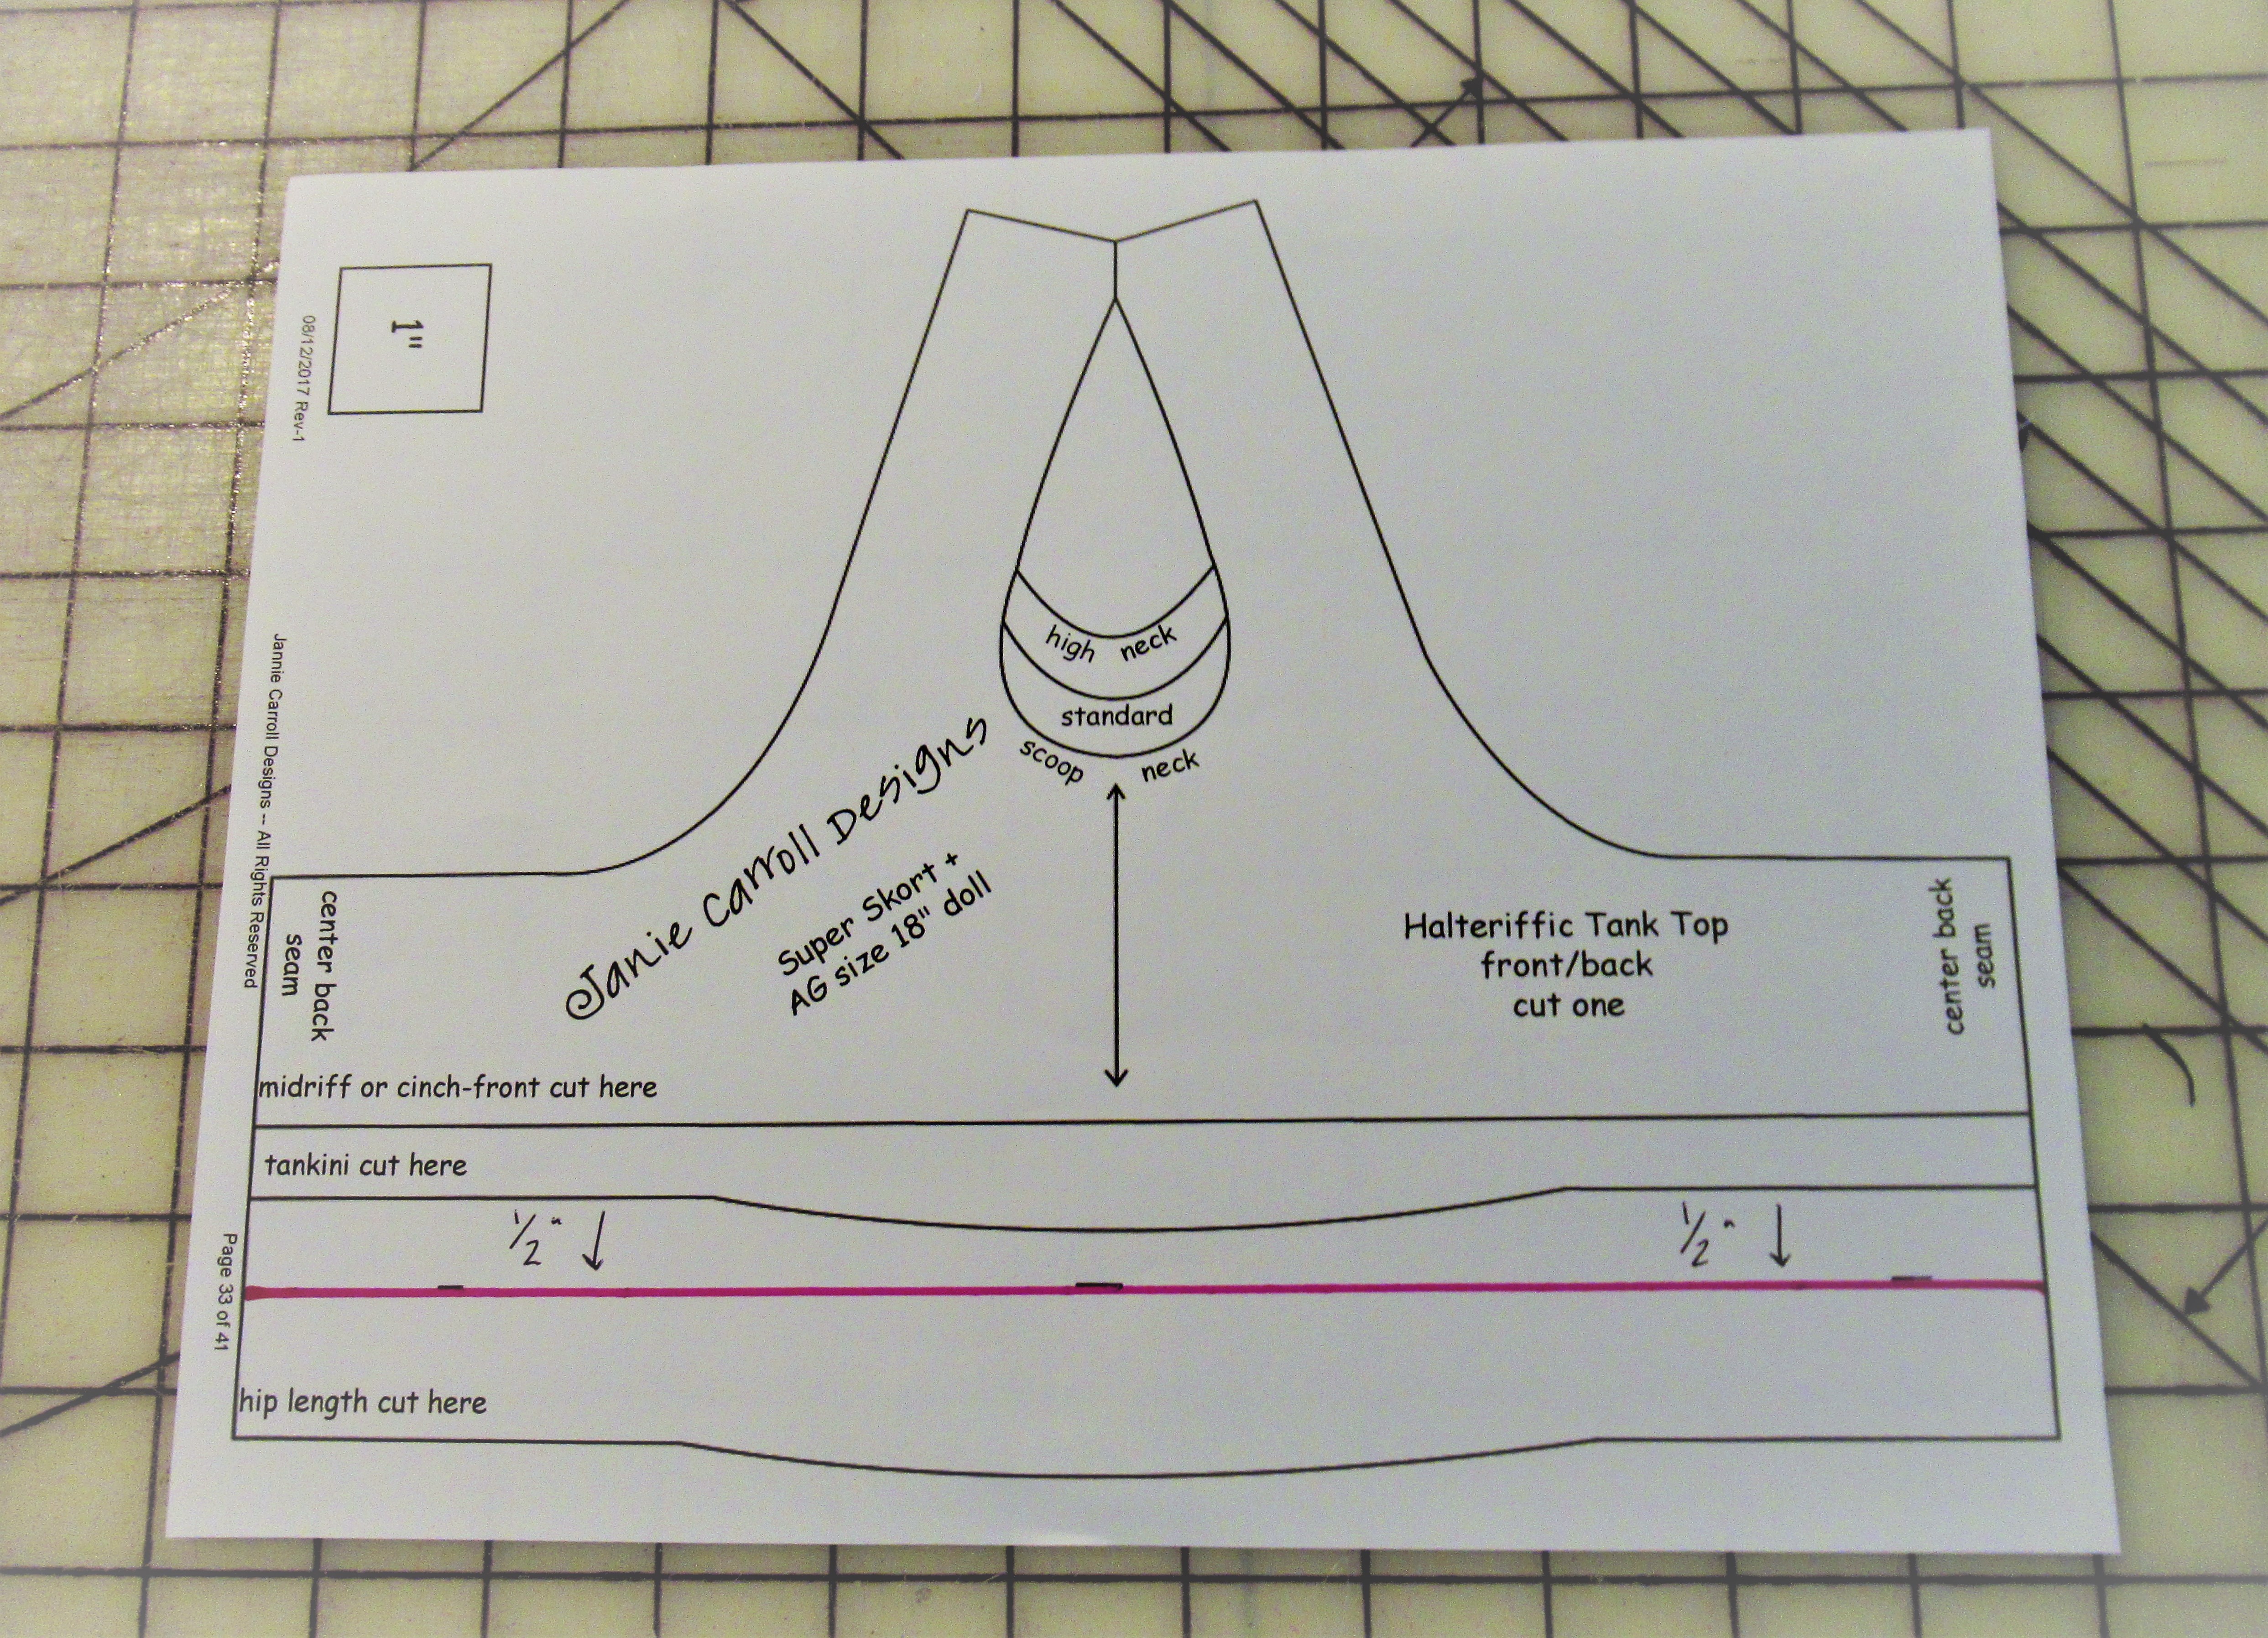
I used a fuchsia pink marker so you can see that new line clearly. I also noted that the new line is 1/2″ exactly below the tankini cutting line. (Ignore that dip along the front of the tankini line, we don’t need that for our halter dress)
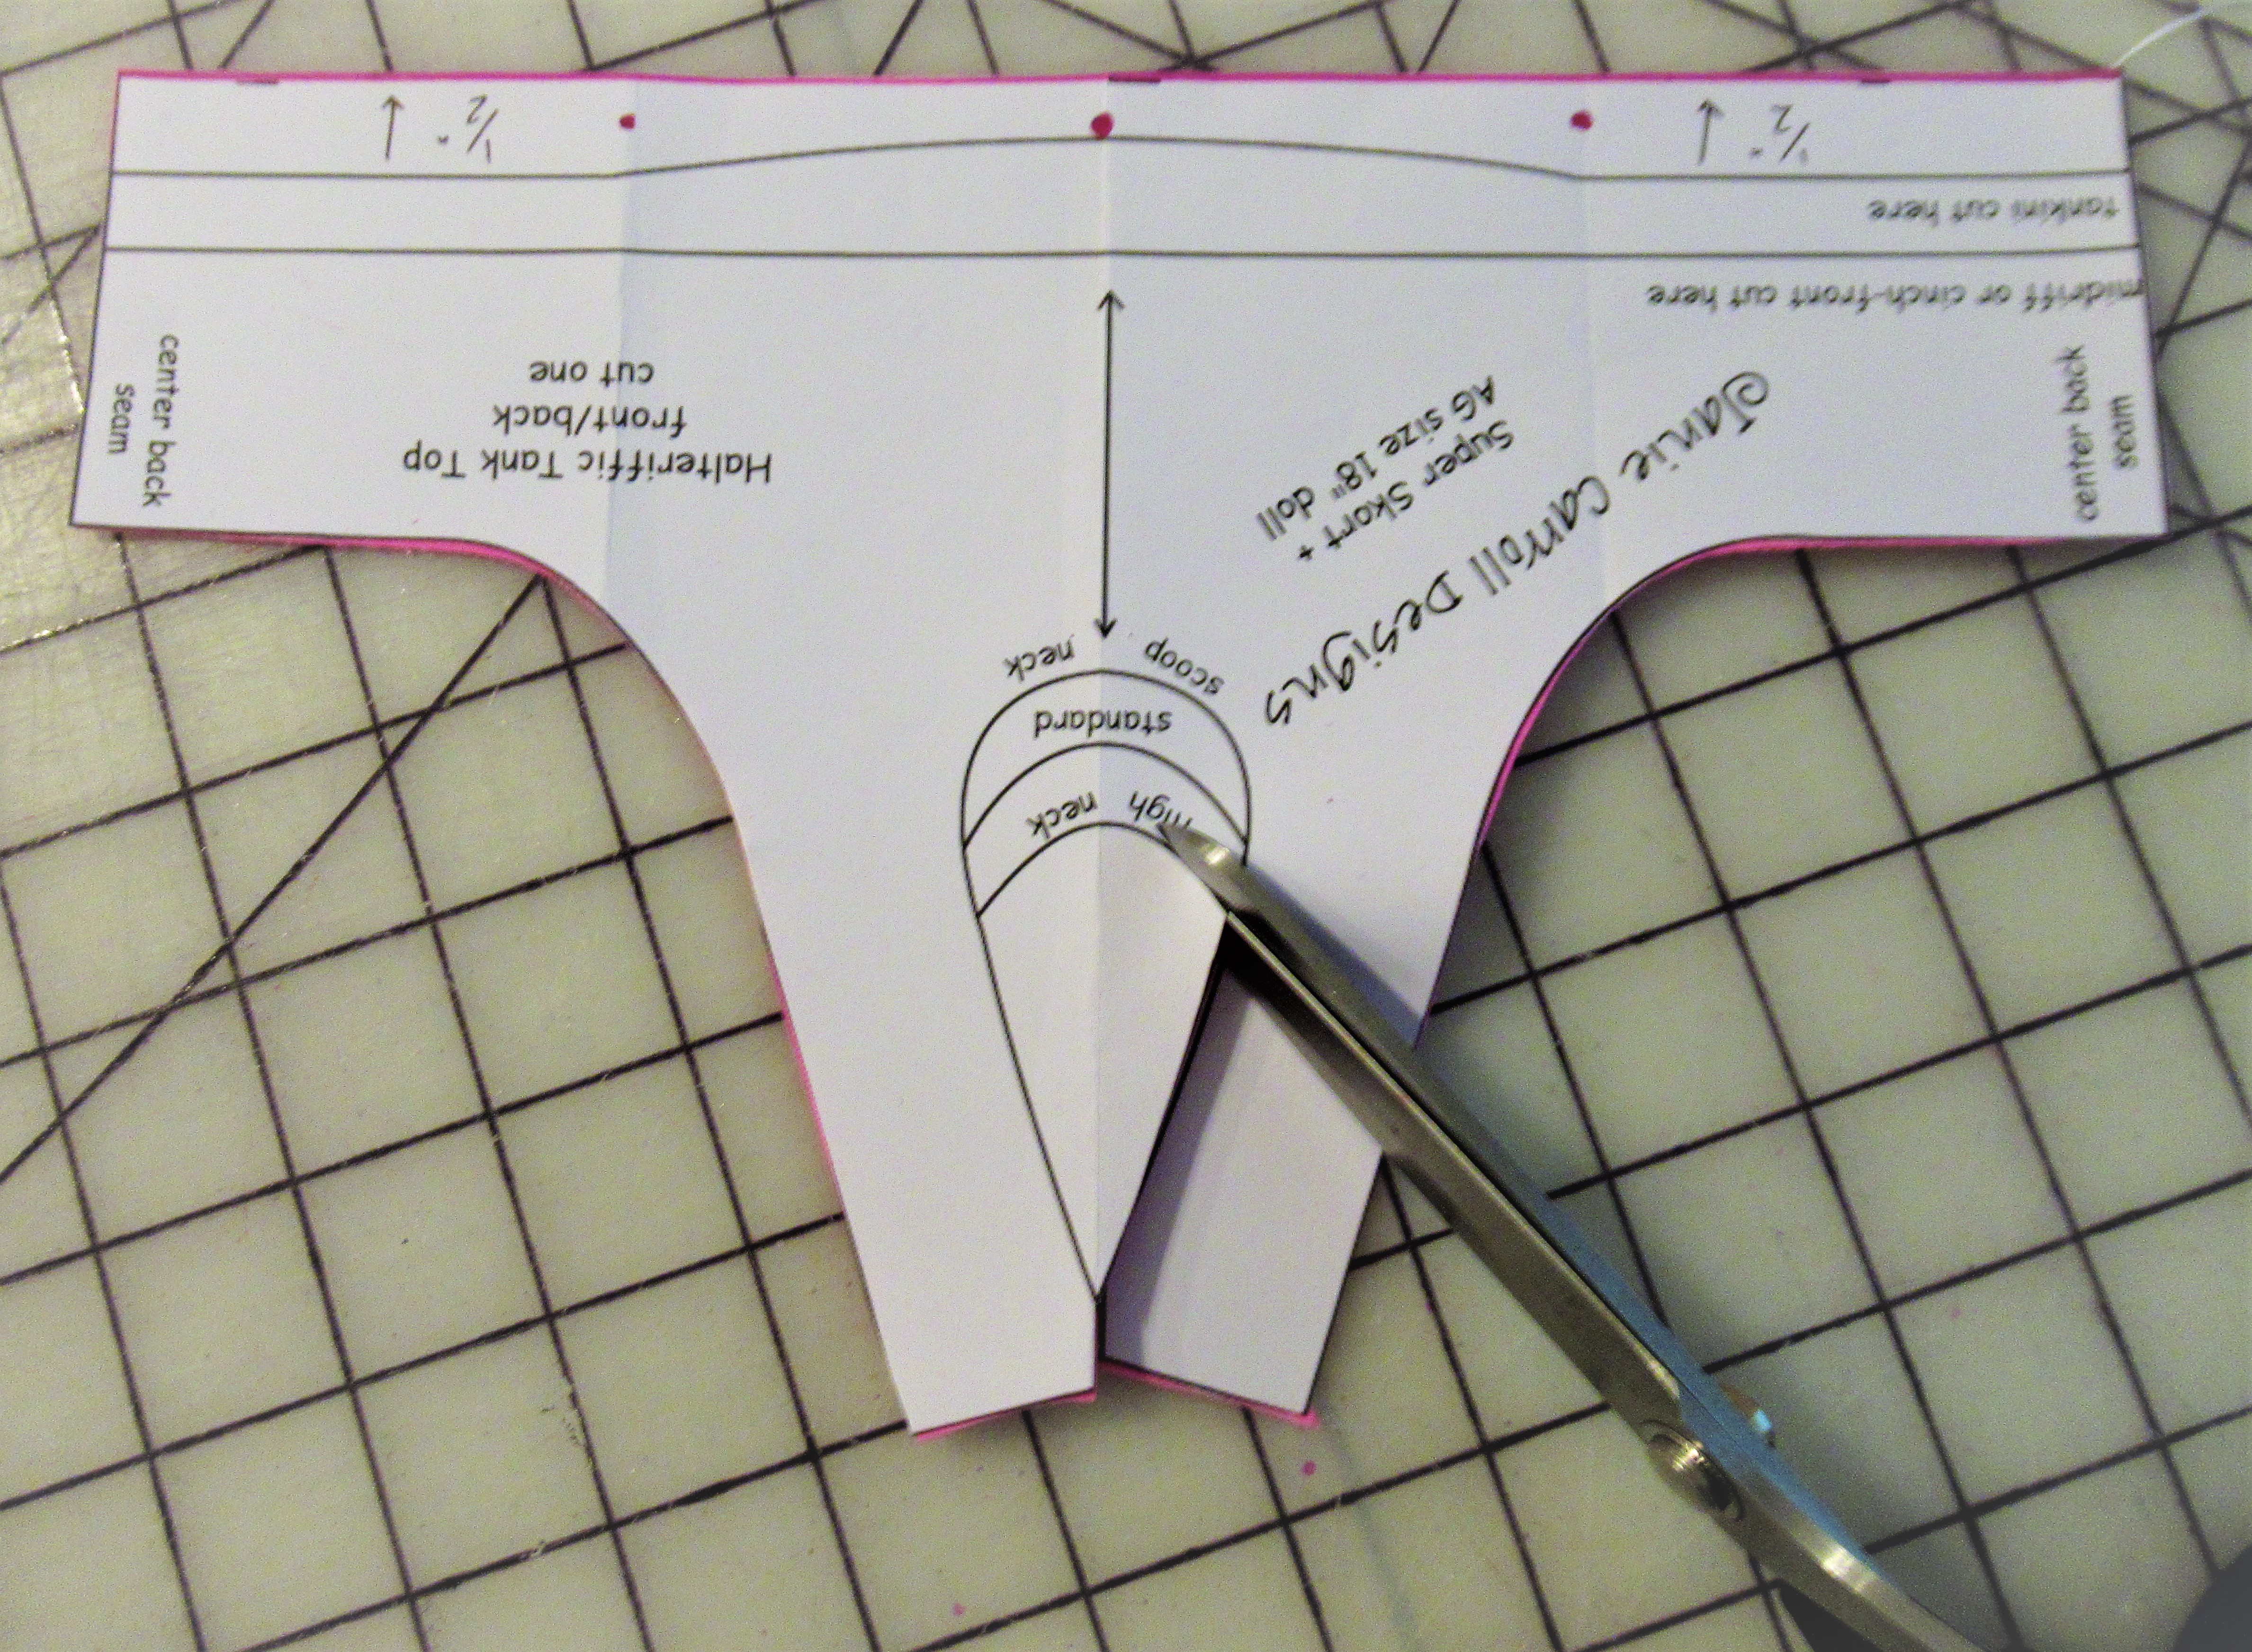
Cut out the paper pattern, except for the neckline choice. Leave that area ‘intact’ for now.
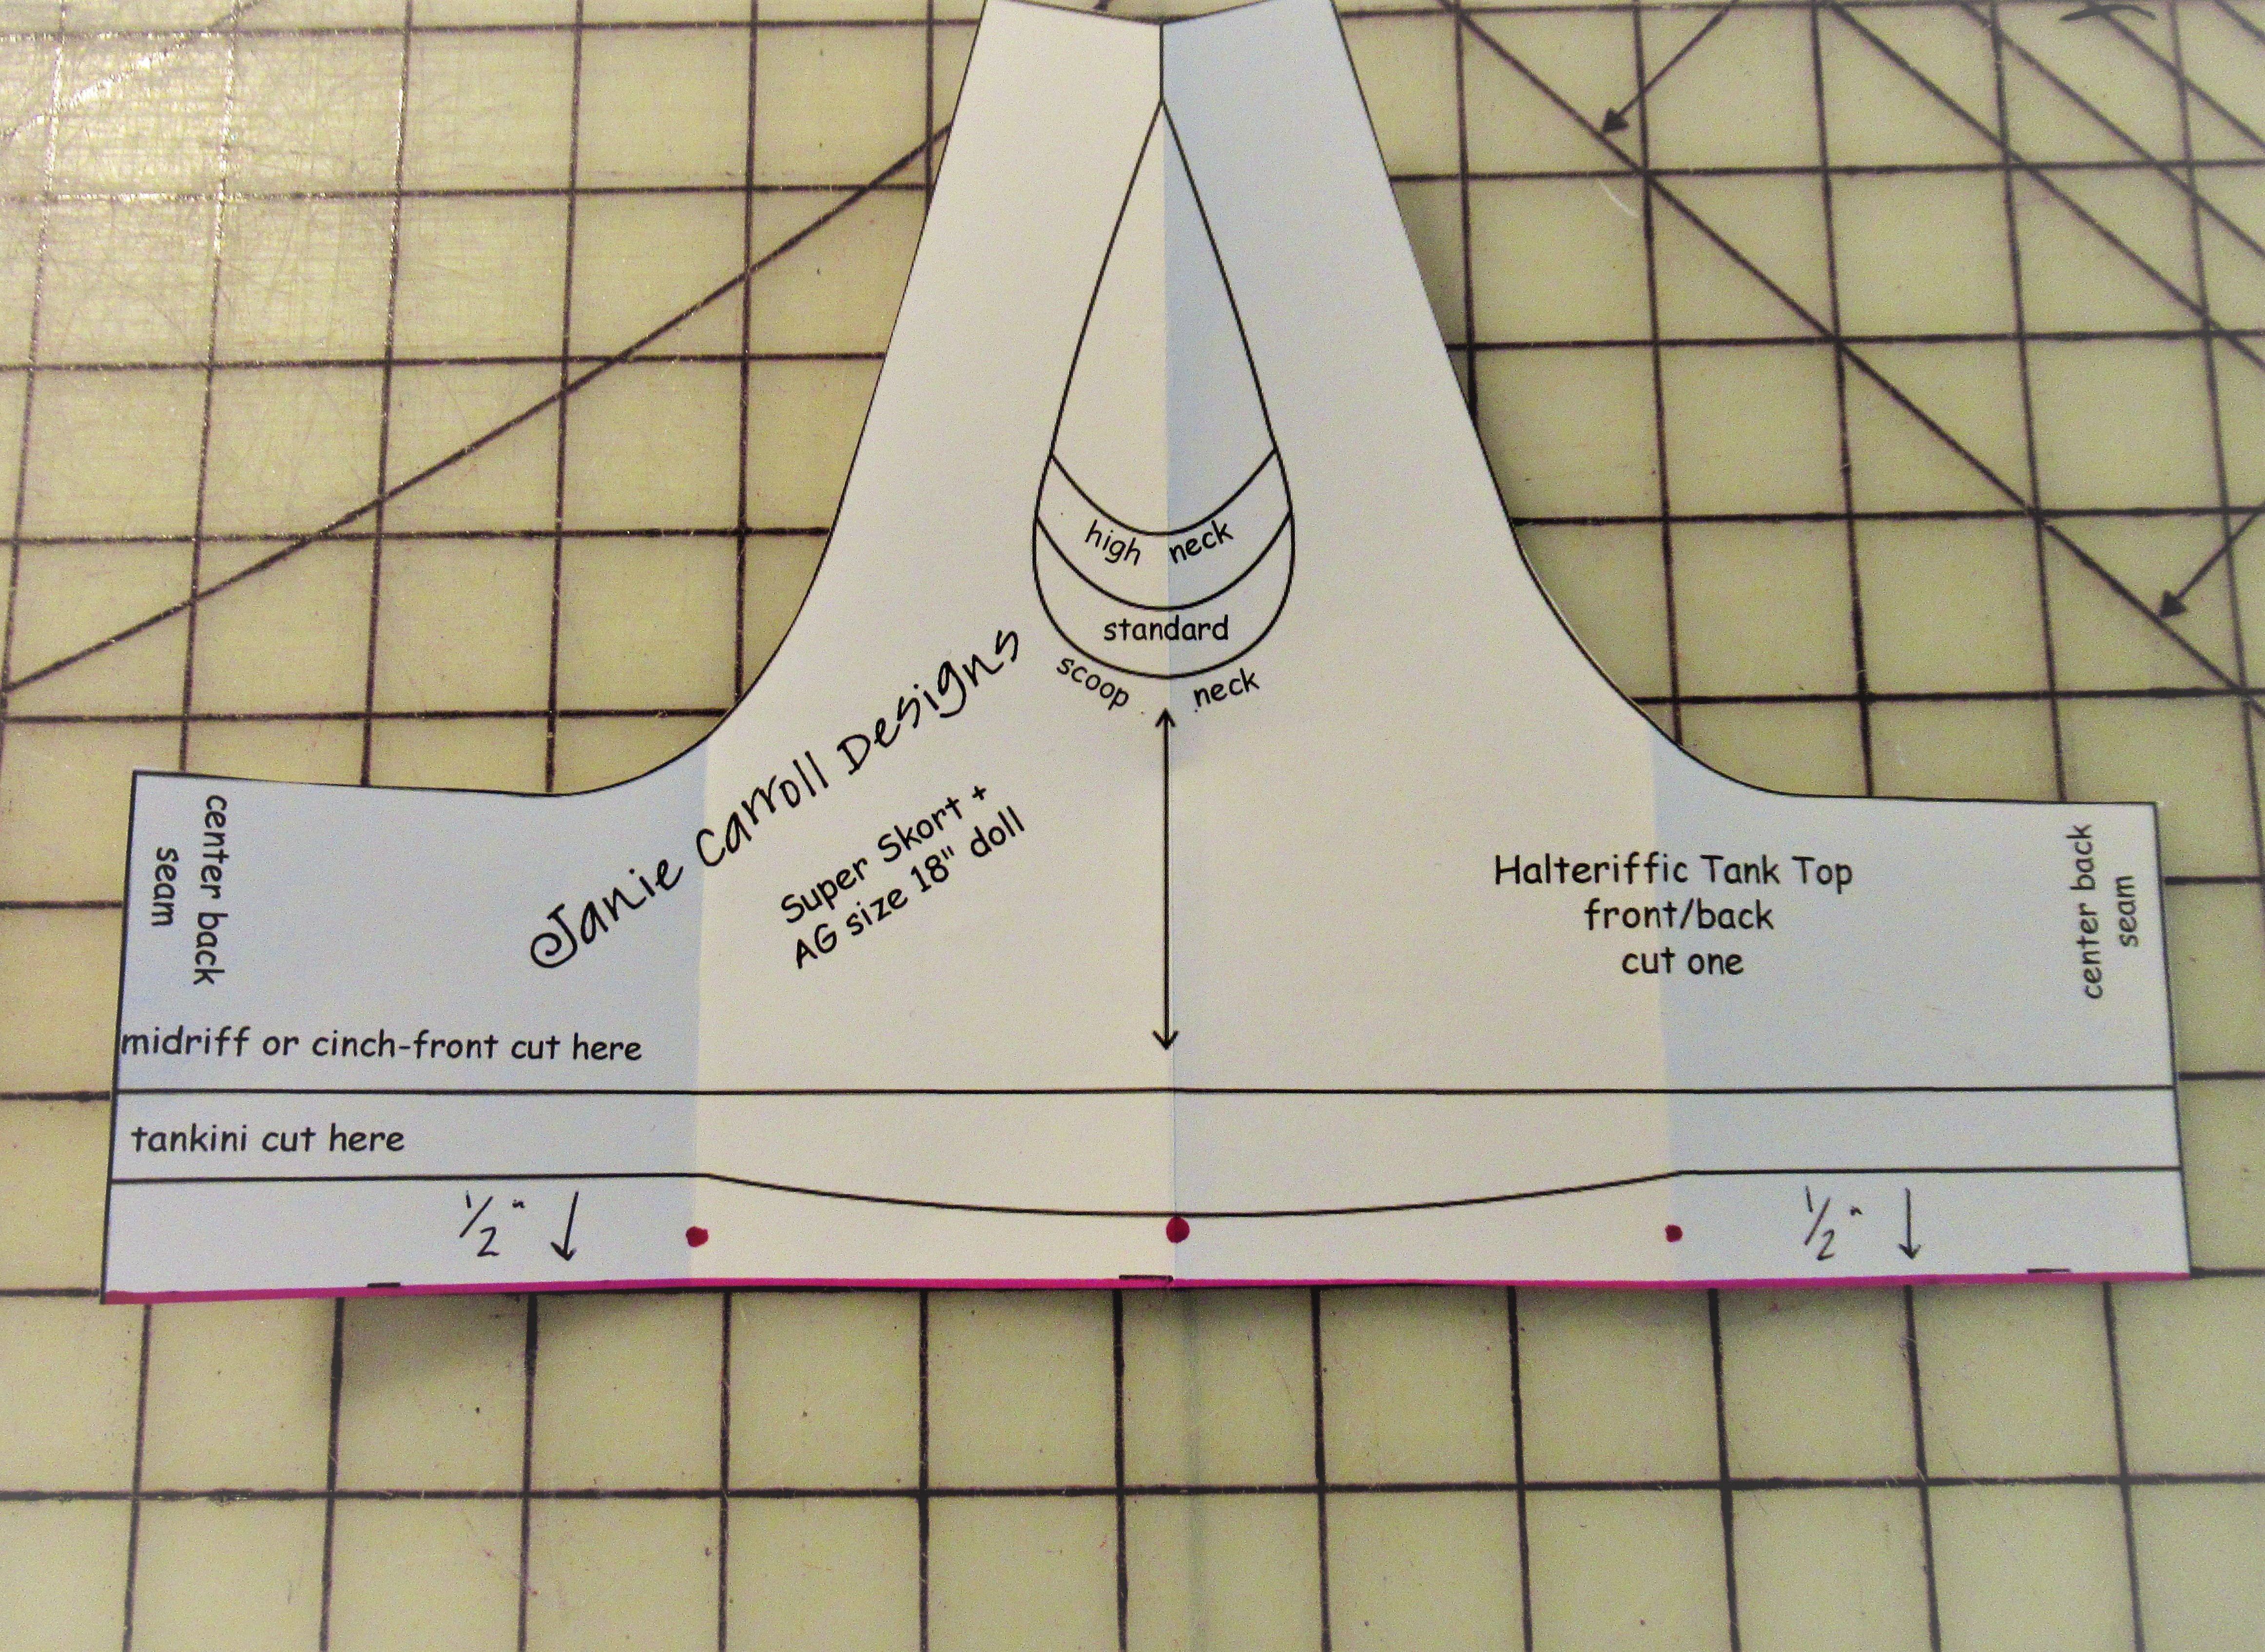
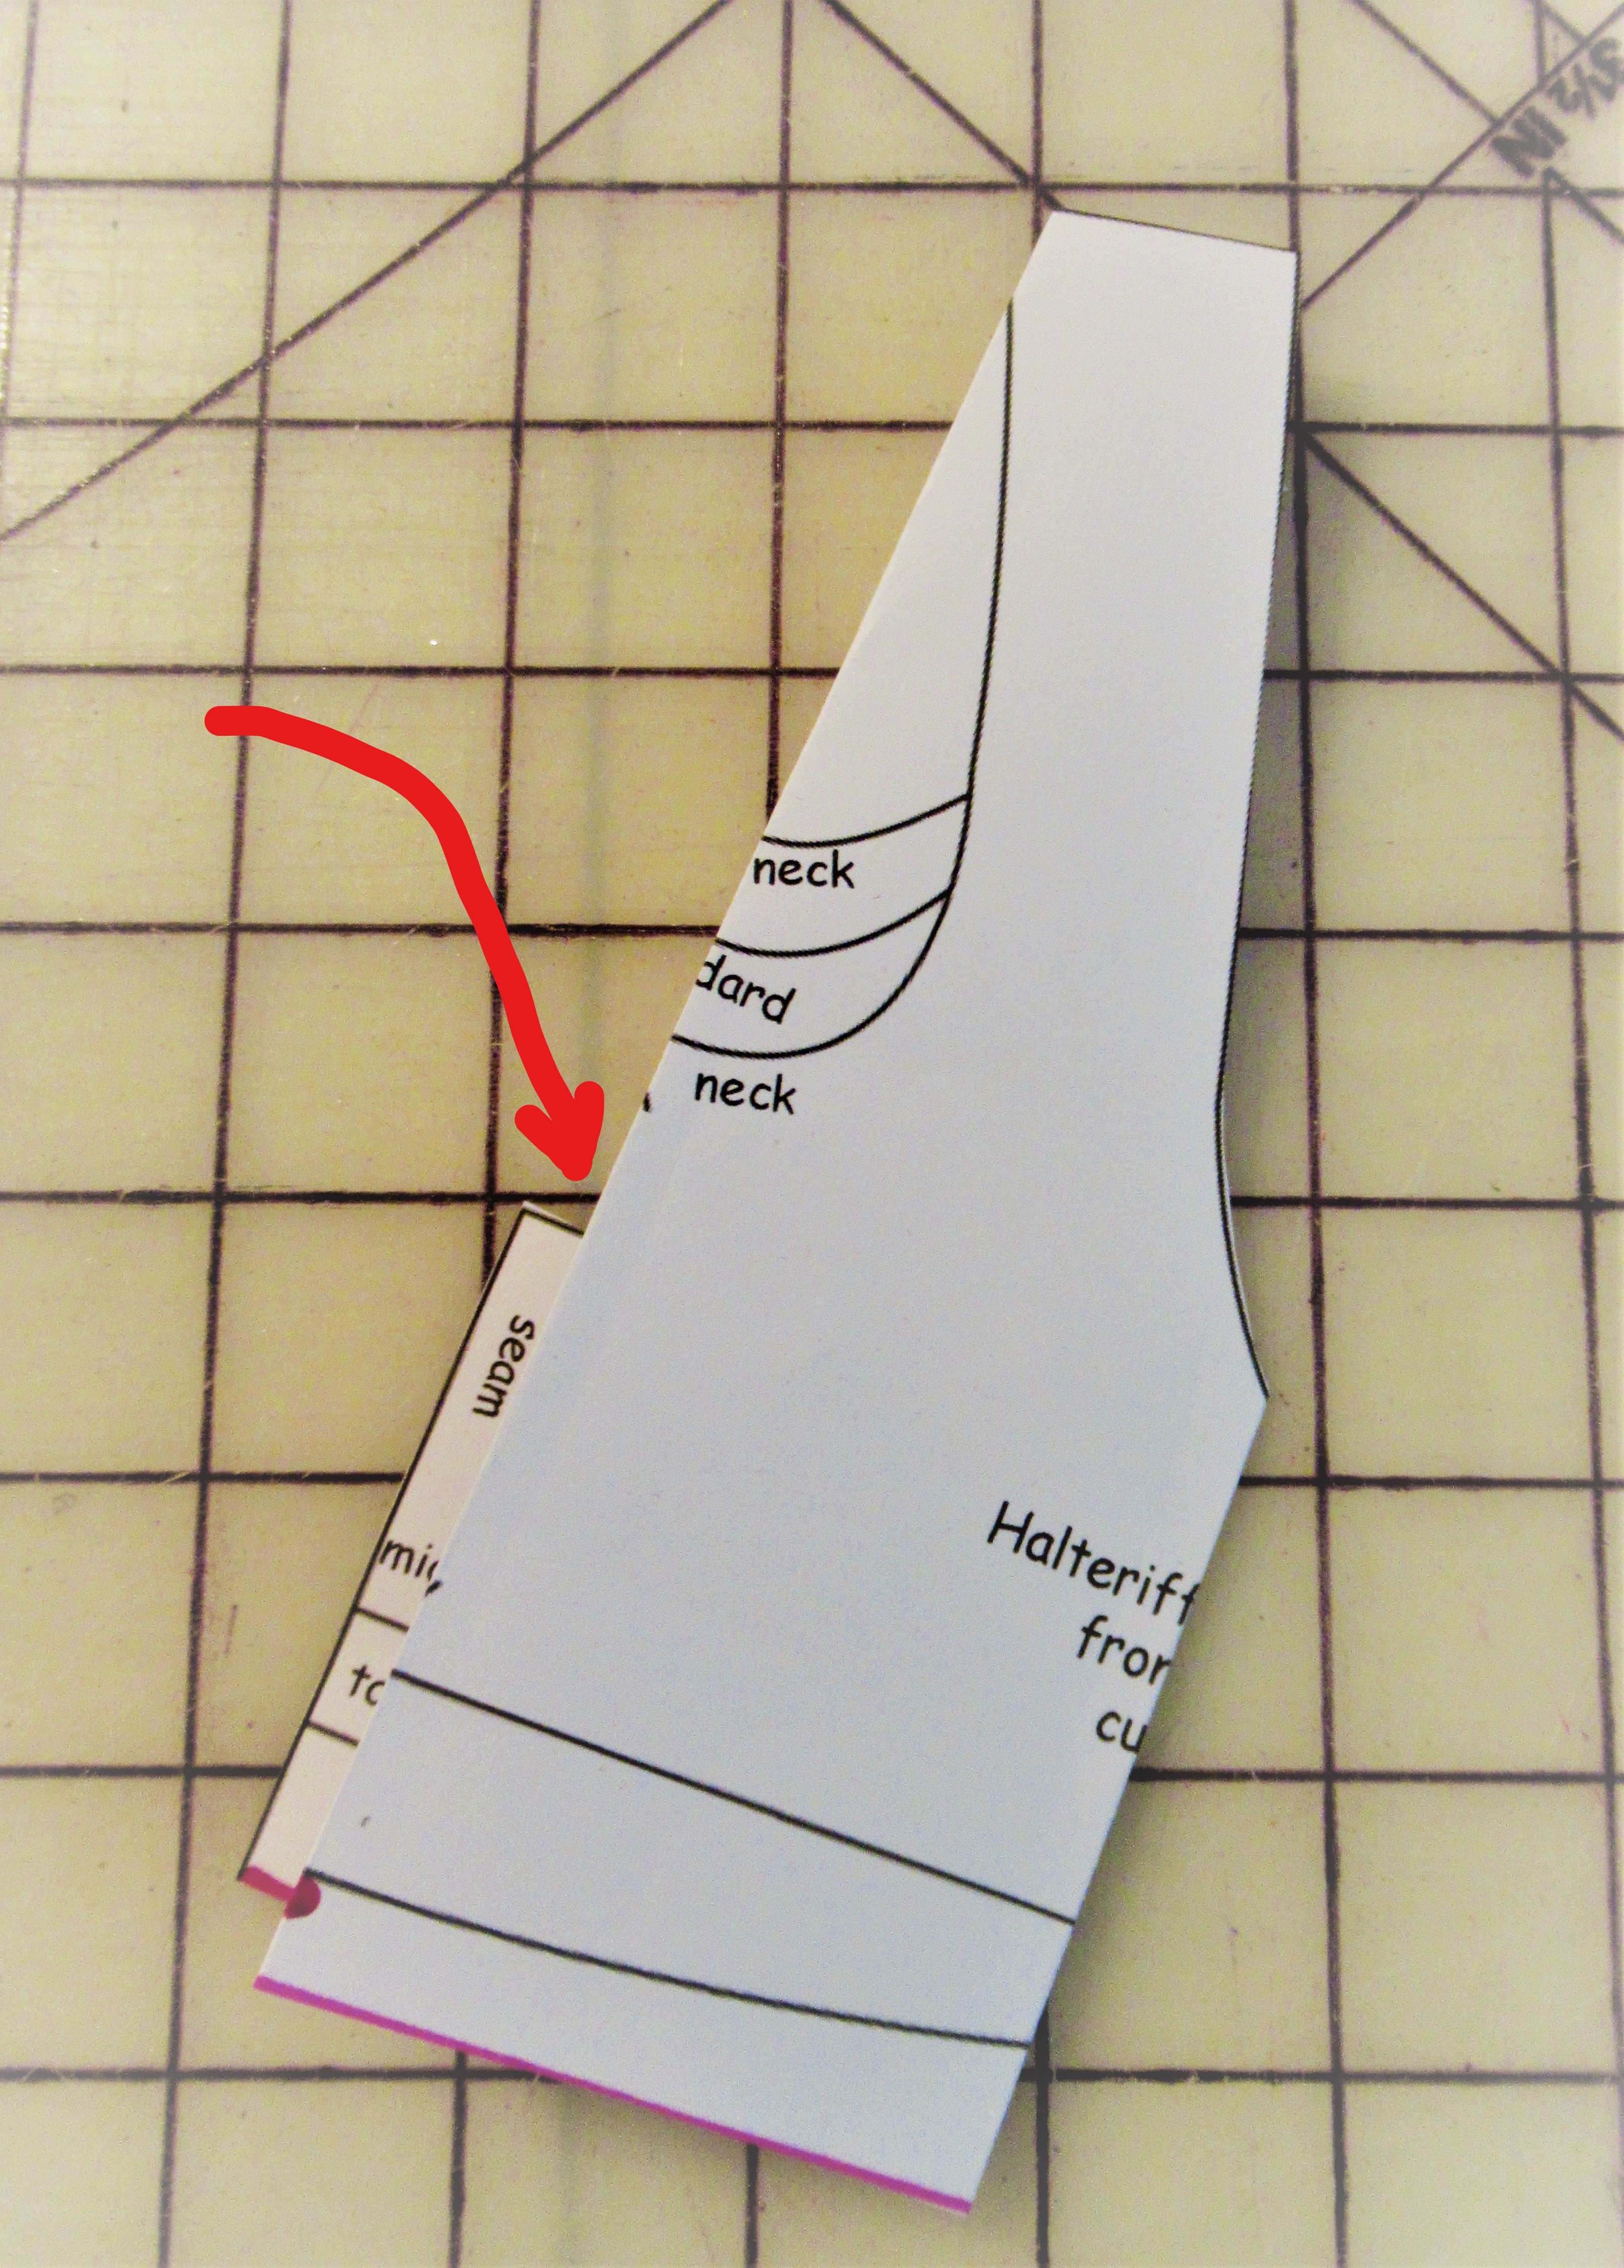
Here’s that pattern piece, and you’ll note that I’ve added pink dots to indicate ‘quarter’ marks along the lower edge of the tank/bodice. Let’s make that easier to do! See those fold lines? Begin by folding your tank pattern in half, right down that center front arrow. Crease that fold, and fold it again, so that the center front fold meets the seam allowance we’ll have down the center back, see the red arrow in the photo below. Make sense? It will look like this:
The bodice pattern is all done! NOTE: I would strongly suggest that you label this ‘new’ pattern piece as ‘bodice for halter dress’ or some such, so you don’t get this confused with another style!
Let’s move on to the skirt and panty from the Candy Shoppe pattern.
Cut the paper pattern for the panty, as usual. Choose the hem, or ‘no hem’ finish, as you prefer, following original pattern instructions. NOTE: Remember to ‘snip-mark’ the center front and the dot, which indicates the side locations, where a seam would often reside.
Cut the paper pattern for the skirt, next. Choose the longest length for the circle skirt. (We will NOT be using the waistband.) Remember to snip-mark the center front, center back and side locations, as well. This divides the skirt into quarters, hence we call this ‘quarter marking’.
A NOTE ON THE SKIRT LENGTH: It’s easy to add length to the skirt by enlarging the size of the circle. Even 1/2″ makes a difference with an 18″ doll. Beginning with your clean photocopy, make a serious of dots or dashes 1/2″ beyond the standard (longest) length on the pattern. You may need to tape a scrap of paper at either end to complete a smooth circle. Remember, adding length is optional, the sample photos were made using the standard length of the pattern.
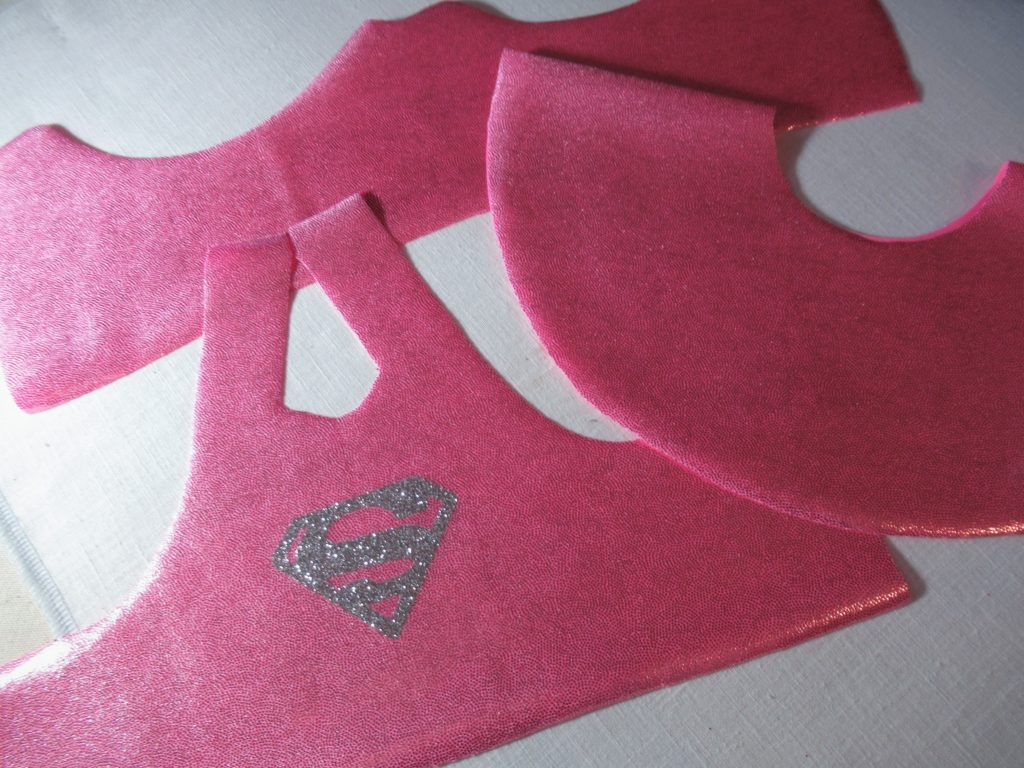
At this point, you will cut out your fabrics! Start with the tank top, hereafter referred to only as the bodice. Check out one of my favorite products, the use of pattern paper spray, or temporary basting spray. This happens to be 202 by Odif, but you’ll find a variety of brands. I buy whatever I can find, or that which is less expensive. (note here, this is not cheap stuff but it lasts a long time and the benefits are worth it!) Spritz the back of the bodice paper pattern and lightly adhere it to the wrong side of your fabric.
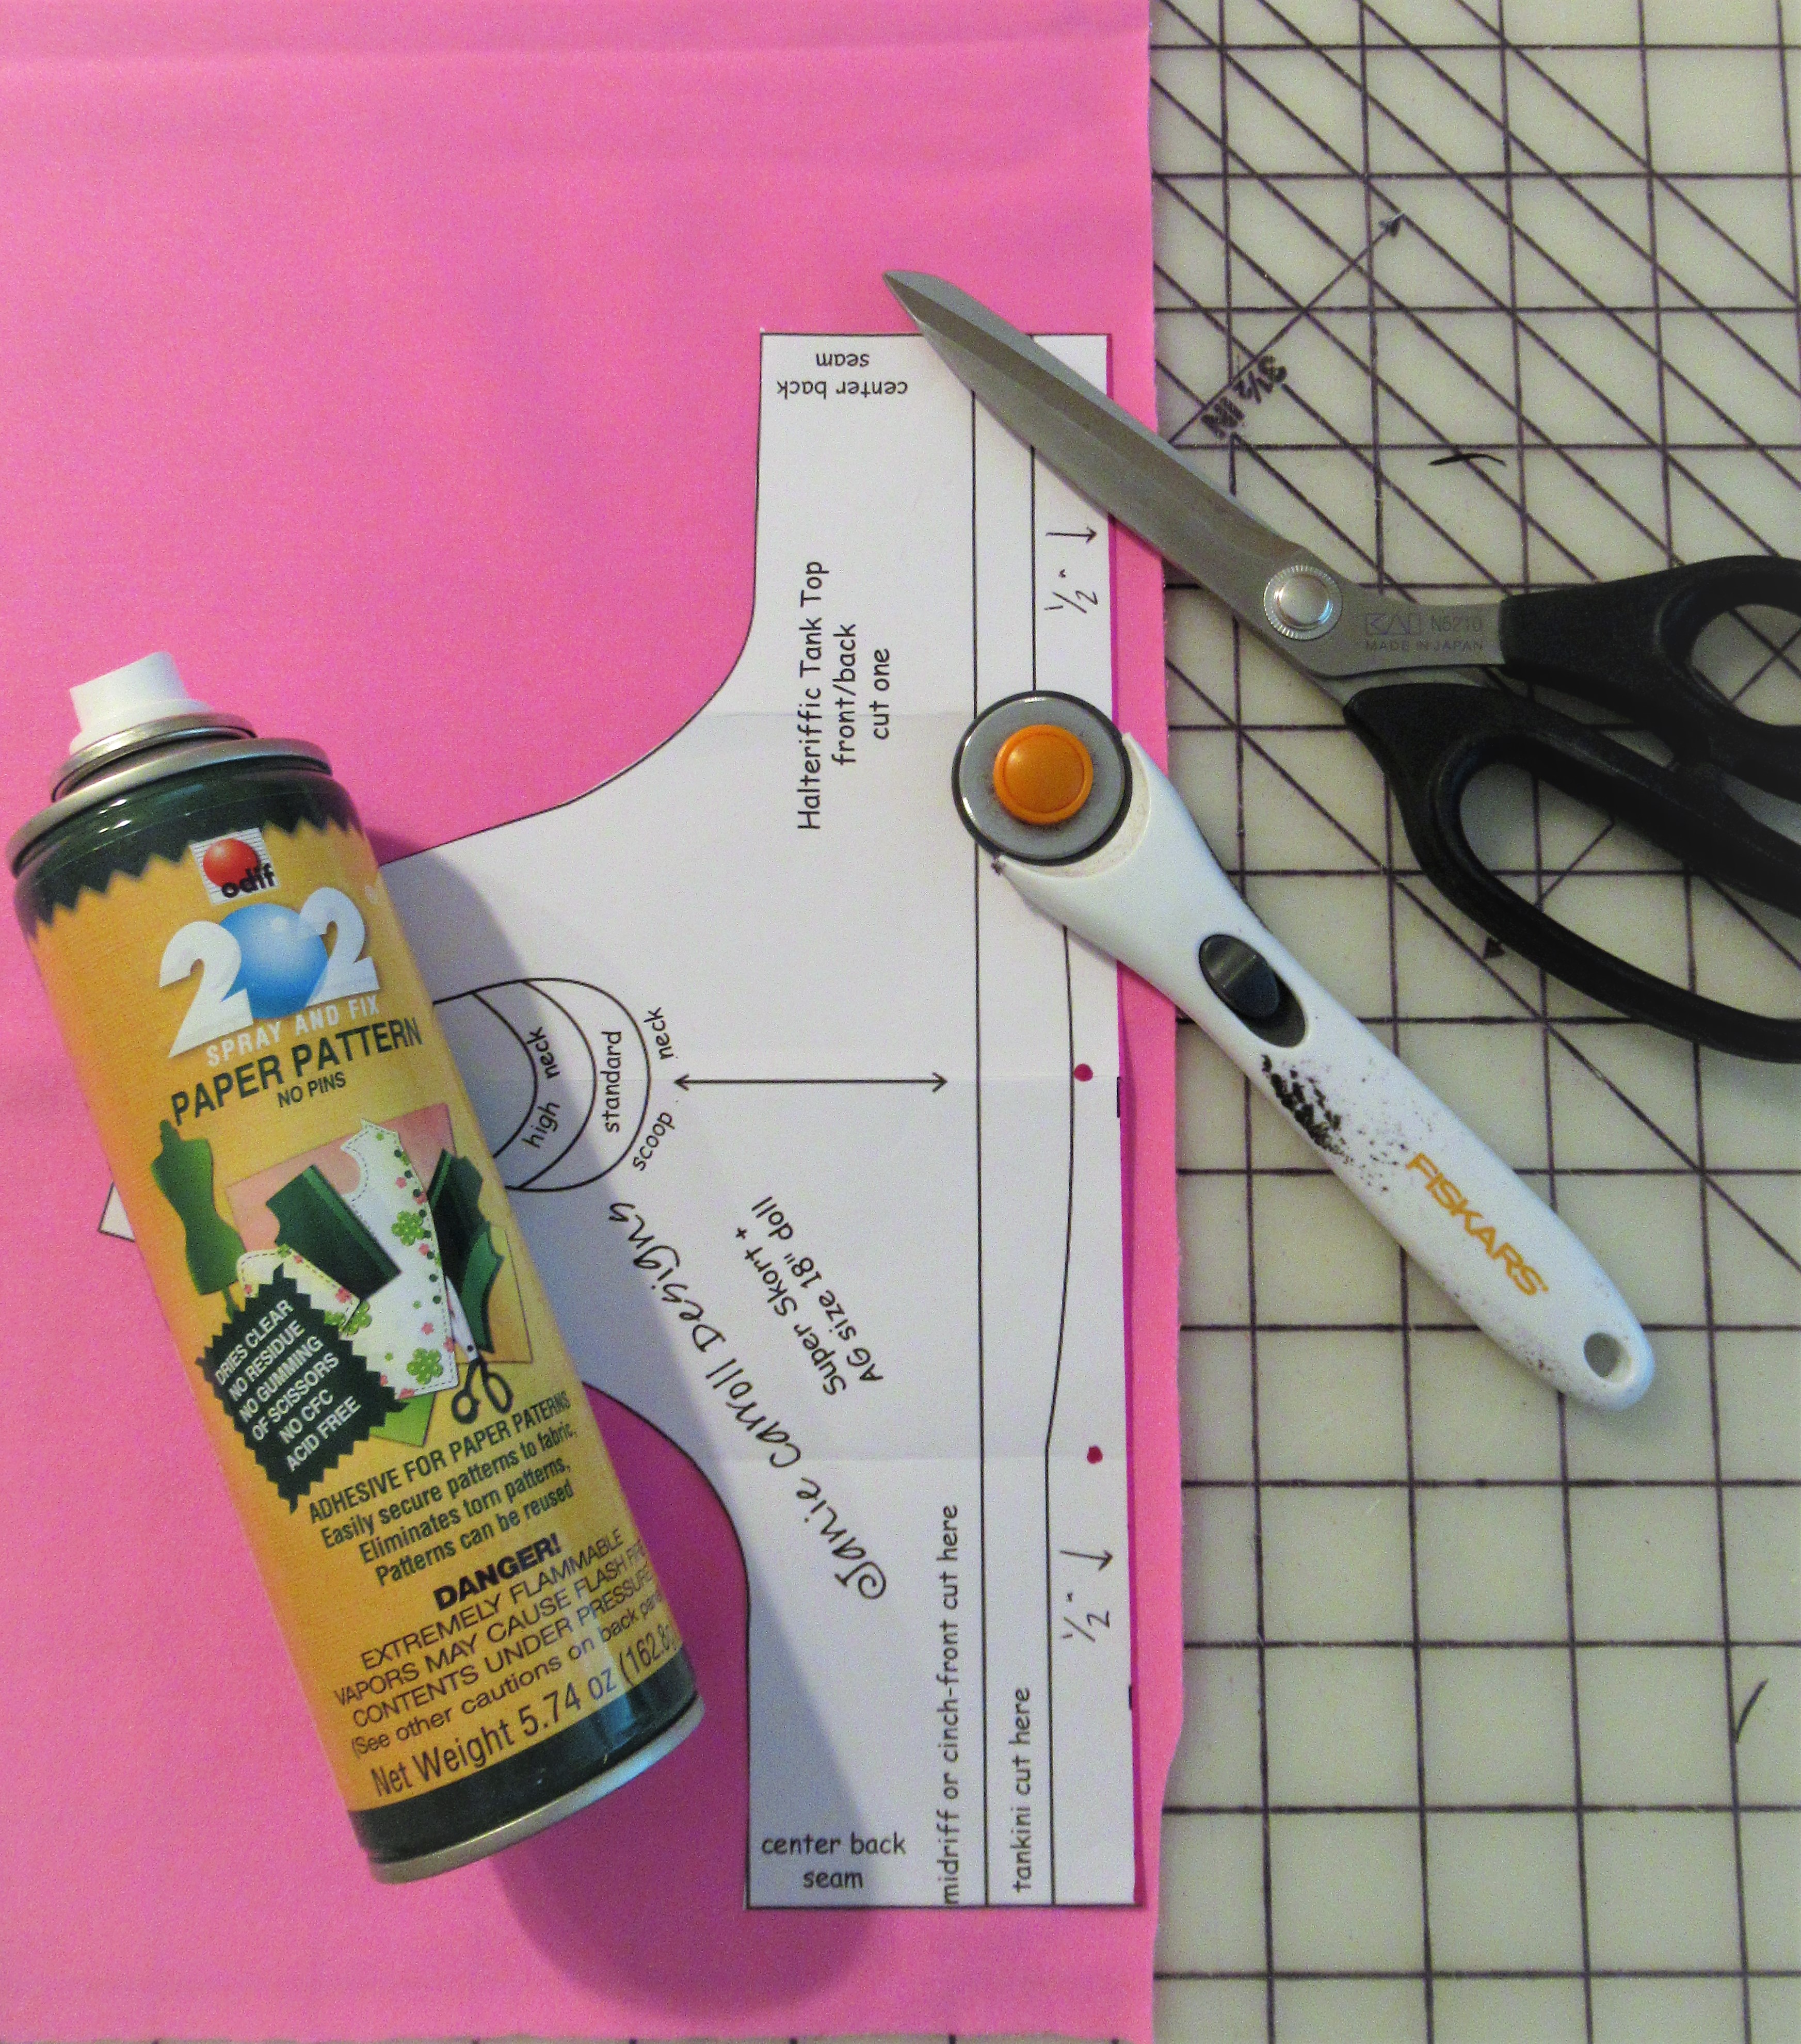
I like to use my 28mm (approx. 1″) rotary cutter to cut the outer edges of pieces like this, but I advise switching to your shears to cut the inner neckline curve. Because I used the temporary spray, no pins were needed, and the fabric is perfectly smooth and flat. Better still? I can cut this tricky inner curve with complete precision, easy as pie. The temporary adhesive spray gives the fabric body and keeps things in place, no shifting or wiggling while you cut!
All cut, ready to begin construction! NOTE: If you’re adding heat transfer vinyl, embroidery, or some other basically flat design to the front of your bodice, now is the best time to do that!
Next, hem the lower legs of the panty section OR trim those edges with scallop edge or pinking shears, if you selected the ‘no-hem’ cut-line; just as the original pattern advises.
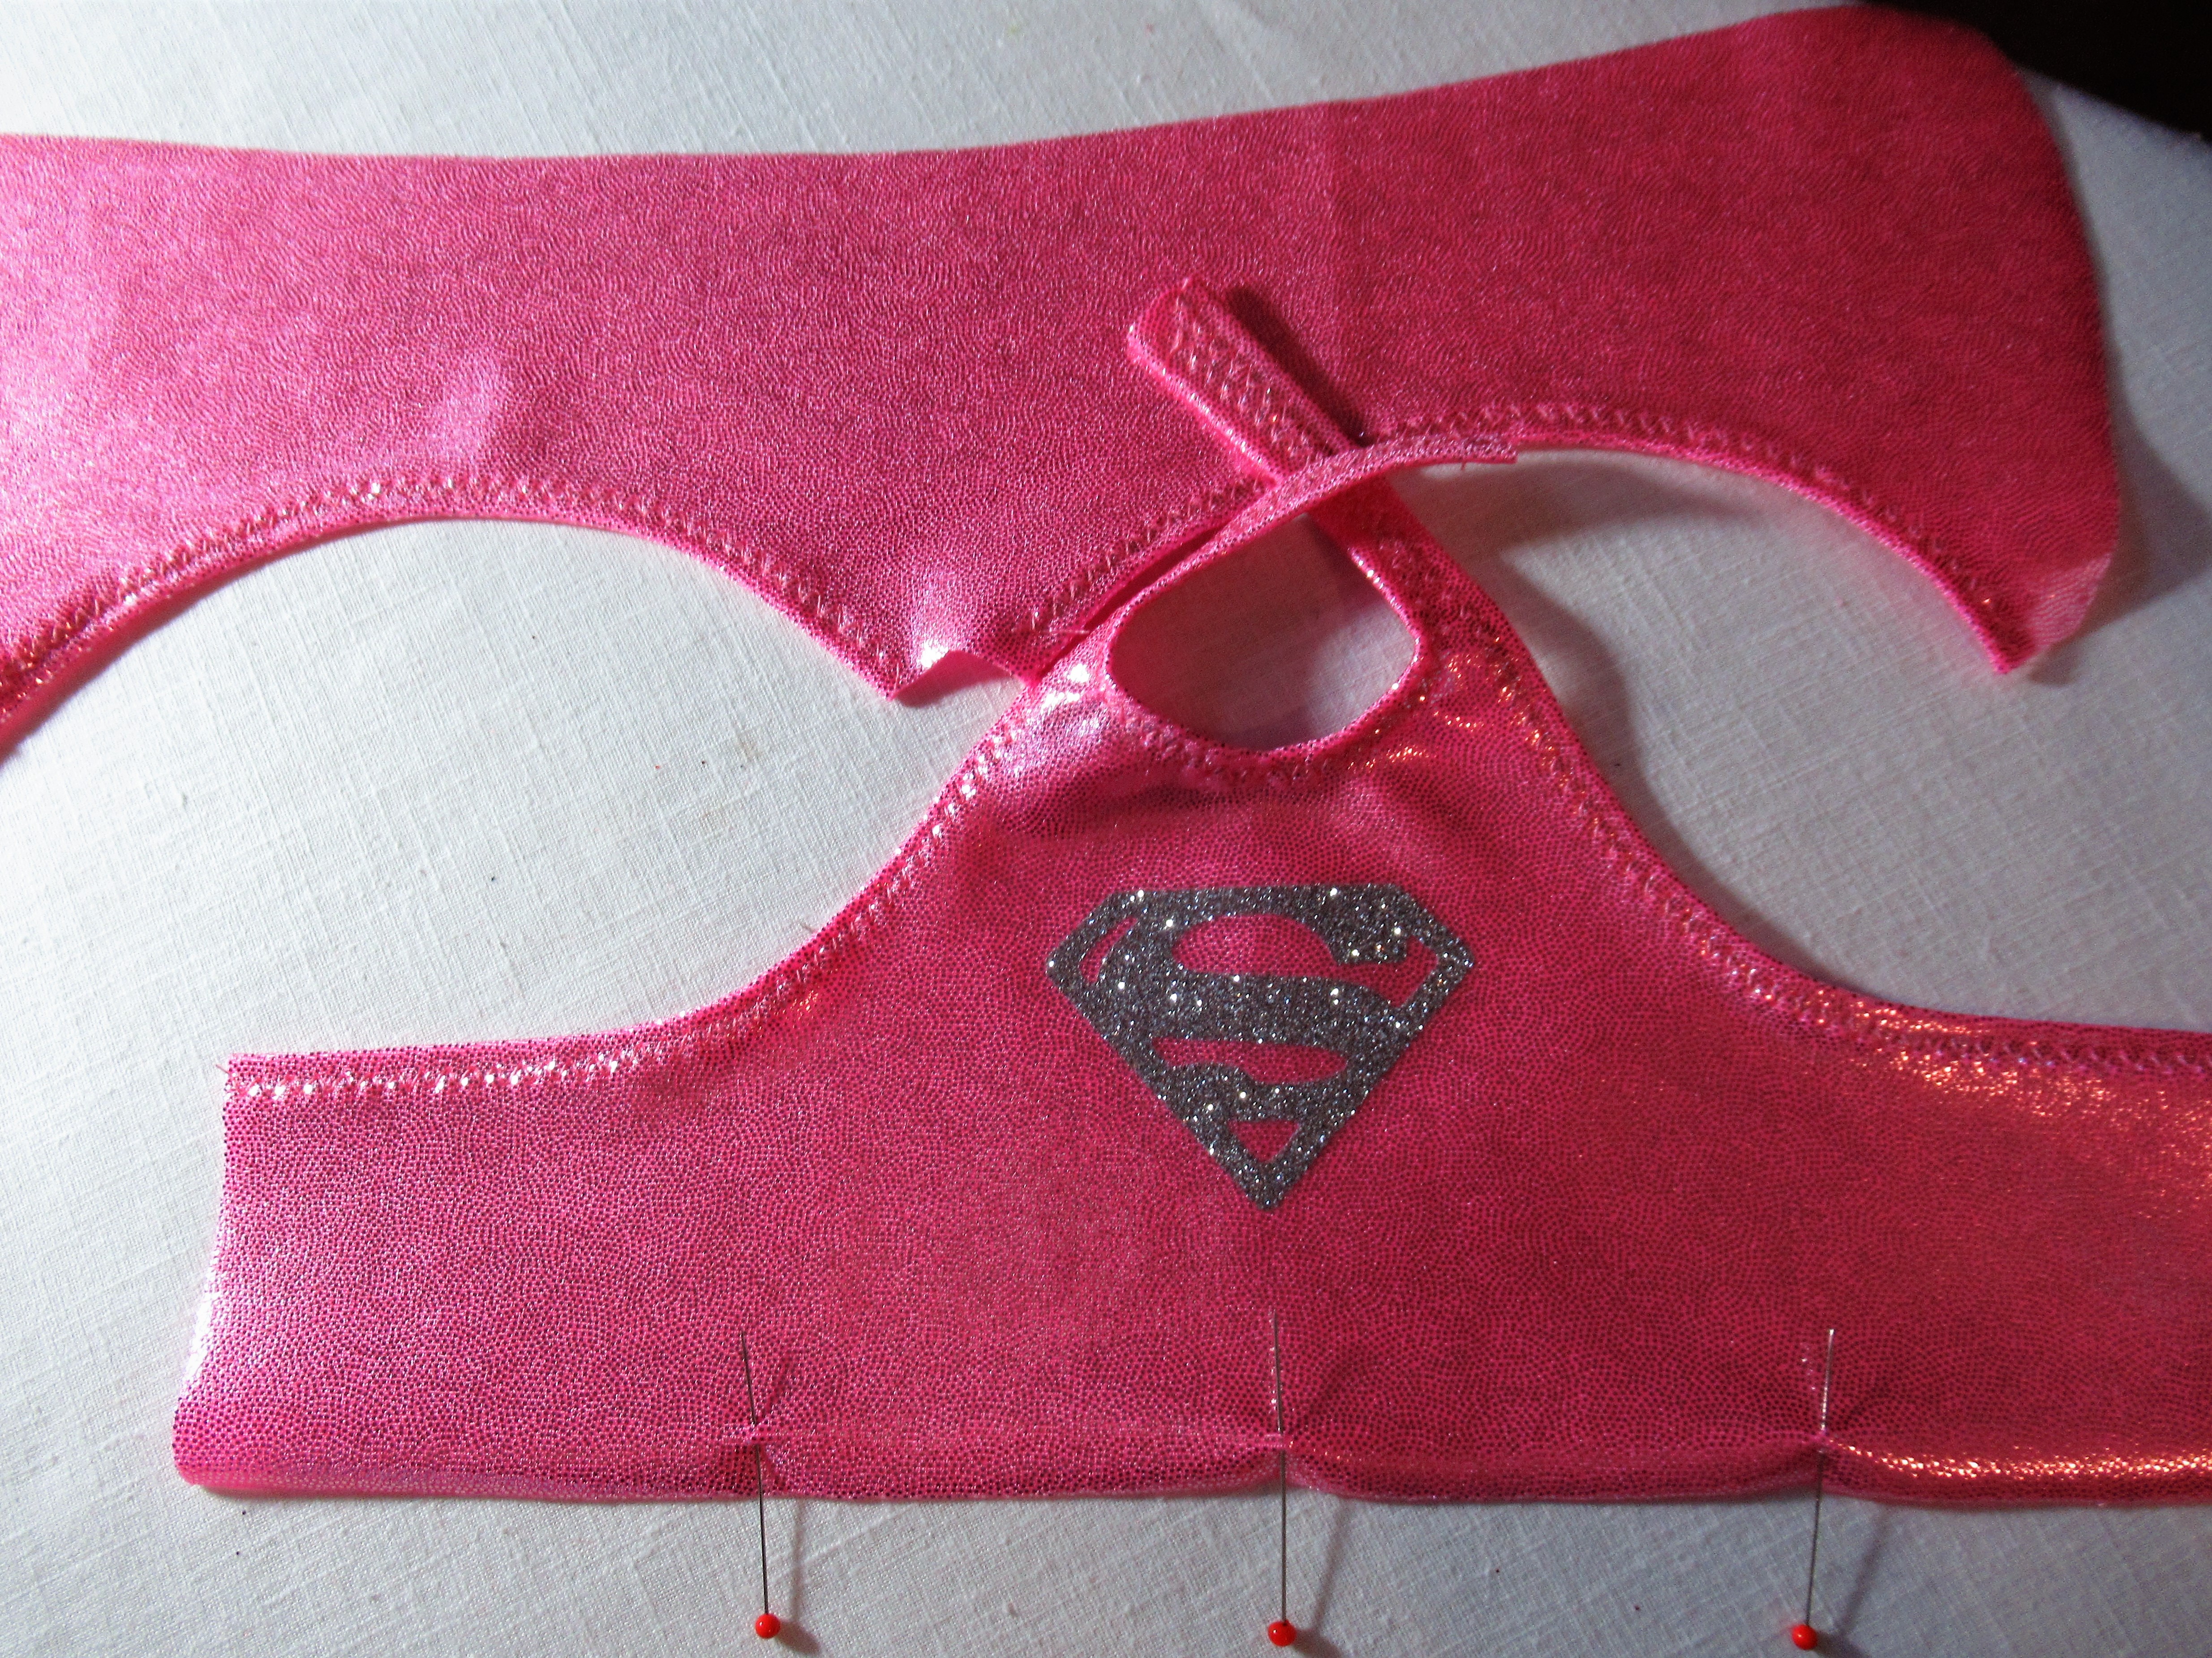
Additinally, hem the upper edges of the bodice now, including the neckline curve, per original pattern instructions. Note that I’ve added pins to denote the quarter marks along the lower edge of the bodice.
Time to do some stitching. Don’t blink – we’ll be done before you know it!
Right sides together, stitch the center back seam of the bodice, and the center back seam of the panty. Finger press these seams open and place pins to hold them open. Time to place pins to further denote the quarter marks of the waistline of the skirt section, and the upper edge of the panty.
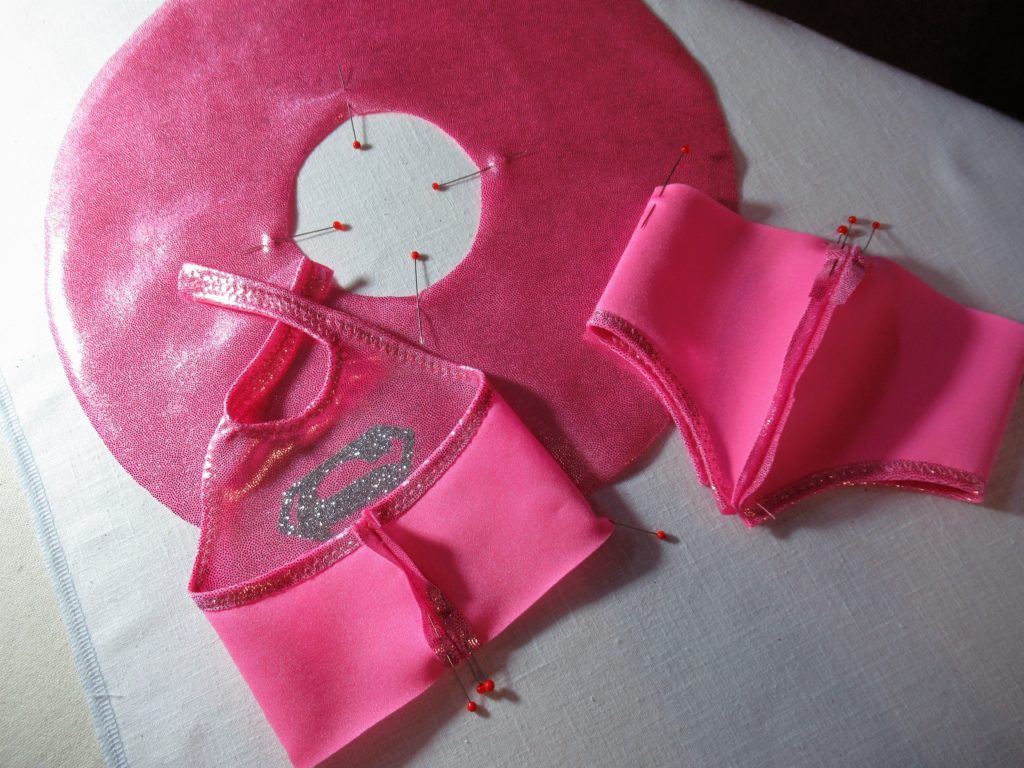
We are ready to put it all together. Turn the bodice section right side out and pin the skirt around the lower bodice edge, right sides together. Place pins at the quarter mark locations first, with additional pins added between these points. I find that 2 pins between each quarter mark are sufficient. Take extra care that the raw edges are perfectly aligned!
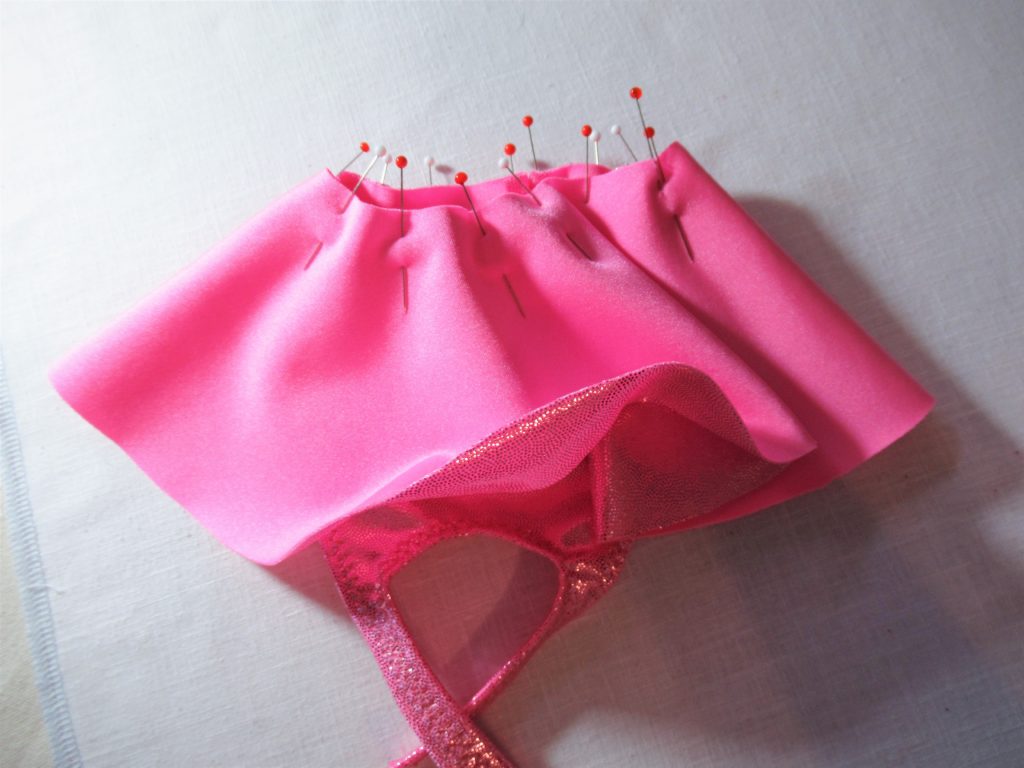
Stitch the seam with a narrow zigzag stitch, as this ‘builds in’ a bit of stretch factor. Working from inside the garment makes this stitching easier!

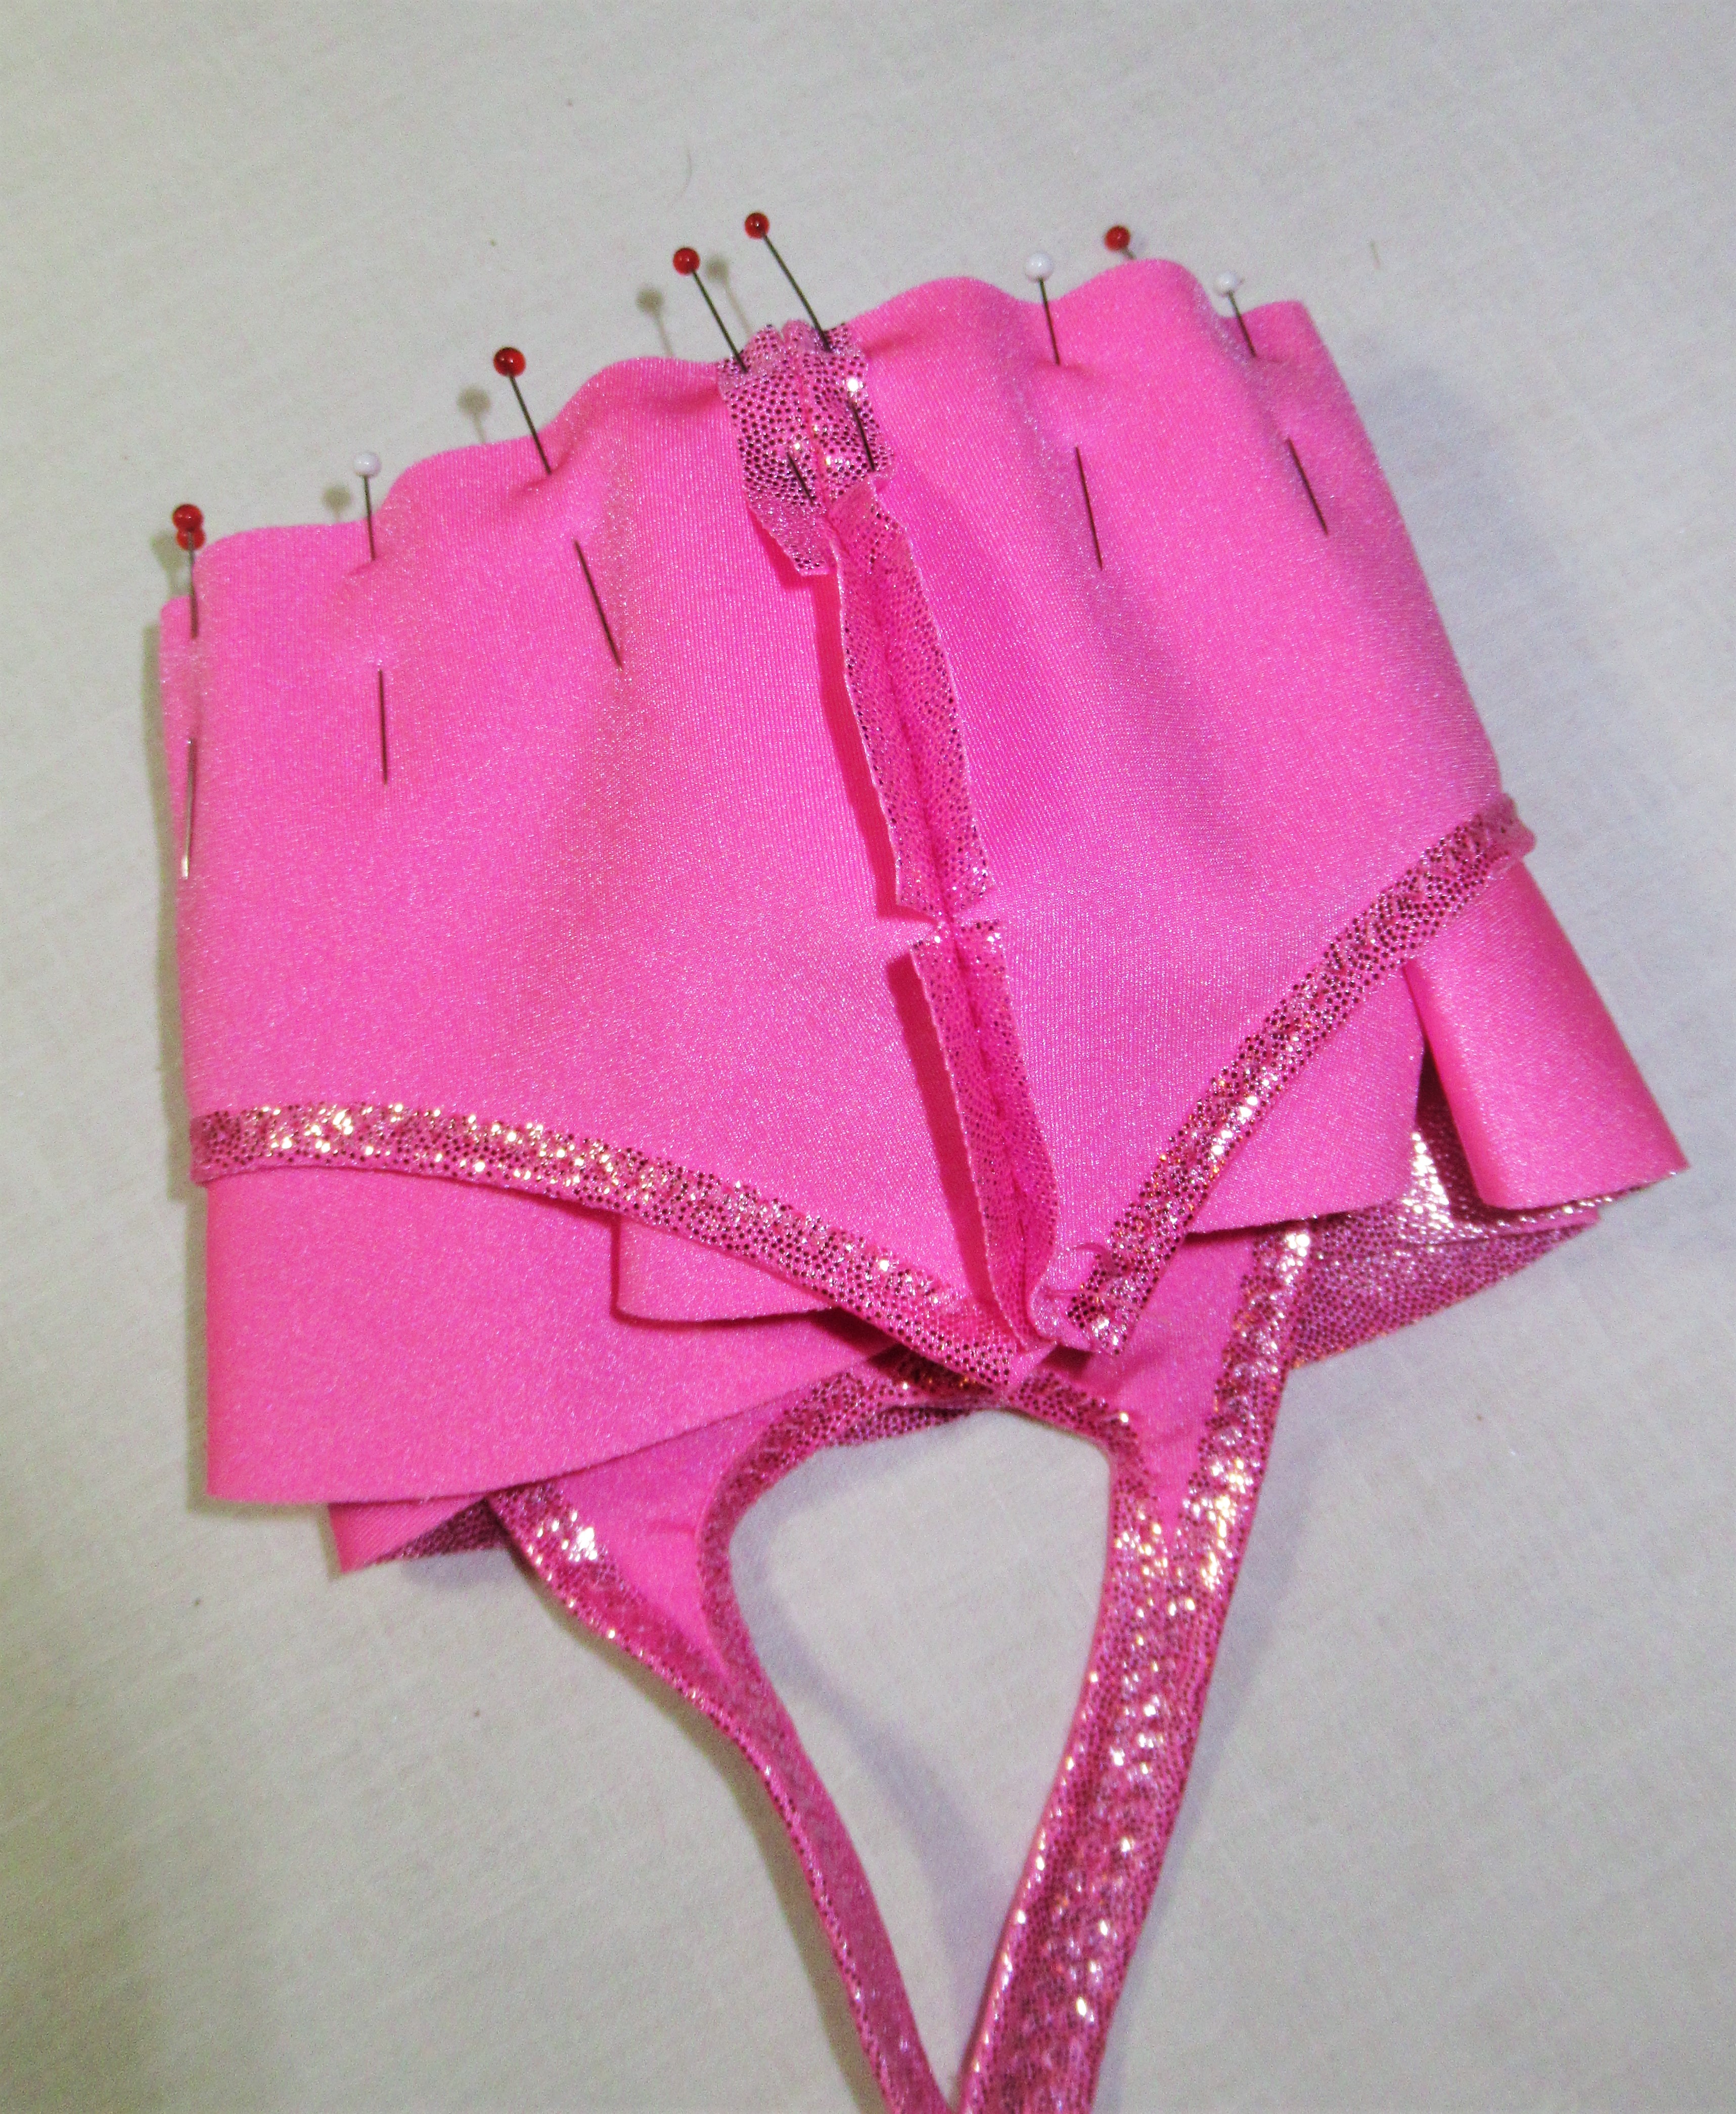
Next, place the right side of the panty against the wrong side of the skirt, as shown in the photo below. (Doesn’t this photo look crazy? SO difficult to get some construction steps beautifully photographed!) I will admit that I pin all 3 layers in place before stitching, but I’ve made hundreds of garments in a similar manner. I really do not advise this unless you are very familiar and comfortable with stitching slippery swim type fabrics.
In any case, it is imperative that you double check your placement of the panty. The center back panty seam must match the center back of the skirt and bodice! Pin, as you did previously, beginning with quarter marks and adding pins between these, as needed.
At the machine, stitch around the waistline again, from the inside of the garment. Don’t forget to remove those pins as you reach them!
Finally, stitch the crotch seam, right sides together, backstitching at each edge for added security. (Sorry, no photo for that step)
If possible, test fit the garment on your doll, and add a hook and loop tab, or hand-sewn snap to your neckline straps at the center back neck.
Don’t forget to label all the pattern pieces you used for this project. I like to store all the pieces for a re-design together, so that they’re easy to find when I decide to make another garment. I also make a quick sketch of what the garment looks like. Please don’t say you’re not an artist. My sketches are completely terrible – but I can still tell what the shape of the outfit was!
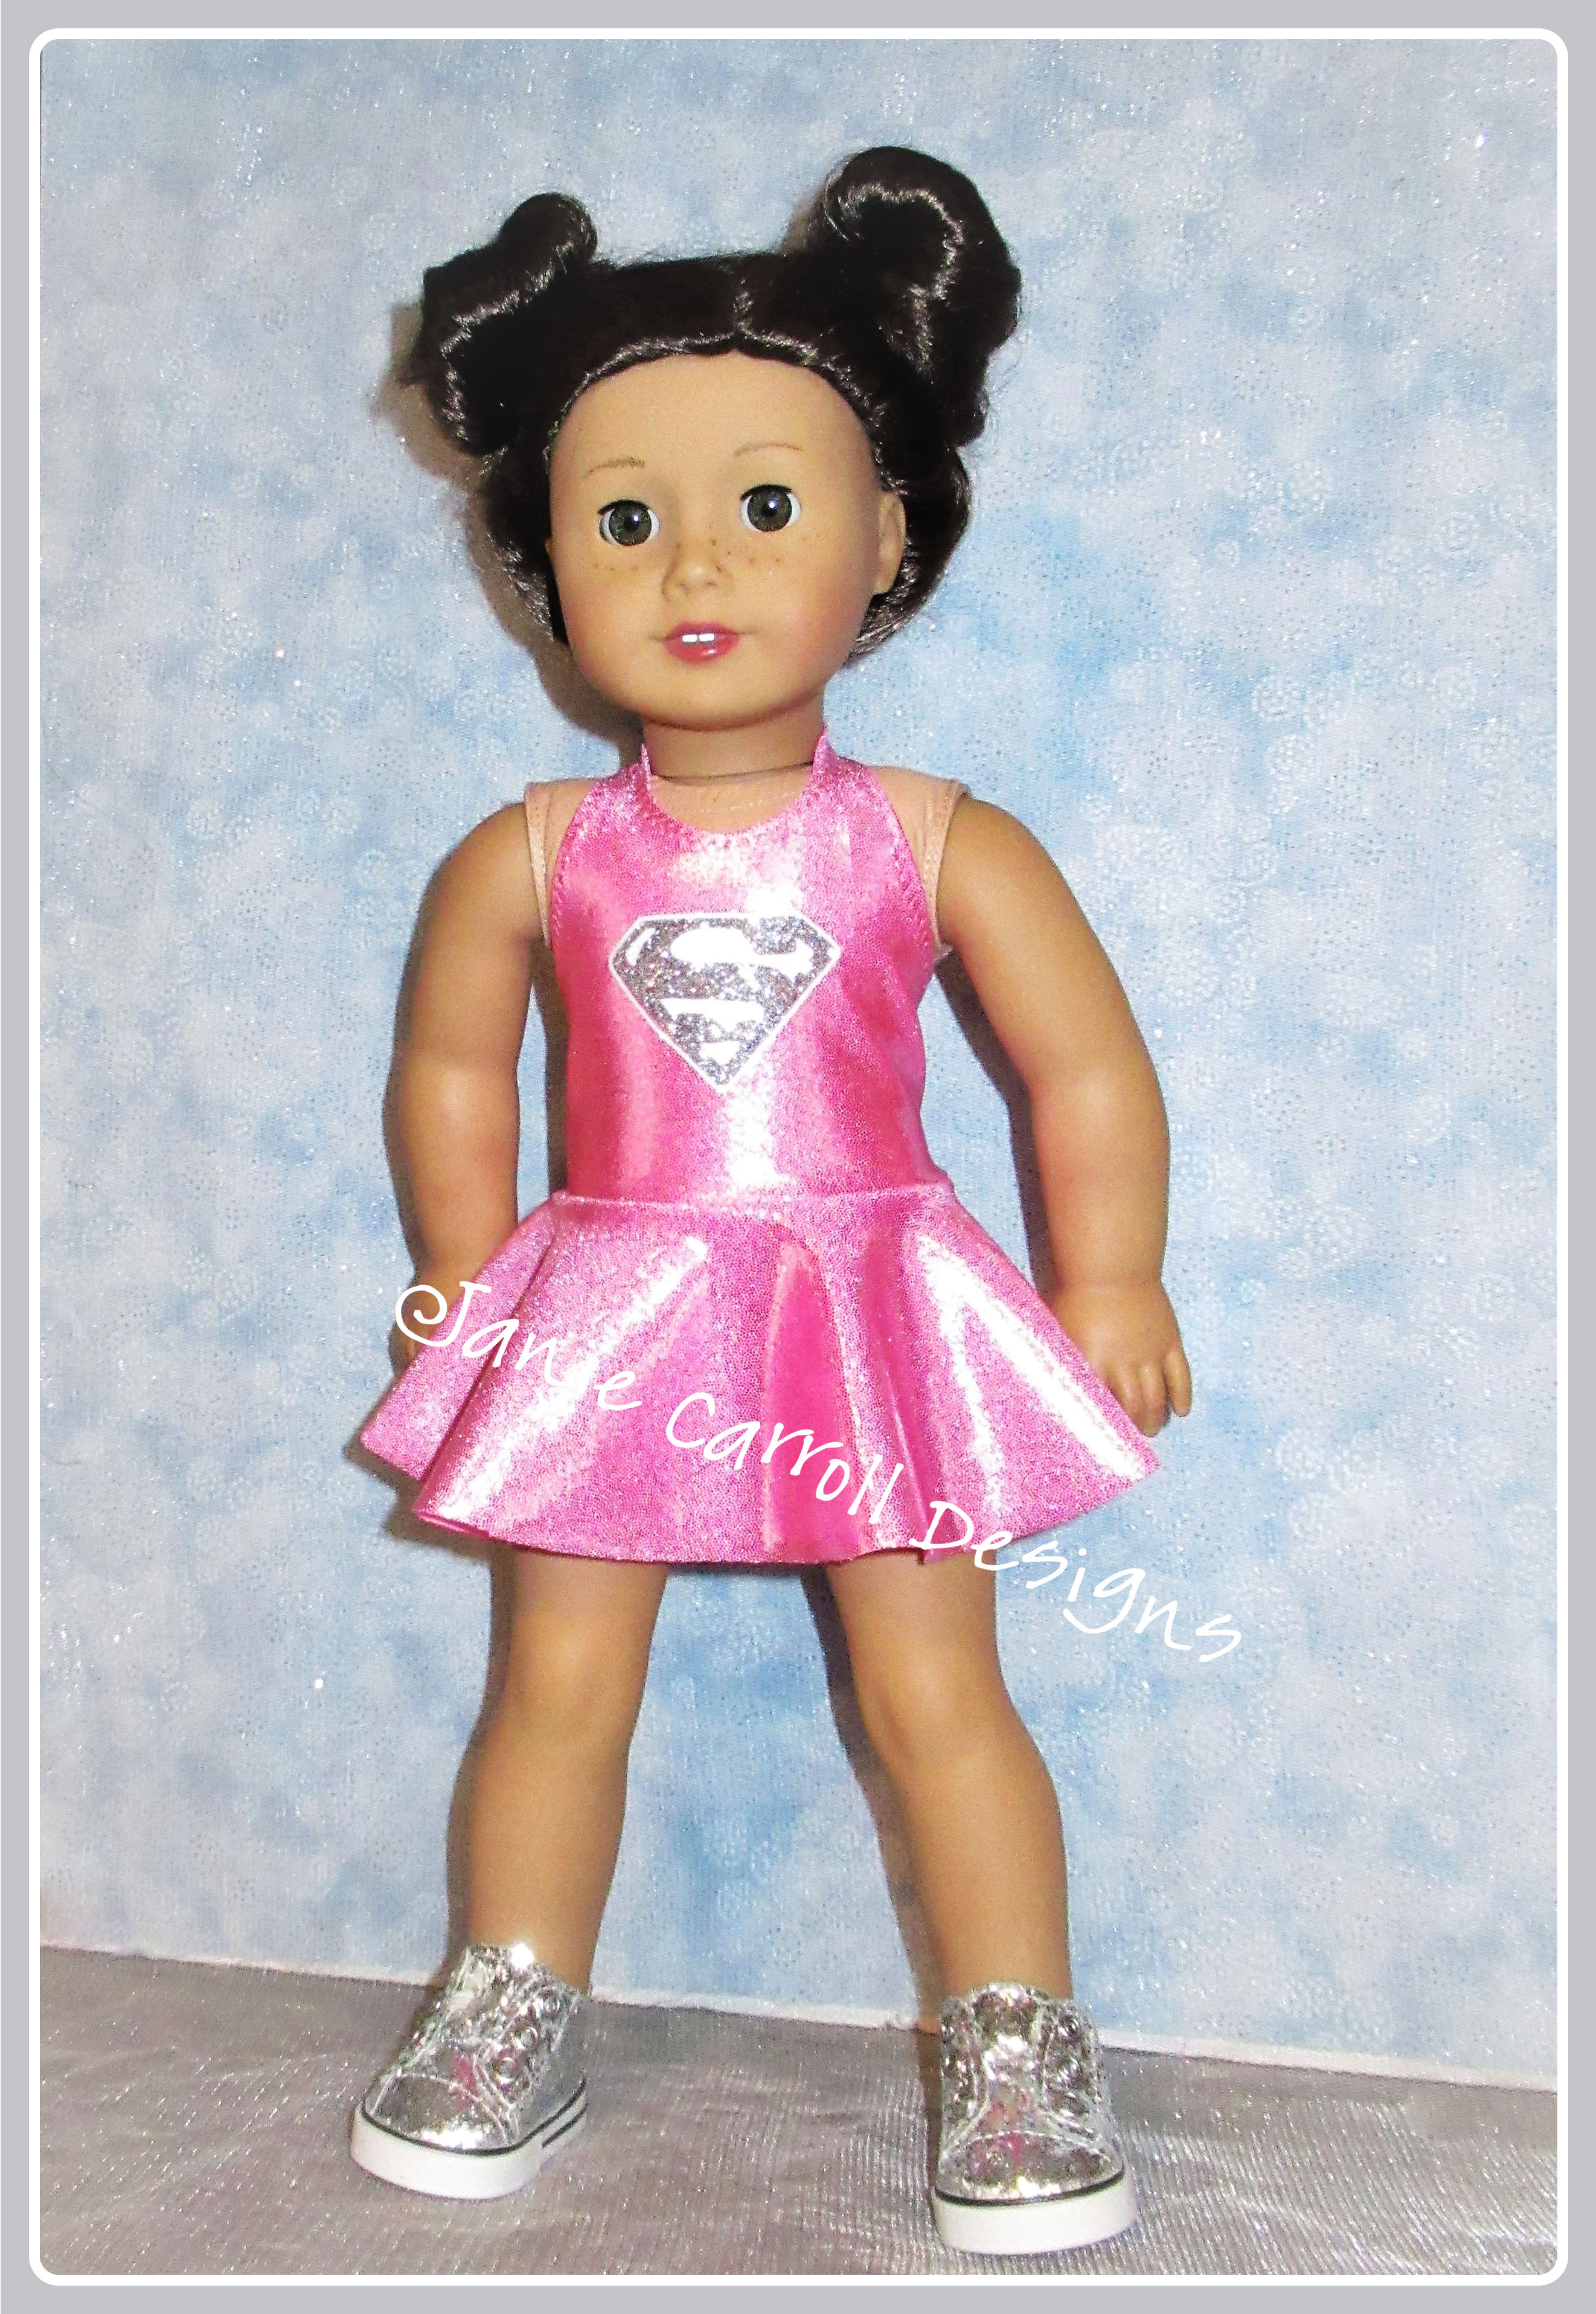
Here’s the final garment of our pink sample, how cute is this? (Remember that you cannot sell items with licensed logos, such as this one, unless you have paid a licensing fee. Make such garments only for your own personal use.)
Here’s another look at our ‘Santa Baby’ dress that started it all! Want to copy these trim details? The belting is a length of foldover elastic, which was pinned in place after the dress was completed. After determining a comfortable fit, I threaded the jeweled buckle (similar can be found on the buttons or notions aisle of fabric stores) onto the elastic; and seamed the elastic up the back. Centering the seam over the center back seam of the bodice, I topstitched in the well, or ‘ditch’ of the seam to secure. I added a few handstitches to secure the buckle to the elastic but there is no other attachment of the belt to the dress. The glimmery pompons were found amongst holiday crafting supplies and are hand-stitched to the bodice. The hair bow was made, using the ‘Big Bow’ template that is included with the Candy Shoppe pattern. The Santa printed grosgrain ribbon was purchased at Hobby Lobby, in 2020. Shoes are purchased, if you need a similar pair please contact me about purchasing a pair.
I hope you’ll have fun with this re-design. How about making a halter dress with the handkerchief hemline? Ooh, that does sound elegant!
Always remember to leave comments, follow my blog, or ask any question you have! I am happy to help you!
Great tutorial, Jane! I can’t wait to pick up some Mystique next time I go home so I can make one or two of these darling outfits.
Oh, I know you’ll make some cute dresses!
Although I don’t see for the type dolls you do I’m always excited to see your creations. I love the halter dress. Thank you for sharing with me Jane.
Thank you, MaryBeth! I always appreciate your support!