
Custom requests give me all the feels!
Fear and trepidation, inspiration, creative impulse, more
fear(!)…determination, and finally, if I’m lucky – exhilaration!
That exhilaration pushes me forward to accept new custom orders.
A recent project was a great example.
A prospective client reached out with a request for a Jack Frost costume.
She sent me this photo, which is an artist’s rendering and NOT my photo.
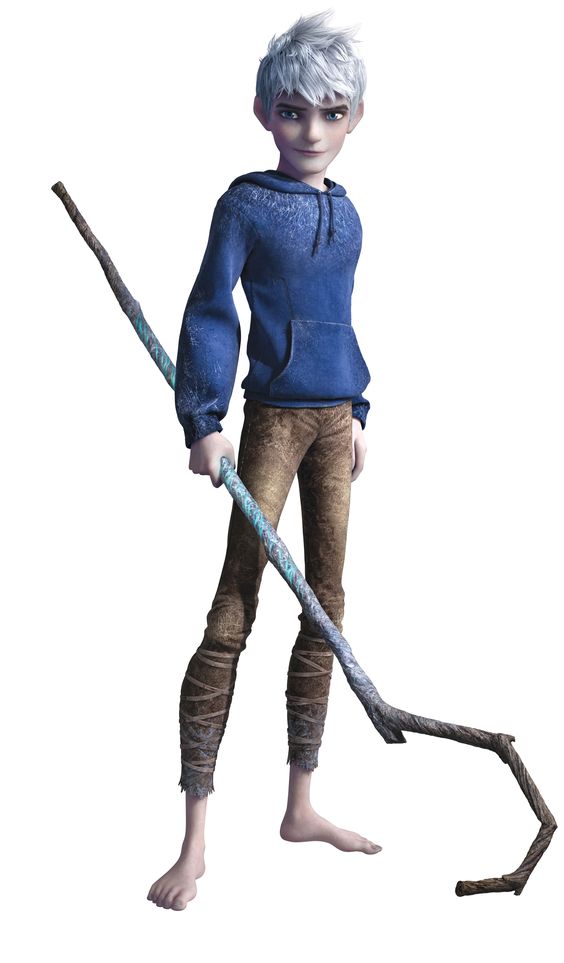
The hoodie and the jeggings look simple enough.
The staff might be a different matter.
It needed to be sturdy, not too fragile.
It needed to look natural, even rustic with a ‘frosty’ appearance.
Possible materials were varied, as this was for an adult collector.
I appealed to my doll page groups for advice.
They had many good possible solutions.
Everything from dowel rods to PVC piping.
For surfacing, clay was suggested, as well as glitter glue
and a variety of other ideas.
Some were not feasible for cost or time considerations.
I am running a business, albeit a small one. I do like to make a small profit!
After discussing this with my handy husband, Tom,
we settled on 1/2″ PVC piping as an interior structure.
This was just a tad bulky but nothing slimmer presented itself.
The original plan was to use purchased joints and end caps
to make the angles of the crook.
There was a small detour to crankiness (his!) when I made the mistake
of asking Tom if he was sure he could do this for me?
Evidently, I should have assumed he’d know exactly what he was doing.
Turns out he did!
We didn’t even have to use the joints.
He got out his tools; a heat gun to ‘bend’ the pvc,
along with some special nippers that neatly cut PVC easily.
This is the point at which I began to take pictures.
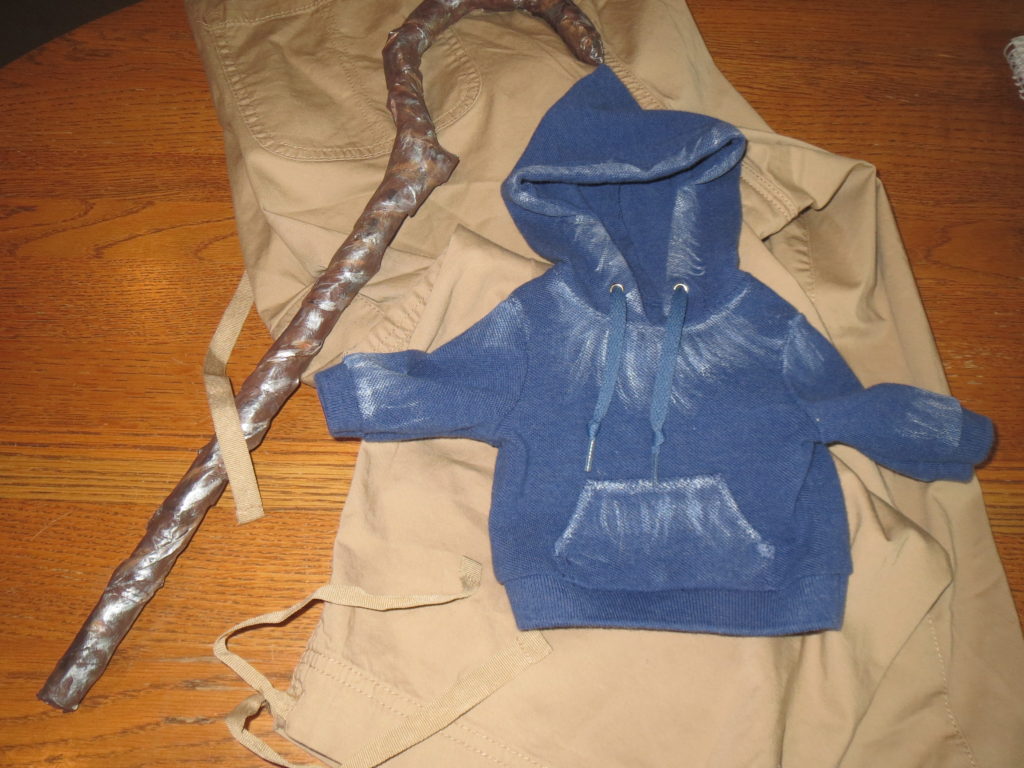
Here is the pvc, bent to correct angles and cut to an overall length about 20″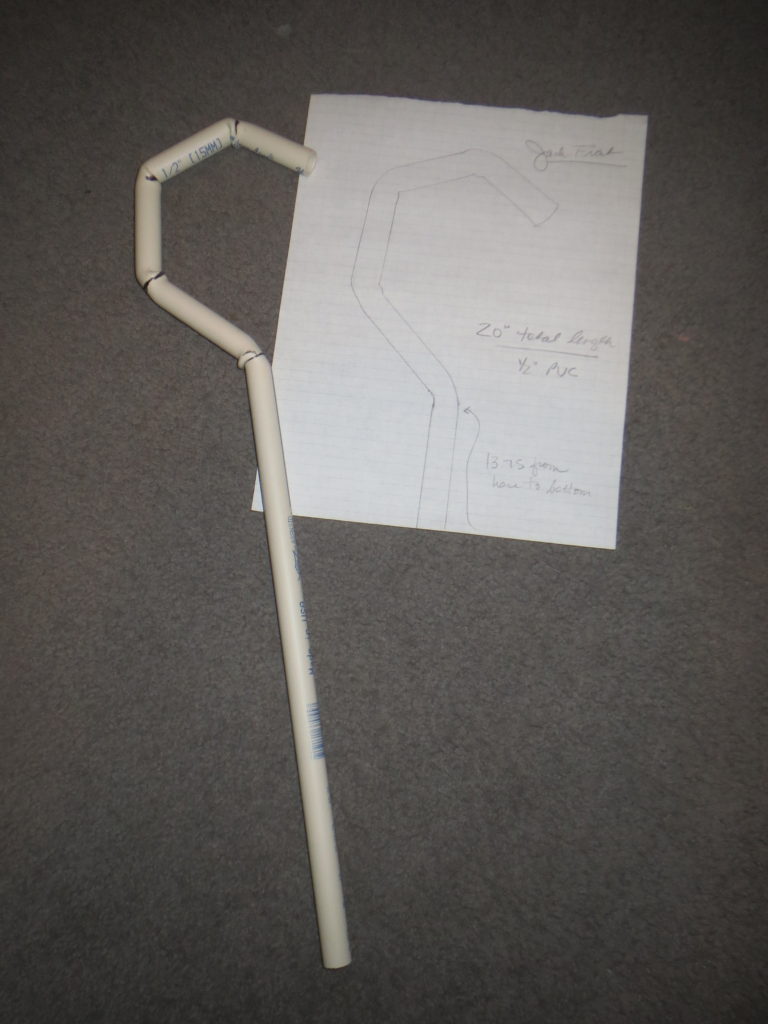
At this point I was pretty elated!
I had imagined this to take far longer than the few minutes he spent on it!
Especially good news as we’d already spent too much time debating
and running to the hardware store!
note here: using the purchased joints would have been fine, so don’t be
put off if you do not have a heat gun!
You can see I’ve traced the finished shape and added a few notes
on the paper. I have learned to keep good notes
on all of my projects, as I am often asked
to make a copy for another customer.
Best not to have to ‘reinvent the wheel’ every time!
Next up? How to cover this to make it look ‘natural’.
Paper mache in its simplest form seemed like a good solution.
I gathered some plain white gift tissue and a stack of newspapers.
I mixed a 1/2 cup of flour with 1 cup of water for thin, homemade glue.
To add some ‘lumpy’ texture, I crinkled and twisted a sheet
of the white tissue paper into a ‘rope’ shape
and loosley wrapped and taped this around the length of the staff.
I tore the newspaper into strips that were about an inch wide.
I prepped a work surface with an old cardboard cutting board
topped with several sheets of newspaper.
I pulled the strips of newspaper through the glue,
one at a time,
smoothing and winding them around the staff.
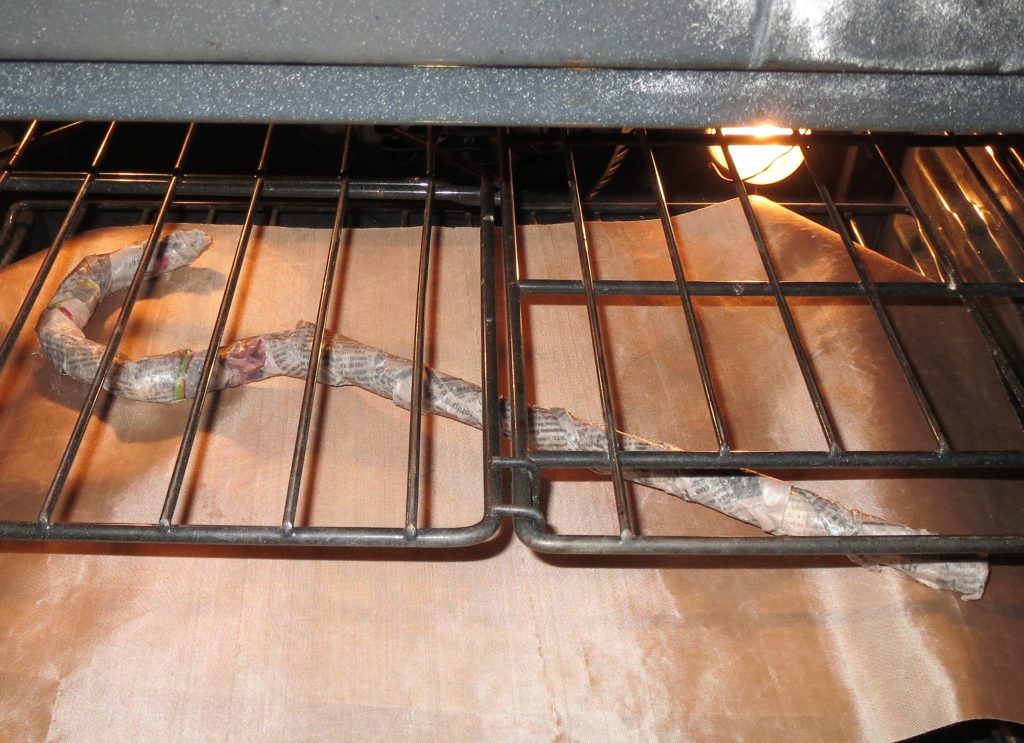
Here you can see this process underway.

This is the messiest part of the project,
so plan to let someone else answer the phone in the midst of this!
I tried to remember that this was to look more like a branch,
so the point was NOT to make it smooth and neat but
rather, imperfect and natural.
Once it was wrapped I set my oven on 200 degrees,
and topped a cookie sheet with a teflon pressing/crafting sheet.
This was to prevent the staff from sticking to the cookie sheet.
You could easily use a sheet of baking parchment paper instead.
Placing the staff on the teflon, I popped it into the oven.
This worked like a charm! It dried nicely while we watched some TV.
With paper mache, particularly made with flour,
it is imperative that the entire project dry out thoroughly!
Using your oven on low heat speeds this process along and
insures that the entire thing will be dry.
Just to be on the safe side, I did not paint my staff
until the following day.
I simply used brown, black and silvery-white acrylic craft paints
to make the staff look more like a branch,
and (hopefully) less like a PVC pipe covered in newsprint!
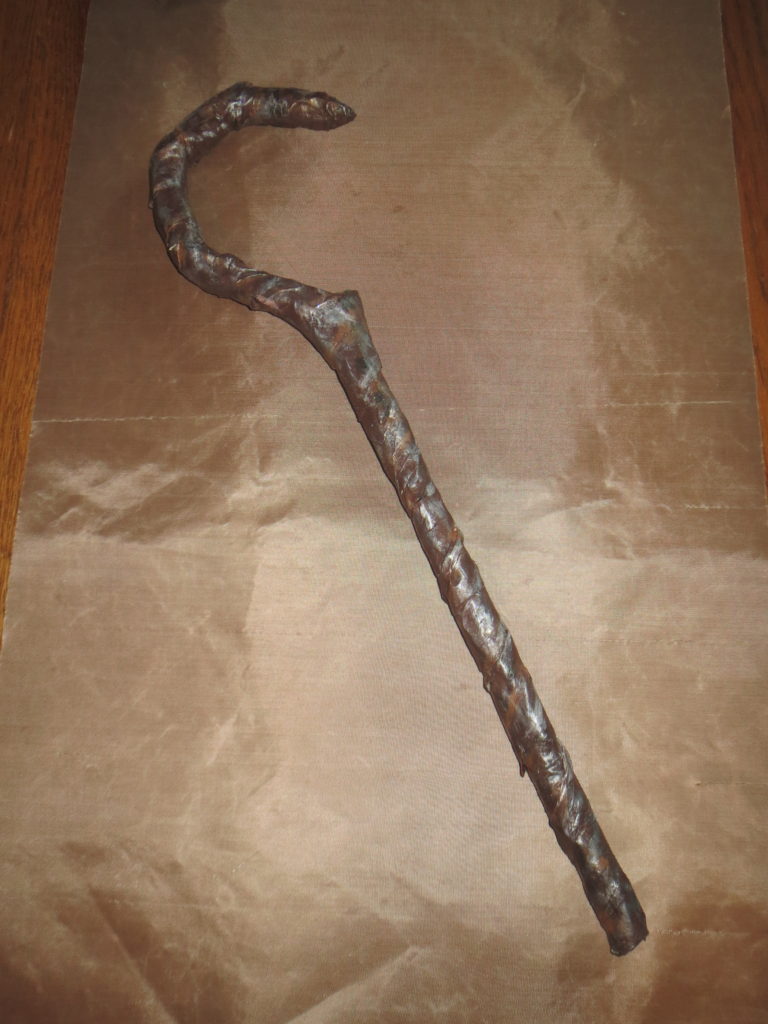
As a final step, I added a layer of satin finish polyurethane sealer.
I found this in a small bottle on the craft paint aisle at JoAnn Fabrics.
In retrospect I think I might have preferred to use a
matte finish in the sealer, overall, and then
just dabbed the satin finish here and there for some added effect.
At this point, my customer had seen the project and was happy with it.
Otherwise, I might have added some glitter effects to look more like frost.
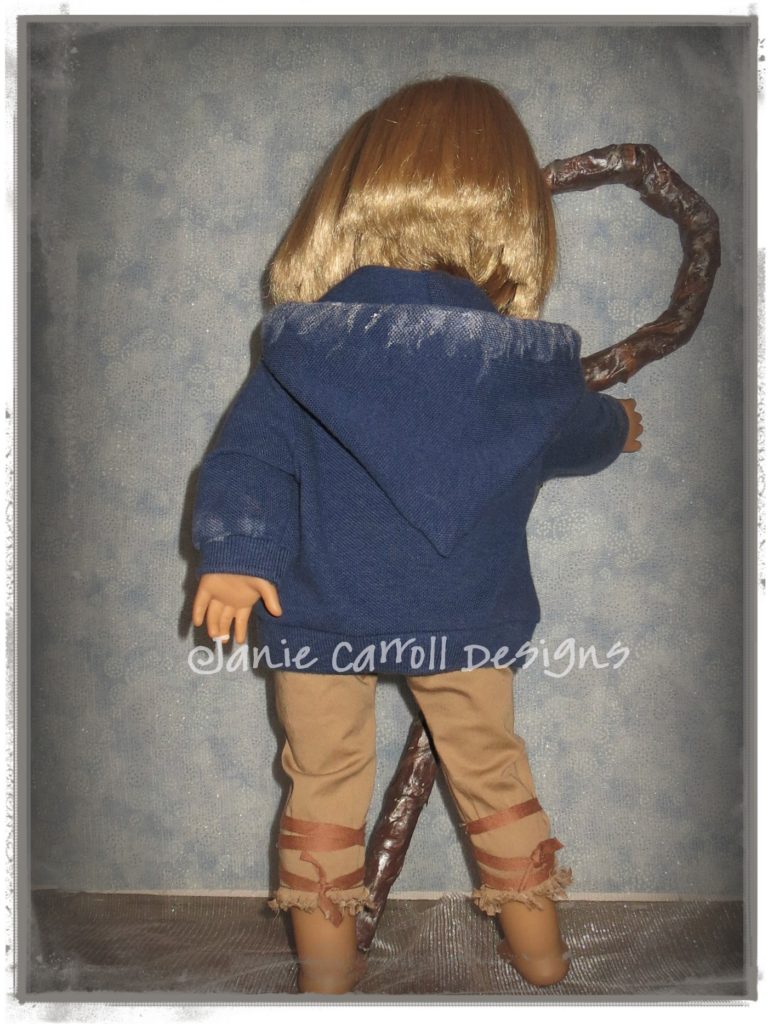
Time to choose patterns and fabric and make the hoodie and jeggings!
For the hoodie, I felt a textured lighter weight knit would work.
Note that the hoodie fits Jack well, hanging close to the body.
Fleece or other sweathshirting would be too heavy.
I found a denimy-blue man’s polo shirt that seemed just right.
Another benefit to this purchase was the ribbing on the sleeves
that could be removed and used for the cuffs and waistband of my hoodie!
As luck would have it, I happened to have a pair of shoelaces
leftover from athletic shoes that came with 2 sets of laces.
I used this pattern for the hoodie, with some simple modifications.
I shortened the top 2″ and cut ribbing for the lower band.
Contrary to the pattern sketch the hoodie does not include a lower band.
I also swapped out ribbing for the sleeve cuffs.
Because I had the perfect drawstring-lace, I added eyelet to the hood
to string the drawstring through.
Have you ever added snaps and been frustrated with
an old-fashioned snap tool? It works great for simple eyelets!
Next up was adding the ‘frost’ effect.
To maintain the softness of the fabric it would be necessary to use
fabric paint for this detailing.
One might use glitter glue or simply plain acrylic paints
but these have draw-backs.
Both would result in stiffness; a rough hand and possible future cracking.
Is it necessary to purchase specified fabric paint?
The answer is a resounding ‘no’.
Invest in a small bottle of ‘textile medium’
which can be easily mixed with any acrylic paint,
instantly making it suitabe for fabric painting!
You should be able to find textile medium on the craft-paint aisle,
often grouped near various top-coats or other specialty treatments.
Unless you’re planning a large quantity of fabric painted projects I suggest the small, 2 ounce bottle.
I purchased my 2 ounce bottle back when my youngest son was 3.
He’s nearly 26 and the product is still going strong.
Here is a link to the product I have, available at JoAnn. https://www.joann.com/ceramcoat-clear-textile-medium-2-ounces/1194653.html#q=textile%2Bmedium&start=1
(Other brands are fine, I do not receive any compensation from this, or any other company.)
I mixed the textile medium with some ‘pearly white’ acrylic paint
and used a nearly-dry brush technique to
get these effects.
I personally feel that a bit of added glitter would be nice,
but the client proclained this photo ‘perfect’.
With the hoodie and the staff you see the plus-size ladies capris pants, purchased at a super price, with which I planned to make the jeggings.
It’s very difficult to find appropriate fabrics in fabric stores.
This pair of capris was a fabric blend with 3% Lycra for stretch – perfect for fitted jeggings.
I did use my own (unpublished) pattern for these.
The leg bindings are made form a leftover bit of twill tape I
happened to have on hand.
As a substitute, one might use 1/4″ grosgrain ribbon.
I experimented with various criss-cross wrappings, tied at the back leg.
They were then secured with hand stitching on either side seam.
Here are final photos of the completed costume, modeled by my Kit.

Here is yet another beautiful shot
graciously shared by my client,
featuring the doll she customized just for this costume.
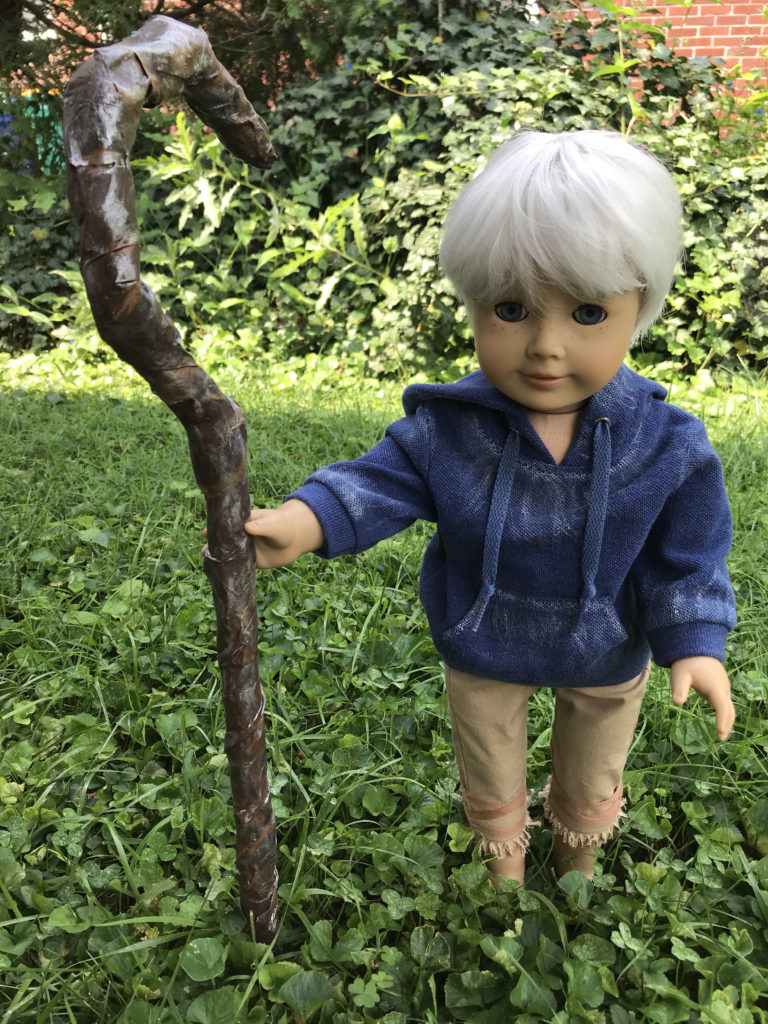
Enjoy!