
I’m getting feedback that buyers are loving the new Starlet Mermaid pattern.
Ready to add something fun?
Here is my promised mini-tutorial on
adding a standing lace collar ruffle
to the neckline edge.
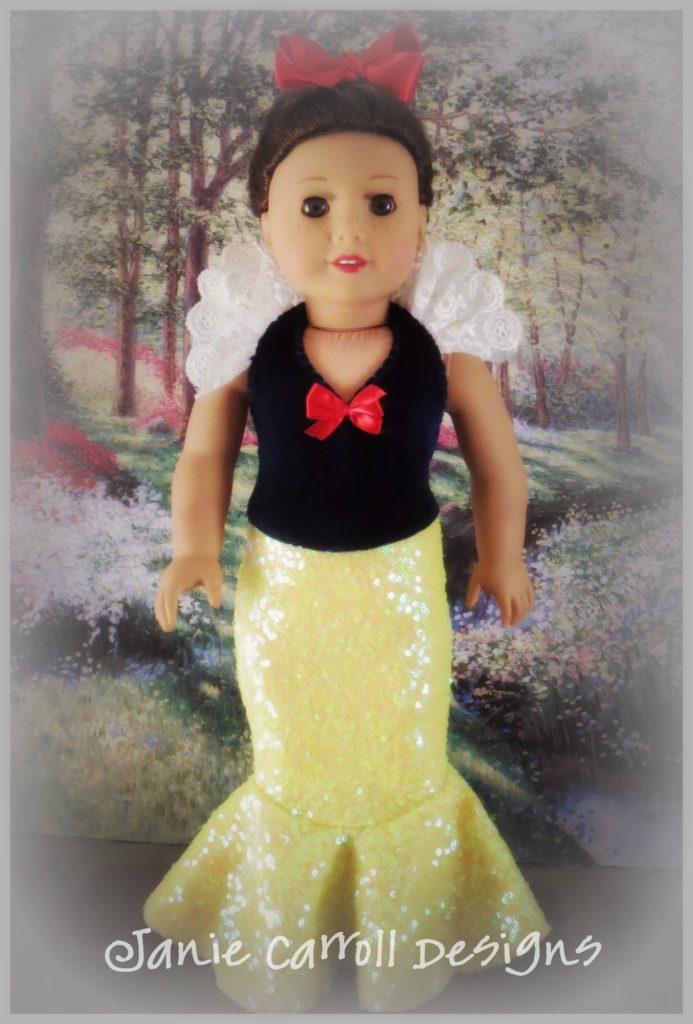
Doesn’t our updated Snow White gown look wonderful?
Adding this lace ruffle is really quite easy to do.
Describing it takes longer than actually accomplishing it!
This tutorial will include measurements that work
for a standard 18″ doll gown
made to fit current American Girl brand dolls.
Follow the pattern instructions for a
two color gown.
I selected stretch velvet for the bodice
and yellow stretch sequined knit for
the lower body and hem-flare.
Construct the garment as usual,
taking care that
your straps are finished neatly and smoothly
and hook and loop tape is also applied neatly.

We usually don’t have to fuss over the strap ends because
they aren’t terribly visible in the finished gown.
Not true with this lace ruffe application,
as the reverse/back strap ends will show when
this gown is worn.
Finish gown construction entirely, including hook and loop tape.
Carefully trim any excess fabric at the end of each finished strap.
See the bit of leftover strap end in this photo?
I need to trim that off.
You want the hook and loop tape to extend right to the end!
You don’t want messy strap ends sticking out,
like they do here!
Our Princess should look Princess Perfect!
In my defense,
when I made this gown I wasn’t sure if I was going to add the lace collar.
I also had no plans for how I’d construct or apply it, either.
Now that it’s done I can share the details with you.
I’m going to take you through the collar thought-process and application
as I experienced it.
Through the discussion of what worked and why,
you’ll learn not only how to apply a lace collar ruffle
to your Starlet Mermaid gown
but also how to think through other projects of this nature.
We’ll assume that
your gown is finished and you’re ready for lace.
You’ll need a piece of lace that is between 3 and 3 1/2″ wide and at least 22″ long.
If you’re lucky, you’ll find something suitable amongst
your stash of trimmings.
(You DO have a stash of trimmings, right?)
My choice is a Schiffli lace, with a beautiful embroidered scalloped edge.
(Schiffli is a delicate lace, characterized by shiny threads on a net background.)
The circular scallops on my lace were a little heavier, lending body as well as style.
I guessed that a finished width of 1 1/2″ would be a good scale for 18″ dolls.
I considered reducing the width of my lace but it occurred to me that folding
the lace over might provide some additional benefits.
It would give a double ruffle effect, provide body,
and give me a nice folded edge to attach –
all at the same time.
This proved to be correct on all counts.
My lace had an unobtrusive stitched straight edge so it
could be used ‘as is’.
If your lace has an irregularly cut edge
or a bulky edge finish you
may wish to neaten that up before you begin.
Lace should not fray particularly, so trimming with
pinking shears should be sufficient.
True confession:
My lace isn’t folded exactly in half.
I cheated by extending the scalloped edge about 1/4″
more than the straight edge, so the scallop would be most visible.
At this point, I was working with the gown
on the doll, pinning and testing to see how things looked.
My first thought was to gather the folded edge
but I found that small pleats, or tucks
gave the lace more stiffness.
This is necessary if we want the lace to stand out prettily.
I worked from the full length of my lace
because I didn’t know how long each side would need to be.
Here’s where you benefit from my trial and error!
I can now tell you now that you need an 11″ length for each side.
Additionally, the finished, pleated piece for each side should be 3 1/2″ to 3 3/4″ long.
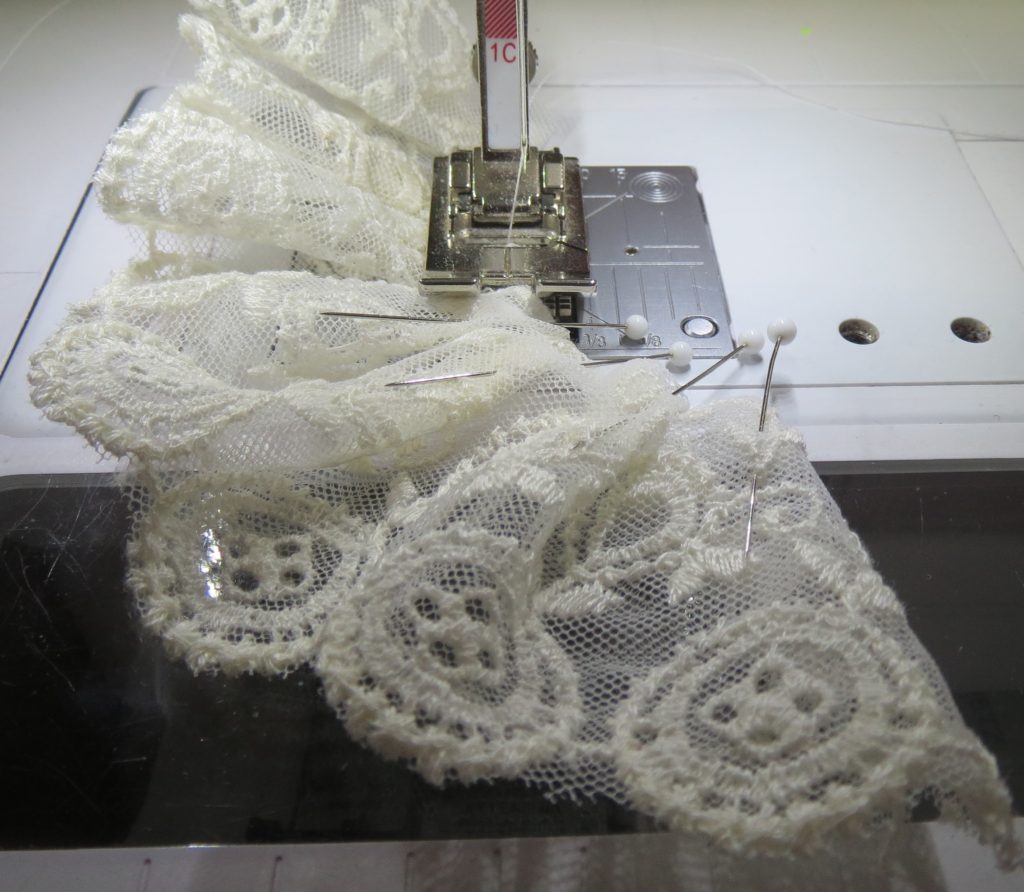
Here you see test-pleating in action. Note that I’m working from the full original length in this picture.
I was not yet sure how long each side would need to be!
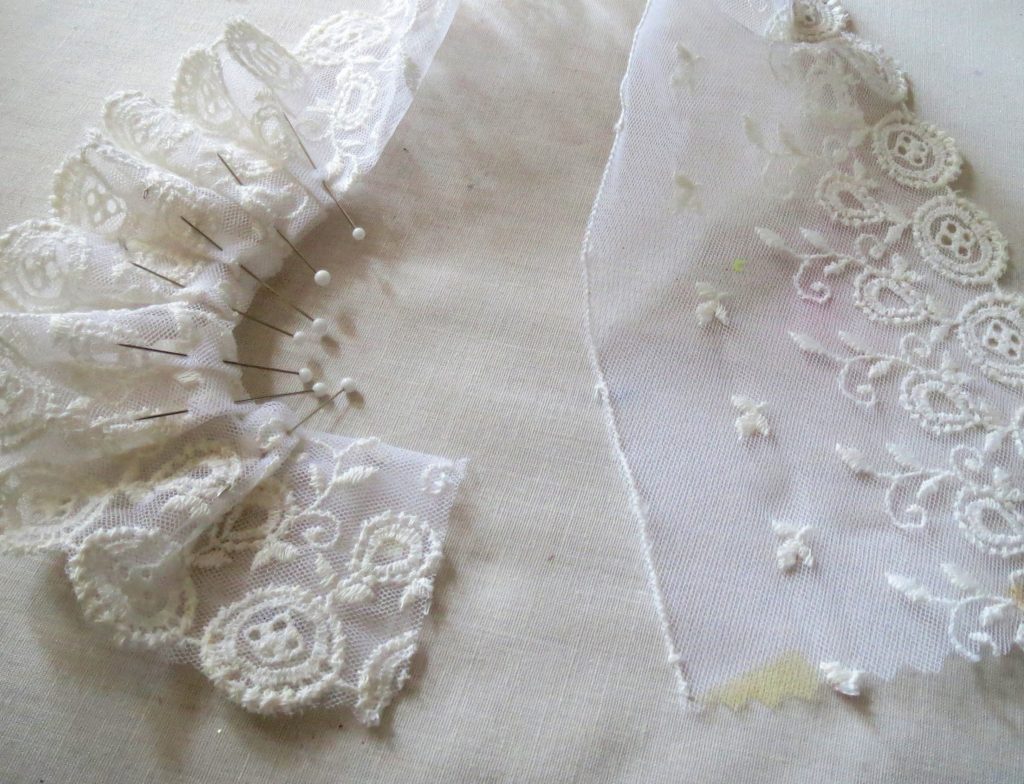
Note the gentle curve which will follow the neckline curve.
After pinning, I did hold this up to the gowned model.

Next, you’ll stitch those pleats in place.
At the sewing machine, select a narrow zigzag stitch
and stitch along the folded edge, removing pins as you reach them.
You may notice that I also folded about 1/4″ of the lace to the wrong side on each short end.
It’s not secured in any way but it looks more pleasant than a raw edge.
Thread a hand-sewing needle with a double strand of thread.
Handstitch the lace just under the finished neckline edge.
I used blue thread for this gown but clear, monofilament thread would be preferable.
I worked from the right side, with the gown on the doll!
It would probably be best to have removed the gown first but
I was in a hurry to see some results!
The lace should extend to the strap ends for a nicely finished effect.
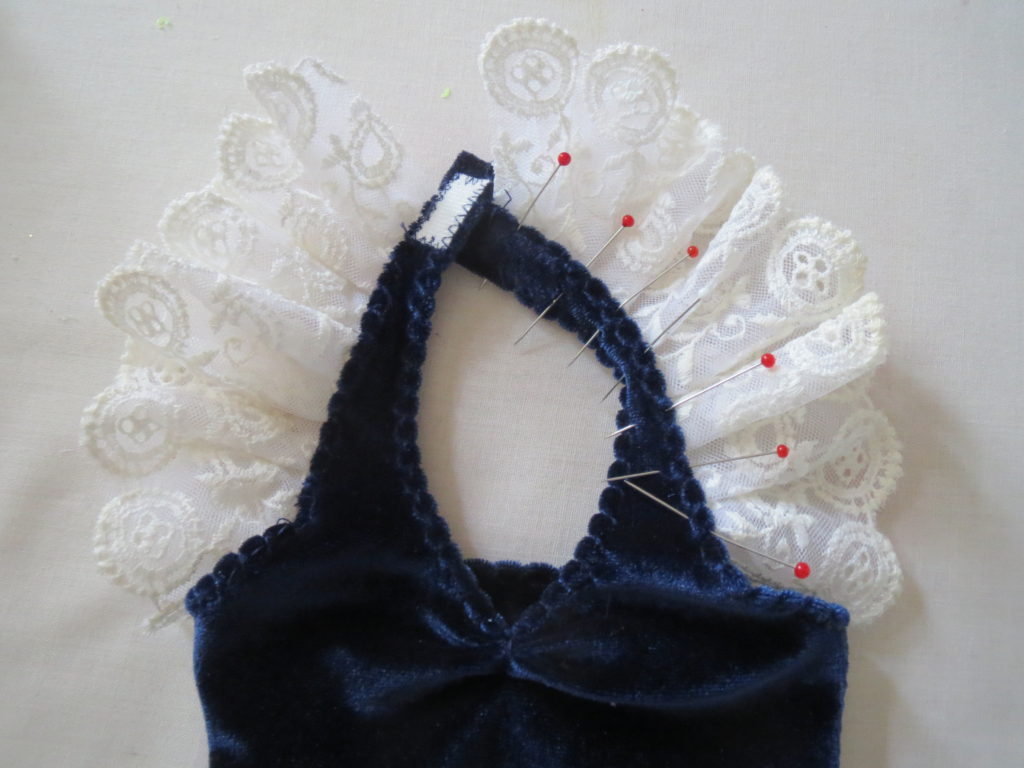
Repeat the process for the second side,
remembering that you’ll need to mirror your work.
In this picture, the first side has been completed and the second side
has been pinned in place for final stitching.
Measure carefully to insure that the lace ends at the same level
on each side.
Dress the doll and close the hook and loop tape firmly.
The lace ruffle will lay flat.
How to get that lovely standing ruffle effect?
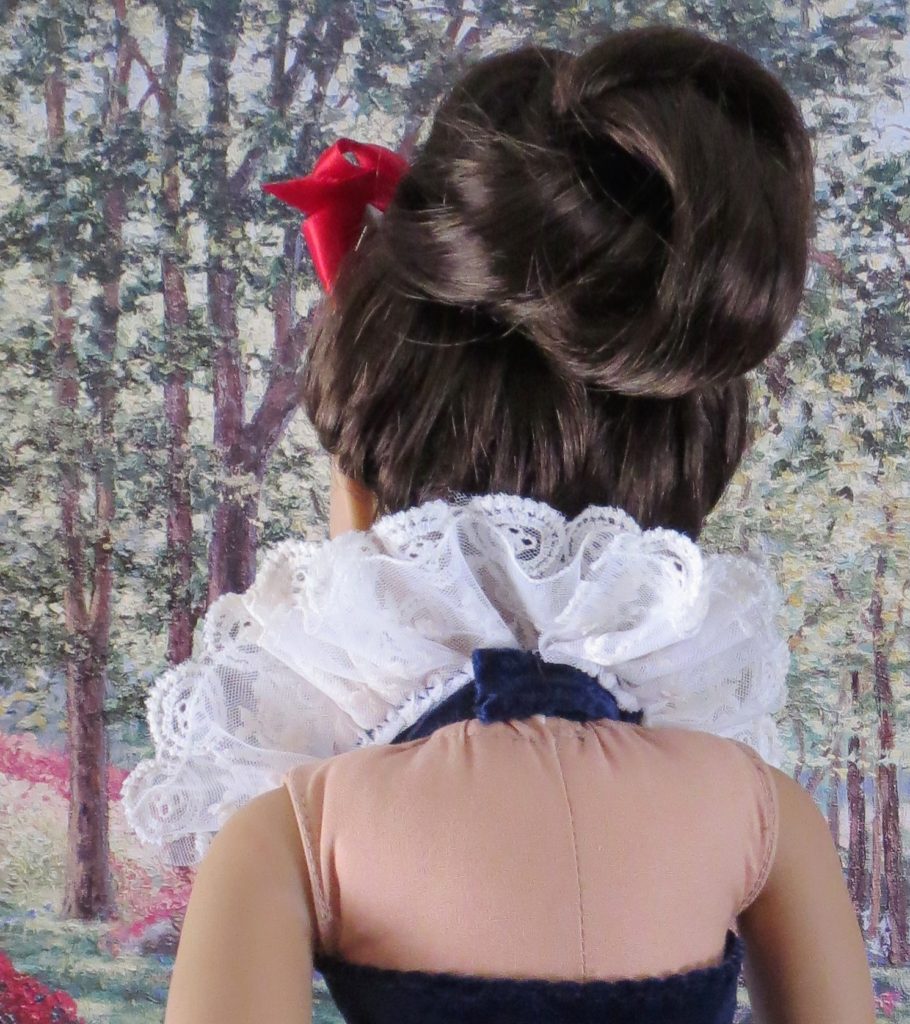
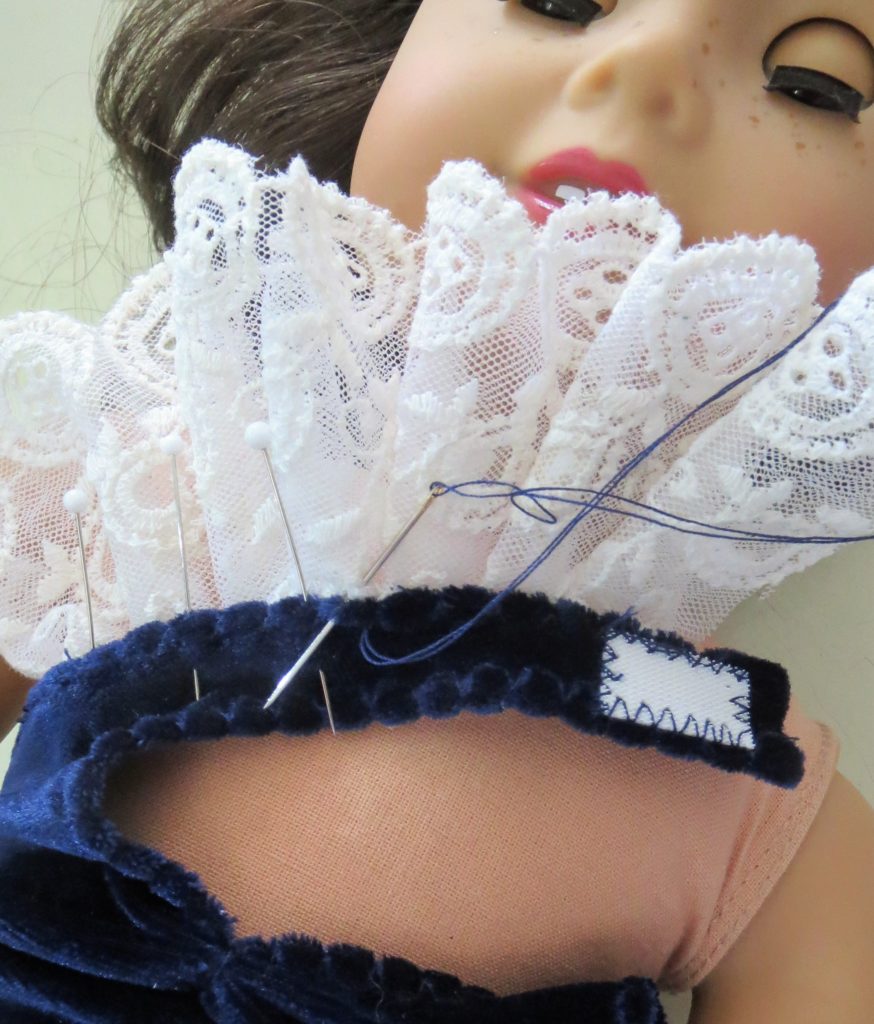
Flip the back neckline up, exposing the
reverse side of the neckline at the center back.
let’s look at this photo again –
The center back neckline has been turned up.
Can you see how folding the lace added support with the under-layer?
That worked well!
Note the messy strap ends that I still need to trim?
How about the blue thread I used for hand-stitching?
These are picky things – but also things that I’ll correct on the next garment!
The finished result is so nice!
I hope you’ve found this tutorial helpful.
A cotton eyelet lace would be nice, for something different.
I feel a single layer in eyelet would be sufficient,
so I’d suggest a 1 1/2″ or 2″ width of trim.
Adding special details is often a matter of trial and error!
I’ve found I have more successes than failures.
Ms. White and I suggest bravery,
but not foolishness.
Happy sewing.
Don’t take apples from strangers!